
Cider fermentation tanks play a vital role in transforming apple juice into the crisp, flavorful beverage you enjoy. These tanks provide an ideal environment for yeast to convert sugars into alcohol, ensuring a controlled and efficient process. By using these tanks, you gain precise control over temperature, which directly impacts the aroma, flavor, and overall quality of the cider. Stainless steel tanks, in particular, prevent unwanted flavors and maintain the purity of the cider. This method not only enhances consistency but also allows you to produce cider with balanced, distinct flavors that stand out in the market.
The Fundamentals of Cider Fermentation
What Happens During Cider Fermentation?
Cider fermentation is a fascinating biochemical process where yeast transforms the natural sugars in apple juice into alcohol and carbon dioxide. This transformation begins when you introduce yeast to the prepared apple juice, also known as the must. The yeast consumes the sugars, producing ethanol as the primary byproduct. Alongside alcohol, the process generates carbon dioxide, which can create a slight fizz in the cider if retained.
During fermentation, the cider undergoes significant changes in its chemical composition. The total soluble solids (TSS), which measure the sugar content, decrease as fermentation progresses. Simultaneously, the pH levels shift, influencing the cider’s acidity and flavor profile. These changes are essential for achieving the desired balance of sweetness, tartness, and alcohol content.
Temperature plays a critical role in this stage. Maintaining a consistent range, typically between 20-27°C, ensures that the yeast remains active and healthy. If the temperature fluctuates too much, the yeast may become stressed, leading to off-flavors or incomplete fermentation. By carefully managing these conditions, you can guide the process to produce a cider with a clean, crisp taste.
Why Fermentation is Essential for Cider Making
Fermentation is the heart of cider making. Without it, apple juice would remain just that—juice. This process not only creates the alcohol that defines cider but also shapes its aroma, flavor, and texture. The yeast strains you select significantly influence the final product. For instance, local yeast strains often enhance the cider’s unique aroma profile, while commercial starters provide consistency.
The fermentation process also develops volatile organic compounds (VOCs), which contribute to the cider’s fragrance and complexity. These compounds evolve throughout fermentation and maturation, giving each batch its distinct character. By optimizing fermentation conditions, you can enhance these aromatic qualities, making your cider stand out.
Additionally, fermentation allows you to control the cider’s sweetness and dryness. By monitoring the fermentation rate and halting the process at the right time, you can achieve the perfect balance for your target audience. Whether you prefer a dry, tart cider or a sweeter, fruit-forward one, fermentation gives you the tools to craft it.
Overview of Cider Fermentation Tanks
What Are Cider Fermentation Tanks?
Cider fermentation tanks are specialized vessels designed to facilitate the transformation of apple juice into cider. These tanks provide a controlled environment where yeast can efficiently convert sugars into alcohol and carbon dioxide. By using these tanks, you ensure that the fermentation process remains consistent and predictable, which is essential for producing high-quality cider.
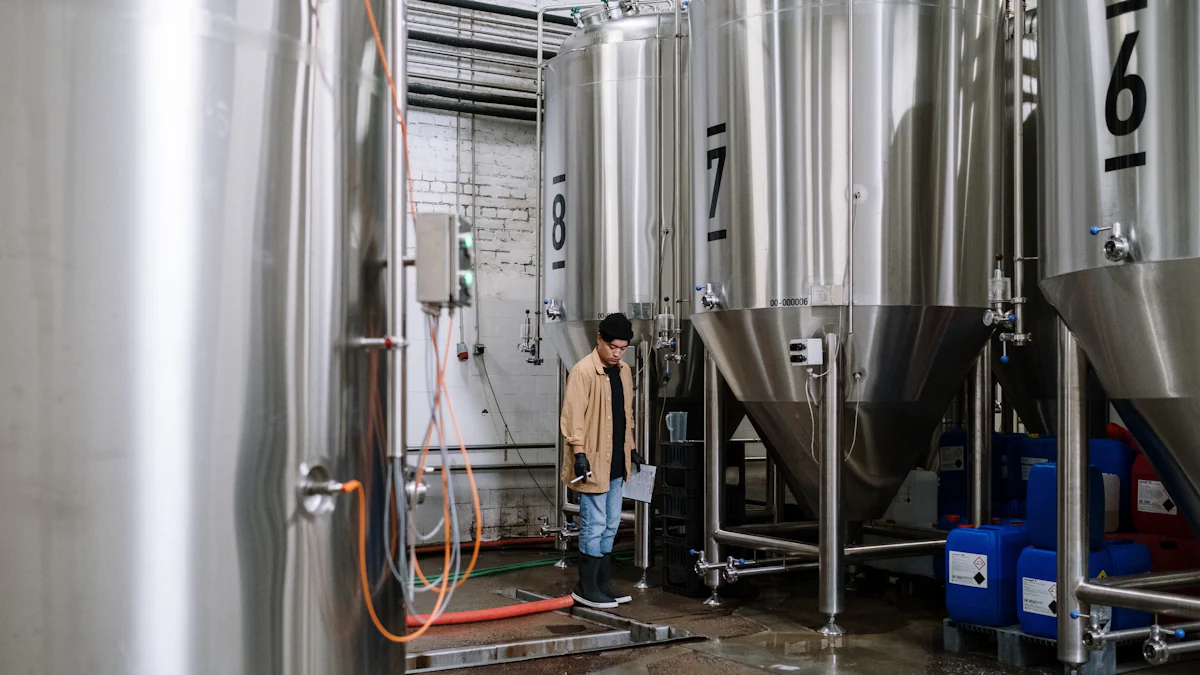
Stainless steel tanks are the most commonly used option for cider fermentation. Their durability and resistance to corrosion make them ideal for handling acidic liquids like apple juice. These tanks also maintain excellent sanitation, reducing the risk of contamination during fermentation. Additionally, stainless steel prevents unwanted flavors from seeping into the cider, preserving its natural taste and aroma.
Modern cider fermentation tanks often include advanced features such as temperature control systems. These systems allow you to maintain the optimal temperature range for yeast activity, ensuring a smooth and efficient fermentation process. Whether you are a small-scale producer or running a commercial operation, these tanks play a vital role in achieving consistent results.
Types of Tanks Used in Cider Fermentation
Several types of tanks are available for cider fermentation, each catering to different production needs. Understanding these options helps you choose the right tank for your process:
Stainless Steel Tanks: These tanks are the industry standard due to their durability, ease of cleaning, and ability to maintain the cider’s purity. They come in various sizes, making them suitable for both small-scale and large-scale production.
Cylindrically-Conical Fermentation Tanks: These tanks are versatile and allow you to perform both primary and secondary fermentation in the same vessel. Their conical shape facilitates the separation of sediment, or lees, from the cider, improving clarity and flavor.
Plastic Fermentation Tanks: While less durable than stainless steel, plastic tanks are a cost-effective option for beginners or hobbyists. However, they may not offer the same level of temperature control or sanitation.
Oak Barrels: Although not as common, oak barrels are sometimes used for fermenting cider to impart unique flavors and aromas. These barrels are more suited for specialty or artisanal cider production.
Each type of tank has its advantages, but stainless steel and cylindrically-conical tanks stand out for their efficiency and ability to produce consistent, high-quality cider.
Key Features of Fermentation Tanks
When selecting a cider fermentation tank, certain features are crucial for ensuring a successful fermentation process:
Temperature Control Systems: Maintaining a consistent temperature is vital for yeast health and activity. Tanks with cooling jackets or insulation allow you to regulate the temperature effectively, preventing issues like stalled fermentation or off-flavors.
Sanitation-Friendly Design: Tanks made from stainless steel are easy to clean and sanitize, reducing the risk of contamination. Smooth surfaces and minimal crevices ensure that no residue remains after cleaning.
Pressure Regulation: Some tanks are equipped with pressure control mechanisms, which are particularly useful for secondary fermentation. These features help you manage carbonation levels in the cider.
Capacity Options: Fermentation tanks come in a wide range of sizes, from small vessels for homebrewers to large tanks for commercial producers. Choosing the right capacity ensures that your tank meets your production needs without compromising quality.
Ease of Sediment Removal: Cylindrically-conical tanks simplify the process of separating sediment from the cider. This feature enhances the clarity and overall appearance of the final product.
By investing in a tank with these features, you can optimize the fermentation process and produce cider with exceptional flavor, aroma, and consistency.
Steps in the Cider Fermentation Process
Preparing the Must
The first step in the cider fermentation process involves preparing the must, which is the freshly pressed apple juice. This stage sets the foundation for the entire fermentation process. To begin, you need to select high-quality apples, as the type and condition of the apples directly influence the flavor, aroma, and overall quality of the cider. You can use a variety of apple materials, including juice, mash, or pomace. Each option contributes unique characteristics to the final product. For instance, adding pomace increases the phenolic content and antioxidants, enhancing the cider’s complexity.
Once you have the apple juice, it’s essential to adjust its composition to create an ideal environment for fermentation. Start by measuring the initial soluble solids content, which indicates the sugar level in the juice. This measurement helps you estimate the potential alcohol content of the cider. If the sugar level is too low, you can add sugar to ensure proper fermentation. Next, check the pH of the must. A pH range of 3.2 to 3.8 is optimal for cider fermentation, as it promotes yeast activity while inhibiting unwanted microbial growth. Adjust the pH if necessary by adding malic acid or potassium carbonate.
Proper sanitation is critical during this stage. Clean and sanitize all equipment, including the press and storage containers, to prevent contamination. By carefully preparing the must, you create the perfect starting point for a successful fermentation process.
Yeast Inoculation and Primary Fermentation
After preparing the must, the next step is yeast inoculation. Yeast plays a vital role in the fermentation process by converting sugars into alcohol and carbon dioxide. You can choose between wild yeast, which naturally occurs on apple skins, or commercial yeast strains. Wild yeast adds unique, complex flavors to the cider but may result in unpredictable outcomes. Commercial yeast strains, on the other hand, offer consistency and allow you to control the fermentation process more effectively.
To inoculate the must, rehydrate the yeast according to the manufacturer’s instructions and add it to the juice. The amount of yeast you use, known as the inoculum amount, significantly impacts the fermentation rate. Using the correct quantity ensures that the yeast population grows rapidly and dominates the fermentation environment, reducing the risk of contamination by undesirable microorganisms.
During primary fermentation, the yeast begins to consume the sugars in the must, producing alcohol and carbon dioxide. This stage typically lasts one to two weeks, depending on factors such as temperature and sugar content. You may notice bubbling or foaming as carbon dioxide escapes from the fermenter. This is a sign that the fermentation process is active and progressing well. Regularly monitor the progress by checking the specific gravity of the must. A steady decrease in specific gravity indicates that the sugars are being converted into alcohol.
Temperature Control During Fermentation
Temperature control is one of the most critical factors in the cider fermentation process. Yeast activity and the overall quality of the cider depend heavily on maintaining an optimal temperature range. For most cider fermentations, a temperature between 20°C and 27°C is ideal. Staying within this range ensures that the yeast remains active and healthy, preventing issues like stalled fermentation or the production of off-flavors.
Modern fermentation tanks often come equipped with temperature control systems, such as cooling jackets or insulation. These features allow you to regulate the temperature with precision. If you’re using a simpler setup, you can place the fermenter in a temperature-controlled room or use external cooling methods like ice packs. Avoid sudden temperature fluctuations, as they can stress the yeast and negatively impact the fermentation process.
Temperature also influences the aroma and flavor profile of the cider. Lower temperatures tend to produce cleaner, crisper flavors, while higher temperatures may enhance fruity and aromatic notes. By carefully managing the temperature, you can tailor the fermentation process to achieve your desired cider characteristics.
Regular monitoring is essential during this stage. Use a thermometer to check the temperature daily and make adjustments as needed. Consistent temperature control not only ensures a smooth fermentation process but also enhances the overall quality of the cider.
Secondary Fermentation and Racking
Secondary fermentation is a critical stage in the cider fermentation process. This phase refines the cider, stabilizes it, and enhances its flavor and aroma profiles. After the primary fermentation concludes, you transfer the cider to a new vessel to begin secondary fermentation. This step, often referred to as racking, separates the cider from the sediment, or lees, that accumulates during primary fermentation. Removing the lees prevents off-flavors and ensures a cleaner, more polished final product.
During secondary fermentation, the cider undergoes subtle but essential changes. The yeast continues to work, albeit at a slower pace, consuming any remaining sugars and producing additional alcohol. This phase also allows the cider to age and develop complexity. The extended contact with trace amounts of yeast and other compounds contributes to the cider’s aromatic depth and smoothness. According to studies, secondary fermentation significantly enhances the cider’s aroma, creating a more appealing and well-rounded profile.
Temperature control remains vital during this stage. Maintaining a consistent temperature, ideally around 20°C, ensures the fermentation process continues smoothly. Research indicates that ciders fermented at this temperature exhibit superior aromatic characteristics and greater consumer acceptance. You can use temperature-controlled tanks or store the cider in a cool, stable environment to achieve this.
Racking also plays a pivotal role in improving the cider’s clarity and stability. By transferring the cider to a clean vessel, you remove impurities and reduce the risk of contamination. This step not only enhances the visual appeal of the cider but also prepares it for bottling or further aging. If you aim to carbonate the cider naturally, you can add a small amount of sugar before sealing the vessel. This triggers a controlled fermentation, producing carbon dioxide that creates a pleasant fizz.
Secondary fermentation and racking are indispensable for crafting high-quality cider. These steps allow you to fine-tune the cider’s flavor, aroma, and appearance, ensuring a product that stands out in both taste and presentation.
The Role of Yeast and Nutrients in Cider Fermentation
Selecting the Right Yeast for Cider Fermentation
Choosing the right yeast is a crucial step in cider fermentation. Yeast acts as the driving force behind the transformation of apple juice into cider by converting sugars into alcohol and carbon dioxide. The type of yeast you select significantly impacts the flavor, aroma, and overall quality of your cider.
You can opt for wild yeast or commercial yeast strains. Wild yeast, naturally present on apple skins, introduces unique and complex flavors to your cider. However, it often leads to unpredictable results due to varying microbial compositions. On the other hand, commercial yeast strains provide consistency and control. These strains are specifically designed for cider production, ensuring a reliable fermentation process and predictable flavor profiles.
When selecting yeast, consider the characteristics you want in your cider. For a crisp and clean flavor, choose a neutral yeast strain. If you prefer fruity or aromatic notes, select a strain that enhances ester production. Research from MDPI Microorganisms highlights how yeast strains influence the microbial dynamics during fermentation, ultimately shaping the cider’s sensory attributes. By carefully choosing the yeast, you can craft a cider that aligns with your desired taste and aroma.
Nutrients Required for Healthy Fermentation
Nutrients play a vital role in maintaining yeast health and ensuring a successful fermentation process. Yeast requires a balanced supply of nutrients to thrive and efficiently convert sugars into alcohol. Without adequate nutrients, fermentation may stall, leading to incomplete sugar conversion and undesirable flavors.
Key nutrients include nitrogen, vitamins, and minerals. Nitrogen, often added in the form of diammonium phosphate (DAP), supports yeast growth and activity. Vitamins like thiamine aid in metabolic processes, while minerals such as magnesium and zinc enhance yeast performance. The initial composition of the must, including its pH and sugar levels, also affects nutrient availability. According to findings from MDPI Metabolites, factors like initial pH and soluble solids influence the fermentation rate and cider quality. Adjusting these parameters ensures that yeast has access to the nutrients it needs.
To provide the necessary nutrients, you can use nutrient supplements specifically formulated for cider fermentation. Regularly monitor the fermentation progress to identify any signs of nutrient deficiency, such as sluggish activity or off-flavors. By addressing these needs, you create an environment where yeast can perform optimally, resulting in a well-balanced and flavorful cider.
The Impact of Additives on Flavor and Fermentation
Additives can significantly influence both the fermentation process and the final flavor of your cider. While some additives enhance fermentation efficiency, others contribute to the cider’s taste, aroma, and stability. Understanding their impact allows you to use them effectively without compromising quality.
Common additives include pectinase, tannins, and sulfites. Pectinase breaks down pectin in apple juice, improving clarity and juice extraction. Tannins, naturally present in apples or added during fermentation, enhance mouthfeel and balance sweetness with astringency. Sulfites, often used as preservatives, inhibit unwanted microbial growth and stabilize the cider.
The choice and timing of additive use matter. For example, adding pectinase during must preparation improves juice yield, while introducing tannins during secondary fermentation refines the cider’s structure. Research from MDPI Fermentation shows how treatments like pectinase impact the final cider’s characteristics, including its acidity and volatile compounds. By carefully selecting and applying additives, you can elevate the complexity and appeal of your cider.
However, moderation is key. Overusing additives may mask the cider’s natural flavors or disrupt the fermentation process. Always follow recommended dosages and test small batches before scaling up. With the right approach, additives can become valuable tools for crafting high-quality cider.
Monitoring and Controlling the Fermentation Process
Monitoring and controlling the fermentation process is essential for producing high-quality cider. By keeping a close eye on key parameters and using the right tools, you can ensure that the fermentation progresses smoothly and delivers the desired flavor, aroma, and alcohol content. This section will guide you through the critical aspects of monitoring and controlling fermentation.
Key Parameters to Monitor During Fermentation
To achieve consistent results, you need to monitor several key parameters throughout the fermentation process:
Temperature: Temperature directly affects yeast activity and cider quality. Maintaining an optimal range, typically between 20°C and 27°C, ensures that the yeast remains active and healthy. Fluctuations can stress the yeast, leading to off-flavors or stalled fermentation.
Specific Gravity: Specific gravity measures the sugar content in the must and helps track the progress of fermentation. A steady decrease in specific gravity indicates that the yeast is converting sugars into alcohol. Tools like an Alcohol Hydrometer or Tilt Wireless Hydrometer make it easy to measure this parameter accurately.
pH Levels: The pH of the cider impacts yeast performance and microbial stability. A pH range of 3.2 to 3.8 is ideal for fermentation. Regularly checking and adjusting the pH ensures a balanced environment for yeast activity.
Alcohol Content: Monitoring alcohol levels helps you determine when fermentation is complete and ensures the cider meets your desired strength. Hydrometers are commonly used for this purpose.
Carbon Dioxide Release: Bubbling or foaming in the fermenter indicates active fermentation. Observing this activity provides a visual cue that the yeast is working effectively.
By keeping these parameters within their optimal ranges, you can guide the fermentation process to produce cider with exceptional quality.
Tools and Equipment for Monitoring Fermentation
Using the right tools simplifies the monitoring process and ensures accurate measurements. Here are some essential tools for fermentation monitoring:
Tilt Wireless Hydrometer and Thermometer: This device allows you to track specific gravity and temperature without opening the fermenter. It logs data in an app, providing real-time updates and graphs for better control.
Alcohol Hydrometer: A traditional tool for measuring sugar content and calculating alcohol levels. It is reliable and easy to use, making it a staple for cider makers.
Stainless Steel Tanks with Temperature Control: These tanks come equipped with integrated cooling or heating systems, allowing you to maintain precise temperature conditions. They are ideal for both small-scale and commercial cider production.
Fermentation Temperature Control Equipment: Devices like cooling jackets, thermostats, and temperature controllers help regulate the fermenter’s temperature. These tools are especially useful for maintaining consistency in fluctuating environments.
Sampling Valves and Racking Arms: Many modern cider tanks include these features, enabling you to take samples and transfer cider without disturbing the fermentation process.
Investing in these tools not only improves the accuracy of your monitoring but also enhances the overall efficiency of the fermentation process.
Troubleshooting Common Fermentation Issues
Even with careful monitoring, challenges can arise during fermentation. Here are some common issues and how to address them:
Stalled Fermentation: If fermentation stops prematurely, check the temperature and specific gravity. Low temperatures can slow yeast activity, while insufficient nutrients may hinder fermentation. Adjust the temperature or add yeast nutrients to restart the process.
Off-Flavors: Stress on the yeast, caused by temperature fluctuations or nutrient deficiencies, can lead to undesirable flavors. Ensure consistent temperature control and provide adequate nutrients to prevent this issue.
Contamination: Unwanted microorganisms can spoil the cider. Proper sanitation of equipment and fermenters minimizes this risk. Using stainless steel tanks with smooth surfaces and easy-to-clean designs further reduces contamination chances.
Excessive Foaming: Overactive fermentation can cause foaming to overflow. Use a larger fermenter or install a blow-off tube to manage this issue effectively.
High Residual Sugar: If the cider remains too sweet, the yeast may not have fully consumed the sugars. Check the specific gravity and consider extending the fermentation time or adding a fresh yeast culture.
By addressing these issues promptly, you can ensure a successful fermentation process and produce cider that meets your expectations.
Identifying the Completion of Fermentation
Signs That Fermentation is Complete
Recognizing when fermentation has finished is crucial for ensuring your cider achieves the desired flavor, aroma, and alcohol content. Several indicators can help you determine if the process has reached its conclusion:
Stable Specific Gravity: Use a hydrometer to measure the specific gravity of your cider. When the reading remains consistent over two to three days, it signals that the yeast has consumed most of the sugars. This stability indicates the end of active fermentation. For example, a final specific gravity between 1.000 and 1.010 often suggests a dry cider, while higher readings may indicate residual sweetness.
Reduced Bubbling Activity: During fermentation, carbon dioxide escapes, creating visible bubbling or foaming in the airlock or fermenter. As fermentation nears completion, this activity slows significantly or stops altogether. A still airlock is a strong visual cue that fermentation has ended.
Alcohol Content Check: Calculate the alcohol by volume (ABV) using the initial and final specific gravity readings. If the ABV aligns with your target, it confirms the fermentation process is complete.
Taste Test: Sampling the cider provides valuable insights into its progress. A finished cider will taste balanced, with no excessive sweetness or harshness. If the flavor feels off, it may require additional time or adjustments.
Clarity Improvement: As fermentation concludes, the cider begins to clear naturally. Yeast and sediment settle at the bottom of the tank, leaving the liquid above more transparent. While not a definitive sign, improved clarity often accompanies the end of fermentation.
Monitoring these signs ensures you halt the process at the right time, preserving the quality and character of your cider.
Post-Fermentation Steps for Cider Making
Once fermentation is complete, several steps follow to refine and prepare your cider for consumption or sale. These steps enhance its flavor, stability, and presentation:
Racking: Transfer the cider from the fermentation tank to a clean vessel, leaving behind the sediment, or lees. This process improves clarity and prevents off-flavors caused by prolonged contact with the lees. Cylindrically-conical tanks simplify this step by allowing easy separation of the liquid from the sediment.
Cold Crashing: Lower the temperature of the cider to near-freezing levels. This technique encourages any remaining particles to settle, resulting in a clearer product. Cold crashing also halts any residual yeast activity, stabilizing the cider.
Carbonation: Decide whether to carbonate your cider. For natural carbonation, add a small amount of sugar before sealing the container. This triggers a secondary fermentation, producing carbon dioxide. Alternatively, use forced carbonation for precise control over the fizz level.
Filtration: Filter the cider to remove any remaining impurities. This step ensures a polished appearance and enhances shelf stability. Fine filters or specialized equipment can achieve this without stripping away flavor.
Pasteurization or Sulfite Addition: Stabilize the cider to prevent spoilage. Pasteurization involves heating the cider briefly to kill any remaining microorganisms. Adding sulfites, such as potassium metabisulfite, inhibits microbial growth and oxidation.
Bottling and Storage: Transfer the cider into bottles or kegs. Use sanitized equipment to maintain cleanliness. Store the cider in a cool, dark place to preserve its quality. Proper storage conditions ensure the cider retains its flavor and aroma over time.
By following these post-fermentation steps, you can elevate the quality of your cider, making it ready for enjoyment or distribution. Each step contributes to a final product that is clear, flavorful, and professionally crafted.
How Tank Fermentation Enhances Cider Quality
Consistency in Flavor and Aroma
Tank fermentation ensures that every batch of cider maintains a consistent flavor and aroma profile. Stainless steel tanks provide a controlled environment where you can regulate key factors like temperature and oxygen exposure. This level of precision allows the yeast to perform optimally, producing balanced and predictable results. Unlike traditional methods such as pomace fermentation, which can lead to variations due to uneven conditions, tank fermentation minimizes inconsistencies.
The ability to control temperature is particularly important for achieving uniformity. Yeast activity depends on stable conditions, and fluctuations can result in off-flavors or incomplete fermentation. With modern tanks, you can maintain the ideal range, ensuring that the cider develops its intended characteristics. For example, fruity and aromatic notes emerge more consistently when fermentation occurs within the optimal temperature window.
Additionally, stainless steel tanks prevent external factors from influencing the cider. Their non-reactive surfaces ensure that no unwanted flavors seep into the liquid, preserving the natural taste of the apples. This clean and hygienic environment supports the production of cider with a pure and distinct flavor, batch after batch.
Improved Clarity and Appearance
Tank fermentation significantly enhances the clarity and visual appeal of your cider. The smooth interior surfaces of stainless steel tanks reduce the likelihood of sediment sticking to the walls, making it easier to separate the liquid from the lees. This design feature simplifies the racking process, resulting in a clearer final product.
Cylindrically-conical tanks take this a step further by allowing sediment to settle naturally at the bottom. You can then remove the lees without disturbing the cider, improving its transparency. Clear cider not only looks more professional but also appeals to consumers who associate clarity with quality.
Temperature control also plays a role in achieving better clarity. By maintaining consistent conditions, you reduce the risk of haze formation caused by protein or pectin interactions. Some producers use additional techniques like cold crashing in tanks to further enhance clarity. This process involves lowering the temperature to encourage particles to settle, leaving the cider bright and polished.
Scalability and Efficiency in Production
Tank fermentation offers unmatched scalability and efficiency, making it ideal for both small-scale and commercial cider production. Stainless steel tanks come in a wide range of sizes, allowing you to choose the capacity that fits your needs. Whether you’re producing a few gallons or thousands of liters, these tanks adapt to your operation seamlessly.
The design of modern tanks streamlines the fermentation process. Features like built-in temperature control systems and sampling valves save time and effort. You can monitor and adjust conditions without opening the tank, reducing the risk of contamination. This efficiency translates to higher productivity and lower operational costs.
For commercial producers, tank fermentation supports large-scale operations without compromising quality. The ability to replicate conditions across multiple tanks ensures that every batch meets the same high standards. This scalability allows you to expand your production while maintaining the flavor, aroma, and clarity that define your cider.
In addition, stainless steel tanks are durable and require minimal maintenance. Their long lifespan makes them a cost-effective investment, especially for growing businesses. By choosing tank fermentation, you not only enhance the quality of your cider but also optimize your production process for long-term success.
Tips for Successful Cider Fermentation in Tanks
Best Practices for Using Cider Fermentation Tanks
To achieve exceptional results in cider making, you must follow best practices when using fermentation tanks. These practices ensure a smooth process and enhance the quality of your cider.
Choose the Right Apples
The foundation of great cider lies in apple selection. Not all apples are equal for fermentation. Hard cider makers emphasize the importance of using apples with balanced sugar, acidity, and tannin levels. Varieties like bittersweet or sharp apples often yield the best results. Blend different types to create a complex flavor profile that stands out.Sanitize Thoroughly
Cleanliness is critical in cider making. Before using your fermentation tank, sanitize it thoroughly to eliminate any bacteria or wild yeast that could spoil the cider. Use food-grade sanitizers and ensure all equipment, including hoses and valves, is spotless.Monitor Temperature Closely
Temperature control is vital for maintaining yeast health and activity. Use tanks with built-in temperature regulation systems or external cooling methods to keep the temperature stable. Aim for a range between 20°C and 27°C to produce clean and crisp cider.Use Quality Yeast and Nutrients
Select a yeast strain that complements the flavor profile you want. For consistent results, opt for commercial yeast strains designed for cider making. Provide adequate nutrients like nitrogen to support yeast activity and prevent fermentation issues.Track Fermentation Progress
Regularly monitor key parameters such as specific gravity, pH, and alcohol content. Use tools like hydrometers and thermometers to track changes. This helps you identify any deviations early and make necessary adjustments.Racking for Clarity
Transfer the cider to a clean vessel after primary fermentation. This step, known as racking, removes sediment and improves clarity. Cylindrically-conical tanks simplify this process by allowing sediment to settle at the bottom.
By following these practices, you can optimize the fermentation process and produce cider with exceptional flavor, aroma, and clarity.
Common Mistakes to Avoid During Tank Fermentation
Avoiding common mistakes is just as important as following best practices. These errors can compromise the quality of your cider and disrupt the fermentation process.
Neglecting Apple Quality
Using low-quality or unsuitable apples leads to poor results. Avoid apples with low sugar content or those that lack acidity and tannins. Always prioritize fresh, high-quality fruit for cider making.Skipping Proper Sanitation
Failing to sanitize your tank and equipment invites contamination. Even small amounts of bacteria or wild yeast can ruin the cider. Never skip this step, no matter how clean the equipment appears.Ignoring Temperature Fluctuations
Allowing the temperature to fluctuate stresses the yeast and causes off-flavors. Avoid placing tanks in areas with inconsistent temperatures. Invest in temperature-controlled tanks or maintain a stable environment.Overlooking Nutrient Needs
Yeast requires nutrients to thrive. Forgetting to add nutrients like diammonium phosphate (DAP) can result in stalled fermentation. Always assess the nutrient needs of your must and supplement accordingly.Rushing the Process
Patience is key in cider making. Rushing through fermentation or skipping secondary fermentation affects the cider’s flavor and clarity. Allow enough time for the cider to develop fully.Improper Racking Techniques
Disturbing the sediment during racking introduces impurities into the cider. Use careful techniques or tanks with racking arms to transfer the liquid without disrupting the lees.Overusing Additives
While additives like pectinase and tannins enhance cider, excessive use masks natural flavors. Follow recommended dosages and test small batches before scaling up.
By avoiding these mistakes, you can ensure a smoother fermentation process and produce cider that meets your expectations.
Cider fermentation tanks offer unmatched benefits, ensuring consistency, control, and scalability in your cider-making process. By using stainless steel tanks, you can precisely manage temperature, which is vital for achieving balanced flavors and preventing defects. Monitoring and controlling key parameters like pH, fermentation rate, and alcohol content allow you to craft cider tailored to your desired taste and quality. Mastering these techniques not only enhances the final product but also refines your skills as a cider maker. Explore tank fermentation to elevate your cider production and create beverages that truly stand out.
FAQ
What should you consider when choosing a cider fermentation tank?
When selecting a cider fermentation tank, you need to evaluate several factors to ensure it meets your production needs. Start by considering the size and capacity of the tank. Determine the volume of cider you plan to produce in each batch and choose a tank that accommodates this amount while leaving enough headspace for proper fermentation and expansion. Tanks with insufficient space can lead to overflow or hinder the fermentation process.
Next, focus on the material of the tank. Stainless steel tanks are highly recommended due to their durability, resistance to corrosion, and ease of cleaning. They also prevent unwanted flavors from affecting the cider, ensuring a pure and consistent product. Additionally, look for tanks with temperature control systems, as maintaining an optimal temperature is crucial for successful fermentation.
Lastly, assess the tank’s features, such as pressure regulation, ease of sediment removal, and sanitation-friendly design. These features streamline the fermentation process and improve the quality of your cider.
What capacity stainless steel vat is best suited for your cider production?
The ideal capacity of a stainless steel vat depends on the scale of your cider production. For small-scale producers or hobbyists, smaller tanks with basic features are sufficient. These tanks allow you to ferment manageable batches while maintaining control over the process. If you operate a commercial cider production facility, larger tanks with advanced features like integrated temperature control and sampling valves are more suitable. These tanks support higher volumes and ensure consistency across batches.
Choosing the right capacity ensures efficient fermentation and prevents underutilization or overloading of the tank.
How does temperature control impact cider fermentation?
Temperature control plays a vital role in cider fermentation. Yeast activity depends on maintaining a stable temperature, typically between 20°C and 27°C. If the temperature fluctuates, the yeast may become stressed, leading to off-flavors or incomplete fermentation. Tanks with built-in cooling jackets or external temperature control systems help you regulate the temperature effectively.
Proper temperature control also influences the cider’s flavor and aroma. Lower temperatures produce clean and crisp flavors, while slightly higher temperatures enhance fruity and aromatic notes. By managing the temperature, you can tailor the fermentation process to achieve your desired cider characteristics.
Can you use additives during cider fermentation?
Yes, you can use additives during cider fermentation to enhance the process and improve the final product. Common additives include:
- Pectinase: Breaks down pectin in apple juice, improving clarity and juice extraction.
- Tannins: Adds structure and balances sweetness with astringency.
- Sulfites: Stabilizes the cider and prevents microbial growth.
Use additives in moderation and follow recommended dosages. Overusing them can mask the cider’s natural flavors. Always test small batches before scaling up to ensure the additives achieve the desired effect.
What is the purpose of secondary fermentation?
Secondary fermentation refines the cider and enhances its flavor, aroma, and clarity. After primary fermentation, you transfer the cider to a clean vessel, a process known as racking. This step separates the cider from the sediment, or lees, that accumulates during primary fermentation. Removing the lees prevents off-flavors and ensures a cleaner product.
During secondary fermentation, the cider continues to mature. The yeast consumes any remaining sugars, producing additional alcohol and subtle flavor changes. This stage also allows the cider to develop complexity and stability, preparing it for bottling or further aging.
How do you know when fermentation is complete?
You can identify the completion of fermentation by monitoring several signs:
- Stable Specific Gravity: Use a hydrometer to measure the specific gravity. If the reading remains consistent over two to three days, fermentation has likely finished.
- Reduced Bubbling Activity: A still airlock or lack of bubbling indicates that carbon dioxide production has ceased.
- Taste Test: Sample the cider to check for balance in flavor and absence of excessive sweetness.
- Clarity Improvement: The cider becomes clearer as yeast and sediment settle.
These indicators help you determine when to proceed with post-fermentation steps like racking or bottling.
Why is sanitation important in cider fermentation?
Sanitation is critical in cider fermentation to prevent contamination by unwanted microorganisms. Bacteria or wild yeast can spoil the cider, leading to off-flavors or failed fermentation. Clean and sanitize all equipment, including tanks, hoses, and valves, before use. Stainless steel tanks are particularly advantageous because their smooth surfaces and corrosion resistance make them easy to clean and maintain.
By prioritizing sanitation, you create a controlled environment where the yeast can thrive, ensuring a successful fermentation process and high-quality cider.
What role does maturation play in cider production?
Maturation allows cider to develop its full flavor and aroma profile. During this stage, the cider rests in a controlled environment, often in stainless steel tanks or oak barrels. The extended contact with trace amounts of yeast and other compounds refines the cider’s taste, creating a smoother and more balanced product.
Maturation also stabilizes the cider, ensuring it remains consistent and enjoyable over time. Whether you aim for a crisp, clean cider or one with complex, layered flavors, maturation is an essential step in cider production.
Can you carbonate cider naturally?
Yes, you can carbonate cider naturally through a process called bottle conditioning. After secondary fermentation, add a small amount of sugar to the cider before sealing it in bottles. The residual yeast consumes the sugar, producing carbon dioxide that creates carbonation. This method results in a natural fizz and enhances the cider’s texture.
Ensure the bottles are designed to withstand pressure to avoid breakage. Monitor the carbonation process carefully to achieve the desired level of effervescence.
How do stainless steel tanks improve cider quality?
Stainless steel tanks enhance cider quality by providing a controlled and hygienic environment for fermentation. Their non-reactive surfaces prevent unwanted flavors from affecting the cider, preserving its natural taste and aroma. These tanks also support precise temperature control, which is crucial for yeast activity and flavor development.
Additionally, stainless steel tanks simplify the racking process, improving clarity and appearance. Their durability and ease of cleaning make them a reliable choice for both small-scale and commercial cider production.


