Fermenting cider is a fascinating process that transforms apple juice into a delightful beverage. You can safely leave cider in a cider fermenting bucket for anywhere between 2 weeks and 4 months. This flexibility depends on factors like temperature, yeast activity, and how well you maintain sanitation. Yeast converts sugars into alcohol during fermentation, while proper sanitation prevents contamination. Monitoring the progress ensures your cider stays safe and flavorful. By following simple steps and paying attention to details, you can enjoy a smooth and rewarding cider-making experience.
What Is the Safe Duration for Cider in a Fermenting Bucket?
Standard fermentation time: 10-14 days
For most cider makers, the standard fermentation period lasts about 10 to 14 days. During this primary fermentation, yeast actively converts sugars into alcohol, creating the foundation of your cider. You’ll notice bubbling in the airlock as carbon dioxide escapes, signaling that fermentation is in full swing. This stage is crucial because it sets the tone for your cider’s flavor and quality.
By the end of this period, the bubbling slows or stops, indicating that the yeast has consumed most of the sugar. At this point, you can decide whether to move your cider to the next stage or let it sit longer. Keeping an eye on the process ensures you know exactly how long in the fermenting bucket your cider should stay during this phase.
Extended durations: 2 weeks to 4 months
Cider offers flexibility when it comes to fermentation time. While 10-14 days is standard, you can safely leave your cider in the fermenting bucket for anywhere from 2 weeks to 4 months. This extended duration allows the flavors to develop further, especially if you’re aiming for a more refined taste.
However, leaving cider on the lees (the sediment at the bottom) for too long—typically beyond 4 weeks—can lead to off-flavors. If you plan to extend the fermentation, consider racking your cider into another container to separate it from the lees. This step helps maintain the cider’s quality while allowing it to mature.
Why cider is forgiving during fermentation
Cider is one of the more forgiving beverages to ferment. Unlike beer or wine, cider can tolerate slight variations in temperature and time without compromising its quality. The natural acidity of apples acts as a preservative, reducing the risk of spoilage. Additionally, the yeast used in cider fermentation is resilient and continues working even under less-than-ideal conditions.
This forgiving nature makes cider an excellent choice for beginners. Whether you’re sticking to the standard 10-14 days or experimenting with longer durations, you have room to learn and adjust. By monitoring the process and understanding how long in the fermenting bucket your cider can safely stay, you’ll gain confidence in crafting a delicious final product.
Factors That Influence How Long Cider Can Stay in a Fermenting Bucket
Temperature and its effect on fermentation speed
Temperature plays a critical role in determining how long in the fermenting bucket your cider can safely stay. Warmer temperatures speed up fermentation, allowing yeast to work more quickly. If you’re fermenting at around 68–72°F (20–22°C), you’ll likely see the process complete within the standard 10–14 days. However, higher temperatures can sometimes lead to off-flavors, so maintaining control is essential.
On the other hand, cooler temperatures slow down yeast activity. Fermenting at 50–60°F (10–15°C) can extend the fermentation time, sometimes taking several weeks or even months. While this slower process enhances the cider’s aromatic profile, it requires patience. Research shows that beverages fermented at lower temperatures often develop more refined flavors, making the wait worthwhile.
To manage temperature effectively, consider using a temperature-controlled environment. This ensures consistency and helps you achieve the desired flavor profile without risking spoilage.
Yeast strain and its role in fermentation duration
The type of yeast you choose significantly impacts how long in the fermenting bucket your cider will stay. Different yeast strains work at varying speeds and produce unique flavors. For example, some strains complete fermentation in as little as 7–10 days, while others take weeks to finish.
Yeast also influences the cider’s sensory profile. Certain strains enhance fruity or floral notes, while others create a drier, more robust taste. Studies highlight how yeast selection shapes the final product, so choosing the right strain is crucial. If you’re aiming for a specific flavor, research yeast options and select one that aligns with your goals.
Additionally, providing yeast with proper nutrients ensures a smooth fermentation process. Nutrients help yeast work efficiently, reducing the risk of stalled fermentation and ensuring your cider reaches its full potential.
Importance of sanitation in preventing contamination
Sanitation is non-negotiable when fermenting cider. Contamination can ruin your batch, no matter how carefully you monitor other factors. Before starting, clean and sanitize all equipment, including the fermenting bucket, airlock, and any tools you’ll use. This step prevents unwanted bacteria or wild yeast from interfering with the fermentation process.
Poor sanitation can lead to spoilage, off-flavors, or even mold growth. These issues not only affect how long in the fermenting bucket your cider can stay but also compromise its safety. By maintaining a clean environment, you protect your cider and ensure it develops as intended.
Regularly check your fermenting setup during the process. If you notice any unusual smells or discoloration, act quickly to address potential contamination. A little extra effort in sanitation goes a long way in preserving the quality of your cider.
Sugar content and its impact on fermentation time
The sugar content in your cider plays a huge role in determining how long it stays in the fermenting bucket. Sugar serves as the primary fuel for yeast during fermentation. The more sugar present, the longer the yeast takes to convert it into alcohol. This process directly affects the timeline of your cider-making journey.
If you’re working with apple juice that has a high sugar concentration, expect a longer fermentation period. Yeast needs extra time to break down the sugars, especially glucose and fructose, which are the main sugars in apples. A study on *sugar uptake kinetics in cider fermentation* found that certain yeast strains, like S. eubayanus, are more efficient at processing these sugars compared to others like S. cerevisiae. Choosing a yeast strain with faster sugar uptake can help shorten the fermentation time if you’re aiming for quicker results.
On the other hand, low-sugar juice ferments faster. With less sugar to process, yeast completes its job more quickly, often within the standard 10–14 days. However, low sugar levels can result in a cider with lower alcohol content. If you prefer a stronger cider, you might consider adding extra sugar or honey before fermentation begins. This technique, known as chaptalization, boosts the alcohol level but also extends the fermentation time.
You should also monitor the sugar levels throughout the process. Using a hydrometer helps you measure the specific gravity of your cider, which indicates how much sugar remains. As fermentation progresses, the specific gravity decreases, showing that the yeast is actively converting sugar into alcohol. When the readings stabilize over a few days, it’s a sign that fermentation is complete.
Pro Tip: If you want a sweeter cider, stop fermentation early by racking the cider into another container and chilling it. This halts yeast activity, leaving residual sugar for a naturally sweet taste.
Balancing sugar content is key to achieving your desired flavor and alcohol level. Whether you prefer a dry, crisp cider or a sweeter, more robust one, understanding how sugar impacts fermentation time gives you greater control over the process.
Risks of Leaving Cider in the Fermenting Bucket Too Long
Fermenting cider is a rewarding process, but leaving it in the cider fermenting bucket for too long can lead to unwanted issues. While cider is forgiving, prolonged fermentation introduces risks that can affect its flavor, safety, and overall quality. Let’s explore these potential pitfalls and how to avoid them.
Development of off-flavors from prolonged contact with lees
When cider sits on the lees—the sediment of dead yeast cells and other particles—too long, it can develop off-flavors. This phenomenon, known as autolysis, occurs as the yeast cells break down, releasing compounds that may taste unpleasant. You might notice flavors described as “yeasty,” “sulfuric,” or even “rubbery.”
To prevent this, consider racking your cider into a secondary container after about 3–4 weeks. This step separates the liquid from the lees, allowing the cider to mature without the risk of these undesirable flavors. If you’re aiming for a clean and crisp cider, keeping an eye on how long in the fermenting bucket your cider stays is essential.
Quick Tip: If you’re unsure whether it’s time to rack, give your cider a gentle swirl and smell it. A fresh, fruity aroma is a good sign, while any strong sulfuric notes suggest it’s time to act.
Risk of oxidation and spoilage
Leaving cider in the fermenting bucket too long increases the risk of oxidation. When oxygen interacts with your cider, it can dull the flavors and create a flat, stale taste. In extreme cases, oxidation may even lead to spoilage, rendering your cider undrinkable.
Cider’s natural acidity, primarily from malic acid, offers some protection against spoilage. However, this doesn’t make it immune. To minimize oxygen exposure, ensure your fermenting bucket has a tight seal and the airlock remains filled with water or sanitizer. If you plan to extend fermentation, transferring the cider to an airtight secondary fermenter can help preserve its quality.
Did You Know? Research shows that ciders fermented at controlled temperatures (around 20°C or 68°F) tend to have better consumer acceptance. Maintaining a stable environment not only enhances flavor but also reduces the risk of spoilage.
Potential for contamination or mold growth
Sanitation is your best defense against contamination and mold growth. Even a small lapse in cleanliness can allow bacteria or wild yeast to take hold, spoiling your cider. Mold growth, while less common, can occur if the fermenting bucket isn’t properly sealed or sanitized. Contaminated cider often smells sour or vinegary and may develop visible discoloration.
To avoid these issues, always sanitize your equipment before use. Regularly check the fermenting bucket for any signs of contamination. If you notice anything unusual, such as floating particles or an off-putting smell, act quickly. Racking the cider into a clean container can sometimes save the batch if the issue is caught early.
Pro Tip: Lactic acid bacteria (LAB) naturally found in cider can inhibit harmful microbes. While LAB contributes to cider’s safety, it’s not a substitute for proper sanitation practices.
By understanding these risks and taking proactive steps, you can ensure your cider remains safe and delicious. Monitoring the fermentation process and knowing when to move to the next stage will help you avoid these common pitfalls.
Impact on cider clarity and overall quality
Clarity plays a big role in how your cider looks and tastes. When cider stays in the fermenting bucket too long, it can lose its bright, clear appearance. Sediment, known as lees, settles at the bottom during fermentation. If you leave the cider on the lees for an extended period, particles may mix back into the liquid, making it cloudy. This not only affects the visual appeal but can also alter the flavor.
To maintain clarity, you should rack your cider into a secondary container after the primary fermentation phase. This step separates the liquid from the lees, ensuring a cleaner and more polished appearance. Using a fine mesh strainer or siphon during this process can help remove any remaining particles.
Pro Tip: If you’re aiming for crystal-clear cider, consider using pectinolytic enzymes. These enzymes break down pectin, a natural substance in apples that can cause haze. Many cider makers swear by this method for achieving professional-level clarity.
The overall quality of your cider also depends on how well you manage the fermentation process. Temperature control is key. Studies show that fermenting at around 20°C (68°F) produces more aromatic compounds, enhancing the cider’s flavor profile. However, higher temperatures can also lead to sulfur-like odors, which may compromise the taste. Keeping the temperature steady and within the recommended range ensures a balanced and flavorful cider.
Yeast selection further impacts quality. Some yeast strains, like S. eubayanus, are known for producing high levels of aroma compounds. These strains can elevate the sensory experience of your cider, giving it fruity or floral notes. However, they may also release sulfur volatile compounds (SVCs) if left unchecked. Choosing a yeast strain that aligns with your flavor goals and monitoring its activity closely will help you craft a cider that stands out.
Quick Fact: Research highlights that prefermentative treatments, such as pulp fermentation, can boost antioxidant activity and enhance the cider’s polyphenol profile. These steps not only improve the drink’s health benefits but also contribute to a richer taste.
By focusing on clarity and quality, you can create a cider that’s both visually appealing and delicious. Regularly checking your cider’s progress and making adjustments when needed will ensure a final product you’ll be proud to share.
How to Tell When It’s Time to Move to the Next Stage
Knowing when to move your cider to the next stage is a crucial part of the fermentation process. By observing specific signs, you can ensure your cider is ready for the next step without risking its quality. Let’s explore the key methods to determine the right timing.
Visual cues: Bubbling activity slowing or stopping
One of the easiest ways to tell if your cider is ready to move on is by watching the airlock. During primary fermentation, yeast actively converts sugars into alcohol, producing carbon dioxide as a byproduct. This gas escapes through the airlock, creating a bubbling effect.
When the bubbling slows significantly or stops altogether, it’s a sign that the yeast has consumed most of the sugar. This visual cue indicates that the fermentation process is nearing completion. However, don’t rely solely on this method. While it’s a helpful indicator, other factors can influence bubbling, such as temperature changes or a loose seal on the fermenting bucket.
Quick Tip: If you notice bubbling has stopped, double-check the airlock and lid to ensure they’re properly sealed. A lack of bubbling doesn’t always mean fermentation is complete.
Using a hydrometer to measure specific gravity
A hydrometer is one of the most reliable tools for determining when your cider is ready to move forward. This device measures the specific gravity (SG) of your cider, which reflects the amount of sugar remaining in the liquid. At the start of fermentation, the SG will be high due to the sugar content. As yeast converts sugar into alcohol, the SG decreases.
When the hydrometer reading stabilizes over several days, it’s a clear sign that fermentation has finished. For most ciders, a final SG reading of around 1.000 or lower indicates that no sugar remains, resulting in a dry cider. If you prefer a sweeter cider, you can stop fermentation earlier by racking the cider and chilling it to halt yeast activity.
Did You Know? Research shows that hydrometer readings below 1.000 indicate minimal residual sugars, producing a dry cider. This tool is essential for cider makers aiming for precision and consistency.
Using a hydrometer not only helps you determine when to move to the next stage but also provides valuable insights into your cider’s alcohol content. By comparing the initial and final SG readings, you can calculate the alcohol by volume (ABV) of your cider.
Taste testing for sweetness and dryness
Your taste buds are another valuable tool for assessing your cider’s readiness. After fermentation slows, take a small sample and taste it. If the cider tastes dry with little to no sweetness, it’s likely that fermentation is complete. On the other hand, if you detect residual sweetness, the yeast may still be working, or fermentation might have stalled.
Taste testing also allows you to evaluate the flavor profile of your cider. If you’re aiming for a specific taste, such as a crisp and dry cider or one with fruity notes, this step helps you decide whether to proceed or make adjustments. For example, if the cider tastes too sharp, you might let it age longer to mellow out the flavors.
Pro Tip: Always use sanitized equipment when taking a sample to avoid introducing contaminants. A clean process ensures your cider remains safe and delicious.
By combining visual cues, hydrometer readings, and taste testing, you can confidently determine when it’s time to move your cider to the next stage. Each method provides unique insights, giving you a well-rounded understanding of your cider’s progress.
Signs of completed fermentation
Knowing when fermentation is complete ensures your cider is ready for the next stage. Several clear signs can help you determine this, so you don’t have to guess. Let’s break down what to look for.
1. Bubbling Slows or Stops
During fermentation, bubbling in the airlock signals active yeast converting sugars into alcohol. As fermentation nears completion, this bubbling slows significantly or stops altogether. When you notice fewer than one bubble per minute escaping through the airlock, it’s a strong indicator that fermentation is almost done. However, don’t rely solely on this visual cue. Other factors, like temperature changes or a loose seal, can also affect bubbling.
Quick Tip: If bubbling has stopped, double-check the airlock and lid to ensure they’re sealed properly. This ensures you’re not mistaking a lack of bubbling for completed fermentation.
2. Formation of Sediment (Lees)
Look at the bottom of your fermenting bucket. A thick layer of sediment, known as lees, forms as yeast cells and other particles settle. This heavy deposit is a natural part of the process and signals that fermentation is wrapping up. If you see a substantial cake of brown solids at the bottom, it’s a good sign your cider is ready to move forward.
Did You Know? Lees can contribute to off-flavors if cider sits on them too long. Racking your cider into a secondary container helps maintain its quality.
3. Liquid Clears
As fermentation progresses, the cider becomes clearer. Yeast activity causes cloudiness during the early stages, but once fermentation slows, the liquid starts to settle and clarify. When your cider looks noticeably clearer, it’s another sign that fermentation is complete. If you’re aiming for crystal-clear cider, letting it sit a bit longer or using pectinolytic enzymes can help achieve that polished appearance.
4. Stable Specific Gravity
Using a hydrometer provides the most reliable confirmation of completed fermentation. Measure the specific gravity (SG) of your cider over a few days. If the readings remain stable, it means the yeast has finished converting sugar into alcohol. For most ciders, a final SG reading close to or below 1.000 indicates dryness and minimal residual sugar.
Pro Tip: Sanitize your hydrometer and testing equipment before use to avoid contamination. Clean tools ensure accurate readings and protect your cider.
5. Taste Test
Take a small sample of your cider and taste it. If it tastes dry with no noticeable sweetness, fermentation is likely complete. This step also lets you evaluate the flavor profile. If the cider tastes sharp or unbalanced, you might let it age longer to mellow out. On the other hand, if it’s too dry for your liking, you can stop fermentation earlier next time to retain some sweetness.
Quick Reminder: Always use sanitized tools when sampling your cider. This prevents introducing bacteria or wild yeast into your batch.
By observing these signs—slowed bubbling, sediment formation, clarity, stable SG, and taste—you can confidently determine when fermentation is complete. Paying attention to these details ensures your cider is ready for the next stage without compromising its quality.
Best Practices for Transitioning Cider from the Fermenting Bucket
Transitioning your cider from the fermenting bucket to the next stage is a critical step in the cider-making process. This phase ensures your cider maintains its quality, flavor, and clarity while avoiding common pitfalls like oxidation or contamination. Let’s dive into the best practices to make this process smooth and successful.
Racking cider to a secondary fermenter or bottling
Racking is the process of transferring your cider from one container to another, typically from the primary fermenting bucket to a secondary fermenter or directly to bottles. This step helps separate the cider from the lees, which is the sediment of dead yeast and other particles that settle at the bottom during fermentation. Prolonged contact with the lees can lead to off-flavors, so removing your cider from this sediment is essential.
To rack your cider, use a siphoning tool like a racking cane and tubing. These tools allow you to carefully transfer the liquid without disturbing the lees. Place the fermenting bucket on a raised surface, such as a countertop, and position the secondary fermenter or bottles below it. Insert the siphon into the cider, ensuring it doesn’t touch the sediment at the bottom. Start the siphoning process and let gravity do the work.
Expert Tip: “Siphoning equipment, such as a racking cane and tubing, is used to transfer the cider from one vessel to another while minimizing oxygen exposure.” This method ensures your cider remains clear and free from unwanted flavors caused by sediment.
If you’re transferring to a secondary fermenter, this step allows your cider to mature further, enhancing its flavor and clarity. For those ready to bottle, ensure the cider has completed fermentation to avoid over-carbonation or bottle explosions.
Proper equipment and sanitation for racking
Sanitation is the cornerstone of successful cider making. Any equipment that comes into contact with your cider must be thoroughly cleaned and sanitized to prevent contamination. Contaminants like bacteria or wild yeast can spoil your cider, leading to unpleasant flavors or even making it unsafe to drink.
Before racking, sanitize all tools, including the siphon, fermenting bucket, secondary fermenter, or bottles. Use a food-grade sanitizer and follow the manufacturer’s instructions for proper dilution and contact time. Rinse the equipment with clean water if required by the sanitizer.
Pro Tip: “One thing that I cannot stress enough is the importance of sanitation. You need to be diligent about making sure everything that could potentially come in contact with your cider is sanitized.” This diligence protects your cider and ensures a successful transition.
When handling your equipment, avoid touching sanitized surfaces with bare hands. Use clean gloves or handle tools by their non-contact areas. This extra step minimizes the risk of introducing contaminants during the racking process.
Avoiding oxygen exposure during the transfer
Oxygen is the enemy of cider at this stage. Excessive exposure can lead to oxidation, which dulls the flavor and creates undesirable aromas. To preserve the quality of your cider, take steps to minimize oxygen exposure during the transfer.
When siphoning, ensure the tubing remains submerged in the receiving container to prevent splashing. Splashing introduces air into the cider, increasing the risk of oxidation. If you’re bottling, fill each bottle to the neck, leaving minimal headspace to reduce the amount of trapped air.
Did You Know? Oxidation not only affects flavor but can also impact the cider’s appearance, causing it to lose its bright, fresh color. Keeping oxygen exposure to a minimum helps maintain both taste and visual appeal.
Using an airtight secondary fermenter or bottles with secure caps further protects your cider from oxygen. If you’re using a secondary fermenter, ensure the airlock is properly sealed and filled with water or sanitizer to create a barrier against air.
By following these best practices—racking carefully, maintaining strict sanitation, and minimizing oxygen exposure—you’ll set your cider up for success in the next stage. These steps ensure your cider retains its flavor, clarity, and overall quality, giving you a final product you’ll be proud to share.
Storing cider after racking or bottling
Proper storage plays a key role in preserving the flavor, aroma, and quality of your cider. Once you’ve racked or bottled your cider, taking the right steps ensures it matures gracefully and remains enjoyable. Let’s explore how you can store your cider effectively.
1. Choose the right storage environment
The environment where you store your cider matters. Aim for a cool, dark place with a stable temperature. Fluctuations in temperature can disrupt the aging process and affect the cider’s taste. A basement, cellar, or a dedicated storage cabinet works well. Keep the temperature between 50–60°F (10–15°C) for optimal results.
Expert Insight: Brian Rutzman, Cider Director of The Northman, emphasizes that cider is a hardy product. It tolerates swings in temperature and light better than craft beer or wine. However, maintaining a consistent environment still ensures the best outcome.
Avoid direct sunlight, as UV rays can degrade the cider and alter its flavor. If you’re storing bottles, ensure they remain upright to prevent the cork or cap from drying out. For long-term storage, consider using opaque containers or wrapping bottles to block light exposure.
2. Monitor oxygen exposure
Oxygen is one of the biggest threats to your cider after bottling or racking. Even small amounts can lead to oxidation, which dulls the flavor and creates off-notes. To minimize this risk, ensure all bottles are sealed tightly. If you’re using caps, double-check that they’re secure. For corked bottles, store them upright to maintain a proper seal.
If you’ve transferred your cider to a secondary fermenter for aging, make sure the airlock is filled and functioning. This prevents oxygen from entering while allowing gases to escape. Regularly check the airlock to ensure it hasn’t dried out.
3. Allow time for aging
Cider often improves with age. After bottling or racking, give your cider time to mature. Aging allows flavors to meld and develop complexity. Depending on your preferences, you can age cider for a few weeks to several months. Dry ciders, in particular, benefit from extended aging, as it softens sharp edges and enhances the overall balance.
Pro Tip: Label your bottles with the racking or bottling date. This helps you track how long each batch has been aging and ensures you enjoy it at its peak.
During the aging process, taste your cider periodically. This helps you determine when it has reached the desired flavor profile. If you notice any off-flavors or changes, act quickly to address potential issues.
4. Avoid unnecessary movement
Once stored, try not to move your cider frequently. Movement can disturb sediment, especially in unfiltered cider, making it cloudy. It can also introduce oxygen into the liquid, which risks oxidation. Place your bottles or fermenter in a stable location where they won’t be bumped or shaken.
5. Plan for serving and enjoyment
When you’re ready to enjoy your cider, chill it to enhance its refreshing qualities. Serve it at around 45–50°F (7–10°C) for the best experience. If sediment has settled in the bottle, pour slowly to avoid disturbing it. For sparkling cider, open bottles carefully to prevent spills or loss of carbonation.
By following these storage tips, you’ll ensure your cider remains flavorful and enjoyable. Whether you’re aging it for months or savoring it right away, proper storage makes all the difference in crafting a cider you’ll be proud to share.
Tips for Monitoring Fermentation Progress
Keeping track of your cider’s fermentation progress ensures a successful batch. By observing key indicators and maintaining records, you can catch potential issues early and make adjustments as needed. Here are some practical tips to help you monitor the process effectively.
Keeping a Fermentation Log
A fermentation log is your best friend during cider making. It helps you track every detail of the process, from start to finish. By recording observations, you create a reference that improves your skills over time.
Start by noting the date you began fermentation. Include details like the type of apple juice, yeast strain, and initial specific gravity (SG). As fermentation progresses, jot down changes you notice, such as airlock activity or temperature fluctuations. Regular entries give you a clear picture of how your cider is developing.
Pro Tip: Use a simple notebook or a digital spreadsheet to keep your log organized. Many cider makers find that digital tools make it easier to spot trends and compare batches.
A well-maintained log also helps you troubleshoot. If something goes wrong, you can look back at your notes to identify what might have caused the issue. For example, if fermentation stalls, your log might reveal that the temperature dropped too low. This habit not only saves time but also boosts your confidence as a cider maker.
Checking Airlock Activity
The airlock is a small but mighty tool in cider making. It shows you how active your fermentation is by releasing carbon dioxide (CO2) produced by the yeast. Watching the airlock gives you real-time feedback on your cider’s progress.
During the first few days, you’ll see rapid bubbling in the airlock. This indicates that the yeast is actively converting sugar into alcohol. As fermentation slows, the bubbling decreases. When it stops completely, it’s a sign that most of the sugar has been consumed.
Did You Know? Studies on cider fermentation reveal that CO2 production peaks during the first 48–72 hours. This aligns with the yeast’s most active phase, known as primary fermentation.
While airlock activity is a helpful indicator, it’s not foolproof. Factors like a loose lid or temperature changes can affect bubbling. Always combine this method with other monitoring techniques for accurate results.
Regularly Measuring Specific Gravity
A hydrometer is an essential tool for cider makers. It measures the specific gravity (SG) of your cider, which tells you how much sugar remains in the liquid. Tracking SG helps you understand how fermentation is progressing and when it’s complete.
To use a hydrometer, take a small sample of your cider and place it in a testing jar. Gently lower the hydrometer into the liquid and read the scale where it floats. Record the SG reading in your fermentation log. Repeat this process every few days to monitor changes.
Quick Fact: Research shows that cider typically starts with an SG of 1.050–1.070, depending on the sugar content of the apple juice. A final SG of around 1.000 or lower indicates a dry cider.
When the SG stabilizes over several days, it means fermentation has finished. This tool also helps you calculate the alcohol by volume (ABV) of your cider. Subtract the final SG from the initial SG, then multiply the result by 131. This gives you the ABV percentage.
Pro Tip: Always sanitize your hydrometer and testing jar before use. Clean tools prevent contamination and ensure accurate readings.
By keeping a fermentation log, checking airlock activity, and measuring specific gravity, you’ll stay in control of your cider-making process. These simple yet effective methods ensure your cider turns out just the way you want it.
Adjusting temperature if needed
Temperature plays a vital role in cider fermentation. It directly affects how yeast behaves and influences the flavor, aroma, and overall quality of your cider. If you notice your fermentation slowing down or producing unexpected results, adjusting the temperature might be the solution. Let’s explore how you can manage this crucial factor effectively.
Why temperature matters in fermentation
Yeast activity depends heavily on temperature. When the environment is too warm, yeast works faster, but it may produce off-flavors or sulfur-like aromas. On the other hand, cooler temperatures slow down fermentation, allowing more time for complex flavors to develop. Research highlights that fermenting cider at around 20°C (68°F) enhances its aromatic profile, creating a more flavorful and appealing beverage.
Quick Fact: A study on the Impact of Temperature on Aromatic Profile of Ciders found that ciders fermented at 20°C displayed the highest aromatic characteristics. This temperature strikes a balance between yeast activity and flavor development.
Signs you might need to adjust the temperature
Monitoring your cider’s progress helps you spot when temperature adjustments are necessary. Here are some common signs:
- Fermentation has stalled: If bubbling in the airlock stops prematurely, the yeast might be too cold to stay active.
- Off-flavors develop: Warm temperatures can cause yeast to produce undesirable compounds, affecting the cider’s taste.
- Unusual aromas: A strong sulfuric or rubbery smell often indicates that the fermentation environment is too warm.
When you notice these issues, it’s time to check the temperature and make adjustments.
How to adjust fermentation temperature
Managing temperature doesn’t have to be complicated. Here are some practical steps you can take:
Cool down an overly warm fermentation:
- Move the fermenting bucket to a cooler location, such as a basement or cellar.
- Use a fan or air conditioner to lower the room temperature.
- Wrap the fermenting bucket with a damp towel and place it in a shallow pan of water. The evaporation cools the cider naturally.
Warm up a slow fermentation:
- Relocate the fermenting bucket to a warmer area, like a kitchen or pantry.
- Use a heating pad designed for fermentation. Set it to a low, consistent temperature to avoid overheating.
- Wrap the bucket in a blanket or insulation to retain heat.
Maintain a stable environment:
- Avoid placing the fermenter near windows or vents where temperature fluctuates.
- Invest in a temperature-controlled fermentation chamber for precise regulation.
Pro Tip: Studies recommend keeping the fermentation environment between 12–15°C (54–59°F) for optimal results. This range ensures steady yeast activity and a balanced flavor profile.
Benefits of proper temperature control
Adjusting and maintaining the right temperature enhances your cider in several ways:
- Improved flavor: Cooler fermentations often result in a cleaner, more refined taste. They also allow fruity and floral notes to shine.
- Better aroma: Research shows that temperature impacts the production of aromatic compounds. For example, cold fermentation creates unique volatile compounds that elevate the cider’s sensory appeal.
- Consistent results: Controlling temperature reduces the risk of stalled fermentation or off-flavors, giving you a more predictable outcome.
By paying attention to temperature and making adjustments when needed, you’ll have greater control over your cider-making process. This simple step ensures your cider develops the flavors and aromas you’re aiming for, resulting in a beverage you’ll be proud to share.
Common Mistakes to Avoid During Fermentation
Leaving cider in the bucket too long
One of the most common mistakes cider makers face is leaving their cider in the fermenting bucket for too long. While cider is forgiving, prolonged contact with the lees—the sediment of dead yeast and other particles—can lead to unpleasant flavors. This process, called autolysis, releases compounds that may taste metallic, sulfuric, or even rubbery. Imagine taking a sip of cider that starts off fine but leaves a strange metallic aftertaste lingering on your palate. That’s often the result of leaving it on the lees for too long.
To avoid this, keep an eye on your fermentation timeline. For most ciders, racking to a secondary fermenter after 2–4 weeks is ideal. If you plan to let your cider mature longer, separating it from the lees ensures a cleaner flavor.
Pro Tip: If you notice off-flavors like metallic or sulfuric notes, act quickly. Racking the cider into a clean container can sometimes salvage the batch before the flavors intensify.
Neglecting sanitation practices
Sanitation is the backbone of successful fermentation. Skipping this step or cutting corners can introduce bacteria or wild yeast into your cider, leading to spoilage or unpleasant flavors. Contaminated cider might smell sour, taste vinegary, or even develop visible mold. No one wants to pour weeks of effort down the drain because of a preventable mistake.
Before starting, sanitize every piece of equipment that will touch your cider—fermenting buckets, airlocks, siphons, and even your hands. Use a food-grade sanitizer and follow the instructions carefully. During fermentation, regularly check your setup for any signs of contamination, like unusual smells or discoloration.
Quick Reminder: Even a small lapse in cleanliness can ruin an entire batch. Always err on the side of caution when it comes to sanitation.
Maintaining a clean environment doesn’t just protect your cider—it also enhances its flavor. A well-sanitized process allows the natural apple notes and yeast characteristics to shine without interference from unwanted microbes.
Ignoring signs of stalled fermentation
Fermentation stalls happen when yeast stops converting sugar into alcohol before the process is complete. This can leave your cider overly sweet or unbalanced. Stalled fermentation often occurs due to low temperatures, nutrient deficiencies, or stressed yeast. Ignoring these signs can result in a cider that lacks the crisp, dry finish many people enjoy.
Signs of a stalled fermentation include a sudden stop in airlock activity, a specific gravity reading that remains unchanged for several days, or a cider that tastes overly sweet. If you notice these issues, take action. Warm up the fermenting bucket if the temperature is too low, or add yeast nutrients to give the yeast a boost.
Did You Know? Yeast strains like S. cerevisiae are resilient but still require proper conditions to thrive. Providing the right environment ensures a smooth fermentation process.
By addressing stalled fermentation promptly, you can save your cider and achieve the flavor profile you’re aiming for. Regularly monitoring your cider’s progress with tools like a hydrometer helps you catch these issues early.
Avoiding these common mistakes ensures your cider-making journey stays on track. By managing fermentation time, prioritizing sanitation, and addressing potential stalls, you’ll create a cider that’s not only safe to drink but also bursting with flavor.
Exposing cider to air during transfer
Transferring cider from one container to another is a delicate process. If you expose your cider to air during this step, you risk oxidation, which can ruin its flavor and aroma. Oxidation happens when oxygen interacts with your cider, leading to flat, stale tastes and unpleasant aromas. To avoid this, you need to handle the transfer with care and precision.
Why oxygen exposure is harmful
Oxygen can alter the sensory profile of your cider. When cider comes into contact with air, it loses its fresh, fruity notes and develops dull or even sour flavors. Research on the *Microbial Ecology of Ciders and Their Sensory Profile* highlights how microbial activities and oxygen exposure can significantly impact the taste and aroma of cider. Oxidation not only affects flavor but also diminishes the vibrant color of your cider, making it appear less appealing.
Additionally, oxygen creates an environment where unwanted microorganisms can thrive. For example, Lactobacillus collinoides, a type of lactic acid bacteria (LAB), can cause undesirable reactions in cider. Studies show that LAB can degrade glycerol, producing a peppery flavor that disrupts the cider’s balance. Preventing oxygen exposure during transfer helps maintain the cider’s integrity and keeps these harmful microbes at bay.
Tips to minimize oxygen exposure
You can take several steps to protect your cider from air during transfer. These simple practices ensure your cider retains its quality and flavor:
Use a siphon or racking cane
A siphon or racking cane allows you to transfer cider without splashing. Place the siphon gently into the cider, avoiding the sediment at the bottom. Keep the receiving container’s tubing submerged to prevent air bubbles from forming.Avoid splashing
Splashing introduces oxygen into the cider. Pouring cider directly from one container to another increases the risk of oxidation. Always use tools designed for smooth, controlled transfers.Fill containers properly
When bottling, leave minimal headspace at the top. This reduces the amount of trapped air and limits oxygen exposure. For secondary fermenters, ensure the airlock is sealed tightly to create a barrier against air.Work quickly and efficiently
Prolonged exposure to air increases the risk of oxidation. Prepare all your equipment in advance and complete the transfer as quickly as possible.
Pro Tip: If you notice any signs of oxidation, such as a flat taste or brownish color, act immediately. Racking the cider into an airtight container and adding a small amount of sulfite can sometimes help slow down further damage.
Benefits of careful handling
By minimizing oxygen exposure, you preserve the cider’s fresh, crisp taste and aromatic complexity. Proper handling also protects the cider’s natural acidity, which acts as a preservative. This ensures your cider remains safe to drink and enjoyable to share.
Taking these precautions during transfer not only enhances the flavor and appearance of your cider but also builds your confidence as a cider maker. With practice, you’ll master the art of transferring cider without compromising its quality.
Why Following Best Practices Ensures a Successful Cider
Consistency in flavor and quality
When you follow best practices, you ensure your cider delivers the same great taste every time. Consistency matters, especially if you want to refine your skills or share your cider with others. By sticking to proven methods, you control the variables that influence flavor and quality.
The type of apples you use plays a huge role in the final product. Different apple varieties bring unique flavors and aromas to your cider. Fully ripe apples, for instance, contain up to 52% more volatile compounds than unripe ones. These compounds enhance the cider’s aroma and taste, making it more appealing. Choosing the right apples and ensuring they’re ripe sets the foundation for a high-quality cider.
Yeast selection also impacts consistency. Each yeast strain produces distinct flavors, from fruity esters to robust alcohol notes. Using the same strain for each batch helps you achieve a predictable flavor profile. Experts in cider making emphasize that yeast not only affects the diversity of volatile compounds but also their concentration in the finished product. This means your choice of yeast directly shapes the sensory experience of your cider.
Maintaining proper fermentation conditions further ensures consistency. Temperature control, sanitation, and monitoring sugar levels all contribute to a balanced and flavorful cider. When you follow these steps, you reduce the chances of off-flavors or spoilage, giving you a cider that meets your expectations every time.
Pro Tip: Keep a detailed log of your cider-making process. Record the apple variety, yeast strain, fermentation temperature, and other key details. This helps you replicate successful batches and identify areas for improvement.
Avoiding unnecessary risks
Best practices protect your cider from common pitfalls. Neglecting sanitation, for example, can introduce bacteria or wild yeast that spoil your batch. Contaminated cider often smells sour or tastes unpleasant, wasting your time and effort. By cleaning and sanitizing all equipment, you eliminate this risk and safeguard your cider’s quality.
Oxygen exposure is another risk you can avoid by following proper techniques. When cider comes into contact with air during transfer or storage, it oxidizes. This dulls the flavor and creates off-notes that ruin the drinking experience. Using siphons and minimizing headspace in bottles prevents oxidation, preserving your cider’s fresh taste.
Temperature fluctuations during fermentation can also harm your cider. Yeast thrives within specific temperature ranges, and deviations can cause stalled fermentation or off-flavors. Keeping your fermenting bucket in a stable environment ensures the yeast works efficiently, producing a clean and balanced cider.
Quick Reminder: Always check your airlock and seals during fermentation. A loose lid or dried-out airlock can let oxygen in, increasing the risk of spoilage.
By addressing these risks proactively, you create a safer and more enjoyable cider-making process. You’ll spend less time troubleshooting problems and more time enjoying the fruits of your labor.
Building confidence as a cider maker
Mastering best practices boosts your confidence. When you know the steps to take and why they matter, you feel more in control of the process. This confidence allows you to experiment and refine your techniques without fear of failure.
Understanding the science behind cider making empowers you to make informed decisions. For example, knowing that fully ripe apples enhance the cider’s aroma helps you choose the best fruit for your batch. Recognizing how yeast strains influence flavor lets you tailor your cider to your preferences. These insights come from following best practices and learning from each batch you make.
Confidence also grows when you see consistent results. Each successful batch reinforces your skills and motivates you to keep improving. Over time, you’ll develop a deeper appreciation for the craft and the unique qualities of your cider.
Expert Insight: Studies on cider production highlight the importance of understanding the raw materials and fermentation process. Experts note that the chemical composition of apples and the microorganisms involved in fermentation shape the cider’s flavor and aroma. By mastering these elements, you gain the knowledge needed to create exceptional cider.
As your confidence builds, you’ll feel more comfortable sharing your cider with friends, family, or even at local events. The pride of crafting a delicious beverage from scratch is unmatched. Best practices not only ensure a successful cider but also make the journey more rewarding.
Enjoying the process and final product
Making cider isn’t just about the end result—it’s about the journey. From selecting the apples to savoring the first sip, every step offers a chance to learn, experiment, and enjoy. You’re not just crafting a beverage; you’re creating an experience that’s as rewarding as it is delicious.
Relish the Simplicity of Cider Making
Cider making doesn’t have to be complicated. In fact, it’s one of the simplest fermentation processes you can try. Apples naturally contain fermentable sugars and aromatic compounds that give cider its unique flavor. Even the yeast needed for fermentation often comes from the apples themselves. Think about it—if you’ve ever left fresh cider in the fridge too long, you’ve already witnessed the magic of natural fermentation! This simplicity makes cider making accessible to everyone, whether you’re a seasoned brewer or a curious beginner.
Fun Fact: Apples straight from the orchard often carry natural cider yeast on their surface. Once you press the juice, fermentation can begin almost effortlessly.
By embracing this straightforward process, you can focus on the joy of experimenting with flavors, techniques, and styles. Each batch becomes a new adventure, offering endless opportunities to refine your craft.
Celebrate Your Creativity
Cider making lets you unleash your creativity. You can experiment with different apple varieties, add spices like cinnamon or cloves, or even blend in other fruits like pears or berries. Want a sparkling cider? Try bottle conditioning. Prefer something sweeter? Stop fermentation early to retain residual sugar. The possibilities are endless, and each choice you make adds a personal touch to your cider.
Pro Tip: Keep a small notebook to jot down your experiments. Record what worked, what didn’t, and what you’d like to try next time. Over time, you’ll build a treasure trove of ideas and recipes.
This creative freedom makes cider making more than just a hobby—it’s a form of self-expression. Every bottle you produce reflects your unique tastes and preferences, turning your cider into a one-of-a-kind creation.
Share the Experience
One of the best parts of cider making is sharing it with others. Imagine pouring a glass of your homemade cider for friends or family and watching their faces light up. It’s a moment of pride and connection that makes all the effort worthwhile. Whether you’re hosting a casual gathering or gifting a bottle to a loved one, your cider becomes a way to bring people together.
Quick Idea: Host a cider tasting party! Share different batches you’ve made, pair them with snacks, and invite guests to vote on their favorites. It’s a fun way to celebrate your hard work and get feedback for future batches.
Sharing your cider also opens the door to new conversations and friendships. You might inspire someone else to try cider making or learn tips from fellow enthusiasts. The cider-making community is welcoming and full of people eager to share their knowledge and experiences.
Savor the Fruits of Your Labor
When the time comes to enjoy your finished cider, take a moment to appreciate everything that went into it. Pour yourself a glass, admire its clarity, inhale its aroma, and savor its flavor. Each sip tells the story of your journey—from selecting the apples to perfecting the fermentation process. It’s a celebration of your effort, patience, and creativity.
Did You Know? Research shows that the sensory experience of drinking cider—its aroma, taste, and appearance—can enhance your enjoyment and create lasting memories. Taking the time to fully engage with your cider makes it even more satisfying.
Whether you’re enjoying your cider alone or with others, let it remind you of the joy of creating something from scratch. The process may have its challenges, but the reward is always worth it. So raise your glass, toast to your success, and start dreaming about your next batch!
How Chenma’s Fermentation Equipment Can Help
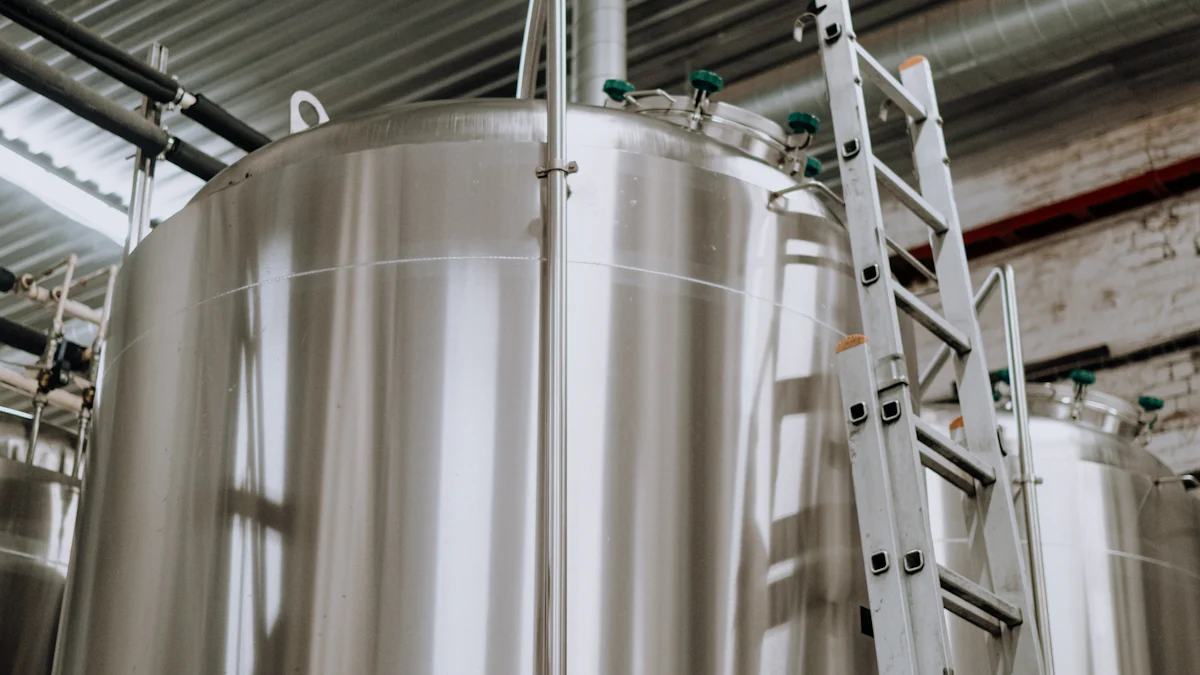
Benefits of using stainless steel fermenting buckets
Stainless steel fermenting buckets bring a level of reliability and efficiency that other materials simply can’t match. When you use stainless steel, you’re choosing durability. Unlike plastic or glass, stainless steel resists scratches, dents, and cracks. This means your equipment will last longer, even with frequent use. Plus, it’s easy to clean, which helps you maintain a sanitary environment for your cider.
Another major advantage is its non-porous surface. Stainless steel doesn’t absorb odors or flavors from previous batches. This ensures that every batch of cider tastes exactly how you want it to. You won’t have to worry about lingering smells or flavors interfering with your cider’s profile.
Temperature control is another area where stainless steel shines. Many stainless steel fermenters, like those offered by Chenma, come with built-in temperature control options. This feature allows you to maintain the perfect fermentation temperature, which is crucial for achieving the best flavor and aroma in your cider.
Quick Tip: If you’re serious about cider making, investing in stainless steel fermenting buckets can elevate your process. They’re not just durable—they’re also designed to make your life easier.
Customizable solutions for cider makers
Every cider maker has unique needs, and that’s where Chenma’s customizable solutions come in. Whether you’re a hobbyist or running a commercial operation, you can find equipment tailored to your specific requirements. Need a fermenter with a larger capacity? Or perhaps you want additional features like sampling valves or pressure gauges? Chenma offers options that adapt to your cider-making goals.
Customization doesn’t stop at size or features. You can also choose designs that fit your workspace. For example, compact fermenters work well in smaller areas, while larger, more complex systems suit commercial setups. This flexibility ensures you’re not compromising on quality or convenience.
Did You Know? Many cider makers prefer stainless steel tanks with conical bottoms. These designs make it easier to separate the lees during racking, ensuring a cleaner and clearer cider.
By opting for customizable equipment, you gain more control over your process. You can fine-tune every step, from fermentation to bottling, to create cider that reflects your vision. With Chenma’s expertise, you’re not just buying equipment—you’re investing in tools that grow with your cider-making journey.
Ensuring safety and quality with Chenma-certified equipment
Safety and quality are non-negotiable when it comes to fermentation. Chenma’s equipment meets the highest industry standards, giving you peace of mind. All products are manufactured using food-grade stainless steel, ensuring they’re safe for contact with your cider. This material also prevents contamination, which is critical for maintaining the integrity of your brew.
Chenma takes quality assurance seriously. Their equipment undergoes rigorous testing to meet certifications like ISO9001-2005 and EU CE standards. These certifications guarantee that the products are not only safe but also reliable and efficient. When you use Chenma-certified equipment, you’re reducing risks like oxidation, contamination, or spoilage.
Pro Tip: Using certified equipment doesn’t just protect your cider—it also enhances its flavor. A clean, controlled environment allows the natural apple notes and yeast characteristics to shine.
In addition to safety, Chenma focuses on user-friendly designs. Features like airtight seals, easy-to-clean surfaces, and precise temperature controls simplify your process. This means you can focus more on crafting the perfect cider and less on troubleshooting equipment issues.
By choosing Chenma’s fermentation equipment, you’re setting yourself up for success. You’ll have the tools you need to produce high-quality cider while ensuring safety and consistency in every batch.
Long-term durability and ease of use
When it comes to fermentation equipment, durability and ease of use make all the difference. You want tools that can handle the demands of cider making without wearing out or causing unnecessary hassle. That’s where Chenma’s Fermentation Equipment stands out. Designed with longevity and user convenience in mind, these tools ensure your cider-making process stays smooth and stress-free.
Built to Last
Stainless steel construction gives Chenma’s equipment unmatched durability. Unlike plastic or glass, stainless steel resists scratches, dents, and corrosion. This means your fermenting buckets and tanks will hold up through countless batches, saving you money in the long run. You won’t have to worry about replacing equipment frequently, even if you’re brewing on a regular basis.
Did You Know? Stainless steel is not only strong but also non-reactive. This ensures your cider’s flavor remains pure, with no risk of unwanted chemical reactions.
Chenma’s products are crafted to meet the highest quality standards. Their equipment has been successfully used by customers worldwide, including a German brewery that relied on Chenma for beer fermentation tanks and CIP (Clean-In-Place) systems. This proven track record highlights the reliability and durability of their designs.
User-Friendly Features
Ease of use is just as important as durability. Chenma’s fermentation equipment includes thoughtful features that simplify your cider-making process. For example:
- Customizable designs: You can tailor the equipment to fit your space and brewing needs. Whether you’re working in a small home setup or a larger commercial operation, Chenma offers solutions that adapt to your requirements.
- Effortless cleaning: The smooth, non-porous surface of stainless steel makes cleaning quick and easy. You’ll spend less time scrubbing and more time enjoying your cider.
- Convenient add-ons: Options like sampling valves and conical bottoms make tasks like racking and monitoring fermentation a breeze. These features help you maintain clarity and quality without extra effort.
“Chenma’s equipment is designed to meet specifications regarding space, utilities, and brewing requirements,” ensuring it works seamlessly with your setup.
Why It Matters
Durable and easy-to-use equipment doesn’t just make your life easier—it also improves your cider. Reliable tools reduce the risk of contamination, oxidation, or other issues that can ruin a batch. Plus, when your equipment is simple to operate, you can focus on perfecting your craft instead of troubleshooting problems.
Investing in high-quality fermentation tools like those from Chenma sets you up for long-term success. You’ll enjoy consistent results, fewer headaches, and the confidence that comes from using equipment built to perform. Whether you’re a beginner or an experienced cider maker, durable and user-friendly tools make all the difference.
Monitoring fermentation and following best practices are essential for crafting high-quality cider. By keeping an eye on factors like temperature, yeast activity, and sanitation, you ensure your cider develops the flavors you desire. The process may seem complex at first, but with attention to detail and the right tools, it becomes both simple and rewarding. Using a reliable cider fermenting bucket and equipment like hydrometers helps you track progress and make timely adjustments. Quality tools, such as Chenma’s fermenting buckets, enhance your experience, giving you confidence and consistency in every batch.
FAQ
How do you make great cider?
Making great cider starts with one essential ingredient—apples. Choose apples that suit your taste preferences. Sweet apples create a smoother cider, while tart ones add a crisp edge. Once you’ve pressed the juice, let the natural fermentation process work its magic. For beginners, starting with fresh apple juice and a reliable yeast strain is a simple way to craft a delicious cider.
Pro Tip: Experiment with different apple varieties to discover unique flavor profiles. Blending sweet and tart apples often yields the best results.
How long should cider be left in primary and secondary fermentation?
The timeline for fermentation depends on your goals. Typically, cider stays in primary fermentation for 2–4 weeks. However, some cider makers leave it for up to 2 months to develop deeper flavors. Secondary fermentation can last anywhere from 2 weeks to 4 months, depending on how much aging and clarity you want.
Quick Tip: Monitor your cider’s specific gravity (SG) during fermentation. When it stabilizes, it’s time to move to the next stage.
What steps should be taken when cider is close to 1.000 SG?
When your cider approaches an SG of 1.000, it’s nearing the end of fermentation. At this point, siphon the cider into a secondary container, taking care not to disturb the sediment at the bottom. Let it sit for another two weeks or until it clears completely. This step ensures a cleaner and more polished final product.
Remember: Always sanitize your equipment before transferring cider to avoid contamination.
What are the options for finishing hard cider?
Finishing hard cider depends on your taste preferences. If you prefer a dry cider, leave it as is after fermentation. For a sweeter cider, you can back-sweeten it by adding sugar or fruit juice. Carbonation is another option—bottle conditioning creates a sparkling cider, while still cider remains flat.
Important: Good sanitation is crucial during this stage to prevent spoilage and ensure the yeast ferments properly.
Is yeast nutrient necessary for cider making?
Yeast nutrient isn’t strictly necessary, but it’s highly recommended. It provides essential nutrients that help yeast thrive, ensuring a quicker and more thorough fermentation. Without it, yeast may struggle, leading to stalled fermentation or off-flavors.
Fun Fact: Adding yeast nutrient can also enhance the cider’s aroma and flavor by supporting healthy yeast activity.
What are the criteria for classifying apples for cider making?
Apples for cider making are classified based on three key factors: acidity, phenolic compounds, and sugar content. High-acid apples add sharpness, phenolic compounds contribute to complexity and tannins, and sugar content determines the alcohol level. Balancing these elements creates a well-rounded cider.
Did You Know? Traditional cider makers often blend different apple varieties to achieve the perfect balance of sweetness, acidity, and tannins.
What is the history of cider consumption?
Cider has a rich history dating back centuries. By the ninth century, cider drinking was already well-established in Europe. After the Norman Conquest of 1066, cider became a staple in England, where it gained widespread popularity. Today, cider remains a beloved beverage worldwide.
Historical Insight: The tradition of cider making has evolved over time, but its roots in European culture remain strong.
How does the cider process modulate microbial composition?
The cider-making process significantly influences microbial composition. For example, culling apples results in ciders with higher microbial numbers. Additionally, the temperature during fermentation affects yeast population dynamics, shaping the cider’s flavor and aroma.
Expert Note: Proper temperature control during fermentation ensures a balanced microbial environment, leading to a cleaner and more consistent cider.
Why is proper clarification important for cider filtration?
Proper clarification is essential for smooth filtration and stability. Poorly clarified cider can clog filter media, making the process inefficient. Clear cider not only looks more appealing but also has a better mouthfeel and flavor.
Pro Tip: Use pectinolytic enzymes to break down pectin and achieve crystal-clear cider before filtration.
What equipment is needed for cider making?
For small-scale home cider production, basic equipment like a fermenting bucket, airlock, siphon, and hydrometer is sufficient. As you scale up, consider investing in stainless steel fermenters, conical tanks, or temperature-controlled systems for better results.
Quick Reminder: Start simple and upgrade your equipment as you gain experience. Quality tools, like those from Chenma, make the process easier and more efficient.