
A cider fermenting container is your key to crafting delicious homemade hard cider. This specialized equipment ensures a safe and controlled environment for fermentation, helping you achieve consistent flavor and quality every time. By using the right container, you prevent contamination and create the perfect conditions for yeast to work its magic. Making hard cider at home isn’t just about the end product—it’s a rewarding experience. With cider sales growing globally and the beverage market booming, there’s no better time to dive into this fun and flavorful hobby.
Preparing Your Cider Fermenting Container for Use
Before you dive into making your homemade hard cider, preparing your cider fermenting container is a crucial first step. Proper preparation ensures a clean and safe environment for fermentation, which directly impacts the quality and flavor of your cider. Let’s break it down into simple steps.
Cleaning and Sanitizing the Container
Cleaning your cider fermenting container is non-negotiable. Even if the container looks spotless, invisible residues or microorganisms can spoil your cider. Start by rinsing the container with warm water to remove any dust or debris. Then, use a mild, unscented detergent to scrub the interior thoroughly. Avoid harsh chemicals, as they can leave behind residues that affect the cider’s taste.
Once cleaned, move on to sanitizing. Sanitization eliminates harmful bacteria and wild yeast that could interfere with fermentation. Use a food-grade sanitizer, following the manufacturer’s instructions. Make sure to sanitize not just the container but also any tools or equipment that will come into contact with your cider, such as airlocks, stoppers, and funnels. Rinse everything with clean water after sanitizing to ensure no residue remains.
Pro Tip: Always sanitize immediately before use, even if you cleaned the container earlier. This extra step guarantees a contamination-free start.
Why Proper Sanitation is Crucial for Homemade Hard Cider
Sanitation isn’t just about cleanliness—it’s about protecting your cider. Fermentation is a delicate process where yeast converts sugars into alcohol. If unwanted bacteria or wild yeast enter the mix, they can outcompete your chosen yeast, leading to off-flavors, spoilage, or even unsafe cider.
Scientific research highlights the importance of hygiene in fermentation. According to studies, regular sanitation of fermentation vessels ensures product safety and quality. Contamination risks decrease significantly when proper hygiene practices are followed. This means your cider will not only taste better but also be safer to consume.
Think of sanitation as setting the stage for your yeast to perform its best. A clean environment allows the yeast to work efficiently, resulting in a smooth and flavorful cider.
Tools and Materials Needed for Cleaning and Preparation
To prepare your cider fermenting container, gather the right tools and materials. Here’s a quick checklist:
- Mild, unscented detergent: For cleaning the container without leaving residues.
- Food-grade sanitizer: To eliminate harmful microorganisms.
- Soft sponge or brush: For scrubbing the interior without scratching it.
- Clean towels or air-drying rack: To dry the container after cleaning.
- Measuring cups: For accurately diluting sanitizers.
- Gloves: To protect your hands during the cleaning process.
Having these items ready makes the preparation process smooth and efficient. Remember, investing time in preparation pays off when you taste the final product.
By taking these steps, you’re setting yourself up for success. A clean and sanitized cider fermenting container creates the perfect environment for fermentation, ensuring your homemade hard cider turns out delicious and safe to drink.
Choosing Ingredients to Make Hard Cider
The ingredients you choose play a huge role in the flavor, aroma, and overall quality of your hard cider. By selecting the right apples, understanding yeast, and exploring optional additives, you can create a cider that’s uniquely yours. Let’s dive into the essentials.
Selecting the Best Apples or Apple Juice
The foundation of any great hard cider is the apples. Not all apples are created equal when it comes to cider-making. You’ll want to focus on apples with the right balance of sugar, acidity, and tannins. These elements work together to create a cider that’s flavorful and well-rounded.
- Cider Apples: These apples are specifically grown for cider-making. They have high sugar content, which helps with fermentation, and a good balance of acidity and tannins. This combination gives your cider depth and complexity.
- Sweet Apples: While sweet apples like Fuji or Gala are low in acidity, they can add a pleasant sweetness to your cider. However, they’re best used in combination with more acidic apples.
- Culinary Apples: These apples, such as Granny Smith or Braeburn, are higher in acidity but lower in tannins. They’re often used in modern ciders for their crisp and refreshing taste.
If fresh apples aren’t an option, high-quality apple juice works too. Look for juice without added preservatives or sweeteners. These additives can interfere with fermentation and alter the flavor of your cider.
Pro Tip: A mix of apple varieties often yields the best results. Combining sweet, tart, and tannic apples creates a balanced cider with layers of flavor.
Understanding the Role of Yeast in Fermentation
Yeast is the powerhouse behind the transformation of apple juice into hard cider. It consumes the sugars in the juice and converts them into alcohol and carbon dioxide. The type of yeast you choose will influence the cider’s flavor, aroma, and alcohol content.
- Cider-Specific Yeast: These strains are designed for cider-making. They enhance the natural apple flavors and produce a clean, crisp finish.
- Wine Yeast: Some cider makers use wine yeast for a more robust flavor profile. These yeasts can handle higher sugar levels, resulting in a stronger cider.
- Wild Yeast: For a more adventurous approach, you can rely on wild yeast naturally present on apple skins or in the air. This method creates unique and unpredictable flavors but requires careful monitoring to avoid spoilage.
Quick Tip: Always follow the yeast manufacturer’s instructions for rehydration and pitching. Proper yeast handling ensures a healthy fermentation process.
Optional Additives for Flavor and Fermentation Control
While apples and yeast are the stars of the show, optional additives can help you fine-tune your cider. These ingredients allow you to control fermentation and add unique flavors.
- Campden Tablets: These tablets kill wild yeast and bacteria in your juice before fermentation. They’re especially useful if you’re using unpasteurized juice.
- Tannin Powder: If your apples lack tannins, adding a small amount of tannin powder can improve the cider’s body and mouthfeel.
- Acid Blend: This mix of citric, malic, and tartaric acids can enhance the cider’s tartness if your apples are too sweet.
- Spices and Fruits: For a creative twist, consider adding cinnamon, cloves, or even berries during fermentation. These additions can elevate your cider’s flavor profile.
Fun Idea: Experiment with small batches when using additives. This way, you can test different combinations without risking your entire batch.
By carefully selecting your ingredients and understanding their roles, you’re setting the stage for a successful cider-making journey. The right choices will help you craft a hard cider that’s not only delicious but also uniquely yours.
Setting Up the Fermentation Process
Setting up the fermentation process is where the magic begins. This step transforms your carefully chosen ingredients into a delicious hard cider. By preparing the cider base, using the fermenting vessel effectively, and installing an airlock, you’ll create the ideal environment for fermentation.
Preparing the Cider Base
The cider base is the foundation of your hard cider. Start by pouring your apple juice or pressed apple mixture into the fermenting vessel. If you’re using fresh apples, ensure they’ve been juiced and strained to remove pulp and solids. Aim to fill the container to about 80% of its capacity. This leaves room for the fermentation activity, which can cause bubbling and foaming.
Before adding yeast, consider treating the juice with Campden tablets. These tablets help eliminate wild yeast and bacteria that could interfere with fermentation. Crush one tablet per gallon of juice and stir it in thoroughly. Let the juice sit for 24 hours, covered with a clean towel or loosely fitting lid, to allow the sulfites to dissipate.
Once the juice is ready, it’s time to add the yeast. Follow the instructions on the yeast packet for rehydration or direct pitching. Sprinkle the yeast evenly over the surface of the juice, then gently stir it in. This step activates the yeast and kickstarts the fermentation process.
Quick Tip: If your juice lacks natural sugars, you can add a small amount of sugar or honey to boost fermentation. Dissolve it in warm water before mixing it into the juice.
Using the Cider Fermenting Container Effectively
Your cider fermenting container plays a critical role in this process. It provides a controlled environment where the yeast can thrive. Make sure the container is clean, sanitized, and dry before use. Any leftover moisture or contaminants can disrupt fermentation.
When transferring the cider base into the container, avoid splashing. Excess oxygen exposure at this stage can lead to oxidation, which negatively affects the flavor. Use a funnel or siphon to pour the juice smoothly into the container.
Keep the container in a cool, dark place during fermentation. Direct sunlight or high temperatures can harm the yeast and alter the cider’s taste. A temperature range of 60–75°F is ideal for most cider yeasts. Monitor the environment to ensure consistent conditions throughout the process.
Pro Tip: If the container isn’t filled to the shoulders, top it off with additional apple juice. This minimizes oxygen exposure and ensures proper fermentation.
Installing an Airlock and Ensuring a Proper Seal
An airlock is essential for managing the gases produced during fermentation. It allows carbon dioxide to escape while preventing oxygen and contaminants from entering the container. To install the airlock, first secure a rubber stopper or lid with a pre-drilled hole onto the fermenting vessel. Insert the airlock into the hole, ensuring a snug fit.
Fill the airlock with water or a sanitizing solution to the indicated level. This creates a barrier that keeps unwanted elements out. Check the airlock periodically to ensure it remains filled and functional.
A proper seal on the fermenting container is equally important. It maintains the anaerobic environment needed for fermentation. Inspect the lid or stopper for any gaps or leaks. If you notice any issues, reseal the container immediately.
Fun Fact: Some cider makers use a blow-off tube instead of an airlock during the initial stages of fermentation. This setup helps manage vigorous bubbling by directing excess foam into a separate container.
By following these steps, you’ll set up a fermentation process that’s efficient and effective. With the cider base prepared, the fermenting vessel properly used, and the airlock installed, you’re well on your way to crafting a flavorful homemade hard cider.
Monitoring and Managing Fermentation
Fermentation is where the magic truly happens in your cider-making journey. This stage transforms your carefully prepared cider base into a flavorful hard cider. By monitoring the process and managing conditions effectively, you ensure a successful primary fermentation and avoid common pitfalls. Let’s explore how to create the perfect environment, recognize fermentation activity, and track progress like a pro.
Ideal Fermentation Conditions (Temperature, Light, and Environment)
Creating the right environment for fermentation is crucial. Yeast thrives under specific conditions, and maintaining these ensures a smooth primary fermentation process. Temperature plays a significant role. Most cider yeasts perform best between 60–75°F. Cooler temperatures slow down fermentation but can enhance fruity flavors, while higher temperatures speed up the process but may introduce off-flavors.
Keep your fermenting container in a dark, cool space. Direct sunlight can harm the yeast and alter the cider’s flavor. A basement or pantry often works well. Avoid areas with fluctuating temperatures, as consistency is key to yeast performance.
Humidity and airflow also matter. Excess moisture can encourage mold growth, while poor ventilation may trap heat. Ensure the space is dry and well-ventilated. If you’re fermenting in a warmer climate, consider using a temperature-controlled fermentation chamber or wrapping the container with a damp towel to keep it cool.
Fun Fact: Research shows that hybrid yeast strains excel in low-temperature fermentation, producing ciders with enhanced fruity aromas. If you’re aiming for a crisp and aromatic hard cider, experimenting with these strains could be worth it.
Signs of Active Fermentation and Troubleshooting Issues
During primary fermentation, yeast consumes the sugars in your cider base and produces alcohol and carbon dioxide. You’ll notice several signs of active fermentation:
- Bubbling in the Airlock: This indicates carbon dioxide escaping from the container. Frequent bubbling means fermentation is in full swing.
- Foam Formation: A layer of foam, known as krausen, may form on the surface of the cider.
- Cloudiness: The cider may appear cloudy as yeast cells multiply and remain suspended in the liquid.
If these signs are absent within 24–48 hours, something might be wrong. Common issues include:
- Inactive Yeast: Yeast may fail to activate if it’s expired or improperly stored. Always check the expiration date and store yeast in a cool, dry place.
- Temperature Problems: If the environment is too cold, fermentation may stall. Move the container to a slightly warmer area and monitor the temperature.
- Oxygen Exposure: Excess oxygen can inhibit yeast activity and lead to spoilage. Ensure the fermenting container is sealed properly with an airlock.
Quick Tip: If fermentation stalls, try gently swirling the container to redistribute the yeast. Avoid shaking, as this can introduce oxygen.
Using Tools Like Hydrometers to Track Progress
A hydrometer is an essential tool for monitoring the progress of your hard cider. It measures the specific gravity (SG) of the liquid, which indicates the sugar content. By tracking changes in SG, you can determine when primary fermentation is complete.
Here’s how to use a hydrometer:
- Take an Initial Reading: Before adding yeast, measure the SG of your cider base. This is your starting gravity.
- Monitor Regularly: During fermentation, take readings every few days. Use a sanitized thief or turkey baster to extract a sample without contaminating the cider.
- Look for Stability: When the SG remains constant for 2–3 days, fermentation is likely complete. Most hard ciders finish with an SG between 1.000 and 1.010, depending on the desired sweetness.
Hydrometers also help calculate alcohol content. Subtract the final gravity (FG) from the starting gravity (SG), then multiply by 131.25. For example, if your SG was 1.050 and your FG is 1.000, the alcohol by volume (ABV) is approximately 6.56%.
Pro Tip: If you don’t have a hydrometer, you can rely on visual cues like reduced bubbling in the airlock. However, a hydrometer provides more precise information.
By maintaining ideal conditions, recognizing fermentation activity, and using tools like hydrometers, you’ll master the art of managing primary fermentation. This attention to detail ensures your hard cider develops the perfect balance of flavor and aroma.
Racking and Secondary Fermentation
Racking and secondary fermentation are essential steps in crafting a refined and flavorful hard cider. These processes help clarify your cider, enhance its taste, and provide an opportunity to experiment with unique flavors. Let’s break it down so you can master this stage of cider-making.
What is Racking, and Why is it Important?
Racking refers to transferring your cider from one container to another, leaving behind sediment that forms during primary fermentation. This sediment, known as lees, consists of dead yeast cells and other particles. While some lees can add complexity to your cider, leaving it in contact with too much sediment for too long can result in off-flavors.
Racking serves several purposes:
- Improves Clarity: By removing sediment, your cider becomes clearer and more visually appealing.
- Prevents Off-Flavors: Prolonged contact with lees can produce unwanted tastes. Racking minimizes this risk.
- Prepares for Aging: Transferring your cider to a secondary container creates a cleaner environment for secondary fermentation and aging.
Historically, cider makers have used racking to refine their beverages. English cider makers, for example, often aged their ciders for extended periods after racking, allowing the flavors to develop fully. This tradition highlights the importance of this step in achieving a high-quality final product.
Quick Tip: Timing matters. Rack your cider once the bubbling in the airlock slows down significantly, indicating that primary fermentation is nearly complete.
How to Transfer Cider to a Secondary Container
Transferring cider during racking requires care to avoid introducing oxygen or disturbing the sediment. Follow these steps for a smooth process:
- Sanitize Everything: Clean and sanitize your secondary container, siphon, and any other tools. This prevents contamination and ensures a safe environment for your cider.
- Position the Containers: Place the primary fermenting container on a raised surface, like a countertop, and the secondary container on a lower surface. Gravity will help with the transfer.
- Use a Siphon: Insert a sanitized siphon into the primary container, keeping the end above the sediment layer. Start the siphoning process and let the cider flow gently into the secondary container.
- Minimize Oxygen Exposure: Avoid splashing the cider during the transfer. Oxygen can lead to oxidation, which negatively affects flavor.
- Seal the Secondary Container: Once the transfer is complete, secure the lid or stopper and reattach the airlock. This maintains the anaerobic environment needed for secondary fermentation.
Pro Tip: If you notice a small amount of sediment transferring, don’t worry. A little sediment won’t harm your cider and can settle out during secondary fermentation.
Adding Flavors During Secondary Fermentation
Secondary fermentation offers a fantastic opportunity to get creative with your cider. At this stage, you can introduce additional flavors to make your cider truly unique. Here are some ideas to inspire you:
- Spices: Add cinnamon sticks, cloves, or nutmeg for a warm, spiced cider. These flavors pair beautifully with the natural apple notes.
- Fruits: Enhance your cider with fresh or dried fruits like berries, cherries, or citrus slices. These additions can create vibrant and refreshing flavor profiles.
- Herbs: Experiment with herbs like rosemary, thyme, or mint for a sophisticated twist.
- Sweeteners: If you prefer a sweeter cider, consider adding honey, maple syrup, or brown sugar. Dissolve the sweetener in a small amount of warm water before mixing it into the cider.
When adding flavors, start with small amounts and taste-test regularly. This ensures you achieve the desired flavor without overpowering the cider’s natural characteristics.
Fun Fact: Historical cider makers often used secondary fermentation to blend different apple varieties or introduce seasonal spices. This practice allowed them to create ciders that reflected local traditions and ingredients.
By mastering racking and secondary fermentation, you’ll elevate your cider-making skills to the next level. These steps not only improve the quality of your cider but also give you the freedom to experiment and craft a beverage that’s uniquely yours.
Bottling Your Homemade Hard Cider
Bottling is the final step in your cider-making journey, where all your hard work comes together. This stage requires careful preparation to ensure your cider stays fresh, flavorful, and safe to drink. Let’s walk through the process step by step, from cleaning bottles to adding carbonation for that perfect fizz.
Cleaning and Preparing Bottles
Clean bottles are essential for bottling hard cider. Any leftover residue or bacteria can spoil your cider, so don’t skip this step. Start by gathering your bottles—flip-top bottles are a great choice because they’re reusable and easy to seal.
Follow these steps to prepare your bottles:
- Rinse Thoroughly: Wash each bottle with warm water to remove any visible dirt or debris.
- Use a Bottle Brush: Scrub the inside of each bottle with a bottle brush and mild detergent. This ensures no residue remains.
- Sanitize: After cleaning, sanitize the bottles using a food-grade sanitizer. Fill each bottle with the solution, let it sit for a few minutes, then rinse with clean water.
- Air Dry: Place the bottles upside down on a drying rack or clean towel to air dry completely.
Pro Tip: Sanitize your bottle caps or flip-top seals as well. Contamination can occur from any part of the bottle.
Having clean and sanitized bottles sets the stage for a successful bottling process. It’s a small effort that makes a big difference in the quality of your cider.
How to Safely Bottle Cider Using a Cider Fermenting Container
Using your cider fermenting container effectively during bottling ensures a smooth transfer of cider into bottles. You’ll need an auto siphon with tubing and a bottle filler to make the process easier and more efficient.
Here’s how to bottle your cider safely:
- Set Up Your Equipment: Place the fermenting container on a raised surface, like a countertop. Position the bottles on a lower surface to use gravity for the transfer.
- Attach the Siphon and Bottle Filler: Connect the auto siphon to the tubing and attach the bottle filler to the other end. The bottle filler allows you to control the flow of cider, preventing spills and waste.
- Start the Siphon: Insert the siphon into the fermenting container, keeping the end above the sediment layer. Pump the siphon to start the flow of cider.
- Fill the Bottles: Insert the bottle filler into each bottle and press down to release cider. Fill each bottle to about an inch below the top to leave room for sealing.
- Seal the Bottles: Once filled, seal the bottles tightly with caps or flip-top closures.
Quick Tip: Avoid splashing the cider during the transfer. Excess oxygen exposure can lead to oxidation, which affects the flavor.
By using the right tools and techniques, you can bottle your cider efficiently while preserving its quality and taste.
Adding Priming Sugar for Carbonation (Optional)
If you prefer sparkling cider, adding priming sugar before sealing the bottles creates natural carbonation. The sugar feeds the remaining yeast in the cider, producing carbon dioxide that gets trapped in the sealed bottles.
Follow these steps to carbonate your cider:
- Calculate the Sugar Amount: Use about 1 teaspoon of sugar per 16-ounce bottle. For larger batches, dissolve the sugar in warm water and mix it evenly into the cider before bottling.
- Add Sugar to Each Bottle: If you’re not mixing the sugar into the cider, add the measured amount directly to each bottle before filling it with cider.
- Seal and Store: After bottling, seal the bottles tightly and store them in a cool, dark place. Allow the cider to carbonate for 1–2 weeks.
Fun Fact: Using honey or maple syrup instead of sugar can add unique flavors to your sparkling cider.
Carbonation adds a delightful fizz to your cider, making it even more enjoyable. Just be sure to monitor the bottles during this process to avoid over-carbonation.
Bottling your homemade hard cider is a rewarding step that brings you closer to enjoying the fruits of your labor. By cleaning and preparing your bottles, using your cider fermenting container effectively, and optionally adding priming sugar, you’ll create a cider that’s ready to impress. Take your time, follow these steps, and savor the satisfaction of crafting your own bottled masterpiece.
Storing and Aging Your Cider
Aging your cider is where patience pays off. Proper storage and aging can transform your cider, enhancing its flavor and complexity. Let’s explore how to store it correctly, how long to age it, and how to enjoy it at its peak.
Ideal Storage Conditions for Homemade Hard Cider
Storing your cider in the right environment is crucial for preserving its quality. Temperature, light, and positioning all play a role in maintaining the flavor and preventing spoilage.
- Temperature: Keep your cider in a cool place, ideally between 50–60°F. Fluctuating temperatures can disrupt the aging process and lead to off-flavors. A basement or cellar works well for consistent conditions.
- Light: Protect your cider from direct sunlight. UV rays can degrade the cider, altering its taste and aroma. Use dark-colored bottles or store them in a dark area to shield them from light exposure.
- Positioning: Store bottles upright. This minimizes the surface area exposed to oxygen, reducing the risk of oxidation. Unlike wine, cider doesn’t need to stay on its side since it doesn’t rely on cork moisture.
Quick Tip: If you don’t have a cellar, a closet or pantry in a temperature-stable part of your home can work just as well.
By following these storage guidelines, you’ll create the perfect environment for your cider to mature gracefully.
How Long to Age Cider for Optimal Flavor
The aging process allows your cider to develop deeper and more refined flavors. The length of time you should age your cider depends on the style and your personal taste preferences.
- Short-Term Aging (1–3 Months): Most ciders are ready to drink after a few months. During this time, the flavors mellow, and any harsh notes from fermentation fade away.
- Medium-Term Aging (6–12 Months): For a more complex cider, consider aging it longer. This period allows subtle flavors to emerge, creating a richer and more balanced profile.
- Long-Term Aging (1 Year or More): Some ciders, especially those with higher tannins or alcohol content, benefit from extended aging. Over time, these ciders develop unique characteristics, much like fine wine.
Fun Fact: Aging on lees, a traditional practice in cider and wine-making, can enhance the flavor. Lees are the dead yeast cells left after fermentation. Allowing your cider to age on lees for a few months can stabilize its color and add nutty or creamy notes.
Experiment with different aging times to discover what suits your palate. Keep a journal to track how the flavors evolve over time.
Tips for Serving and Enjoying Aged Cider
Serving your aged cider properly ensures you get the most out of its flavor and aroma. Here’s how to make the experience even better:
- Chill Before Serving: Serve your cider slightly chilled, around 45–55°F. This temperature range highlights its flavors without muting them.
- Pour Gently: When pouring, avoid disturbing any sediment that may have settled at the bottom of the bottle. This keeps your cider clear and smooth.
- Use the Right Glassware: A tulip-shaped glass or wine glass works best for cider. These shapes concentrate the aromas, enhancing your tasting experience.
- Pair with Food: Aged cider pairs beautifully with a variety of dishes. Try it with sharp cheeses, roasted meats, or even desserts like apple pie.
Pro Tip: If you’ve experimented with adding spices or fruits during secondary fermentation, take note of how these flavors shine after aging. They often become more pronounced and harmonious.
Enjoying your cider is the reward for your hard work and patience. Savor each sip and share it with friends or family to celebrate your cider-making journey.
By storing your cider under ideal conditions, giving it the right amount of time to age, and serving it thoughtfully, you’ll elevate your homemade cider to a whole new level. Aging isn’t just about waiting—it’s about letting your cider reach its full potential.
Troubleshooting Common Cider-Making Issues
Even with careful preparation, challenges can arise during your cider-making journey. Don’t worry—most issues have straightforward solutions. Let’s tackle some common problems you might face and how to address them effectively.
Fermentation Problems and How to Fix Them
Fermentation is the heart of making hard cider, but it doesn’t always go as planned. If your fermentation stalls or doesn’t start, it’s often due to inactive yeast, temperature issues, or improper preparation.
Here’s how to troubleshoot:
Inactive Yeast: If fermentation hasn’t started within 24–48 hours, your yeast might be the culprit. Check the expiration date on the yeast packet. If it’s expired, replace it with fresh yeast. For active yeast, rehydrate it in warm water (around 95–100°F) before adding it to your cider base. This step ensures the yeast wakes up and gets to work.
Temperature Problems: Yeast thrives in specific temperature ranges, usually between 60–75°F. If your fermenting container is too cold, move it to a warmer spot, like a pantry or near a heating vent. If it’s too warm, relocate it to a cooler area or wrap it with a damp towel to regulate the temperature.
Nutrient Deficiency: Sometimes, yeast struggles due to a lack of nutrients in the cider base. Adding yeast nutrient or energizer can give it the boost it needs to ferment properly.
Pro Tip: Bri Valliere, an expert in fermentation troubleshooting, emphasizes the importance of monitoring your cider closely during the first few days. Early intervention can save your batch from failure.
If fermentation still doesn’t resume, consider starting a new batch of yeast and pitching it into the cider. Always sanitize your tools to avoid contamination during this process.
Preventing Contamination and Off-Flavors
Contamination is every cider maker’s nightmare. It can lead to off-flavors, spoilage, or even unsafe cider. The good news? You can prevent it with proper sanitation and attention to detail.
Sanitize Everything: Before starting, clean and sanitize all equipment, including your fermenting container, airlock, and siphon. Use a food-grade sanitizer and rinse thoroughly with clean water.
Avoid Oxygen Exposure: During fermentation, oxygen can introduce unwanted bacteria or wild yeast. Keep your fermenting container sealed with an airlock and avoid opening it unnecessarily.
Use Fresh Ingredients: Old or spoiled apple juice can harbor bacteria that disrupt fermentation. Always use fresh, high-quality ingredients for your hard cider.
Monitor Your Environment: Store your fermenting container in a clean, dry space. Avoid areas with high humidity, as this can encourage mold growth.
Quick Tip: Gabe Cook, a cider advocate, highlights the importance of shared knowledge in preventing contamination. Learning from others’ experiences can help you avoid common pitfalls.
If your cider develops off-flavors, identify the cause. A vinegar-like taste often indicates acetobacter contamination, which occurs when oxygen enters the fermenting container. Discard the batch and double-check your sealing process for future attempts.
Addressing Bottling and Storage Challenges
Bottling and storage are critical steps where mistakes can impact the final product. Common issues include over-carbonation, flat cider, or spoilage during storage.
Over-Carbonation: If your bottles become over-carbonated, they might explode. This usually happens when too much priming sugar is added. To prevent this, measure your sugar carefully—about 1 teaspoon per 16-ounce bottle is sufficient. Store bottles in a cool place and check them regularly during carbonation.
Flat Cider: If your cider lacks fizz, the yeast might not have enough sugar to produce carbon dioxide. Dissolve a small amount of sugar in warm water and add it to the cider before bottling. Ensure the bottles are sealed tightly to trap the carbonation.
Spoilage During Storage: Improper storage can lead to spoilage or off-flavors. Keep your bottles in a cool, dark place, away from direct sunlight. Use dark-colored bottles to protect the cider from UV rays.
Fun Fact: Historical cider makers often stored their bottles in underground cellars to maintain consistent temperatures and preserve flavor.
If you notice sediment in your bottles, don’t panic. This is normal and doesn’t affect the cider’s quality. Pour the cider gently to leave the sediment behind.
By addressing these challenges head-on, you’ll gain confidence in your cider-making skills. Troubleshooting is part of the learning process, and each batch brings you closer to mastering the art of crafting hard cider.
Experimenting with Your Cider Fermenting Container
Experimenting with your cider fermenting container opens up a world of creativity and flavor possibilities. This is where you can truly make your cider unique, tailoring it to your taste preferences and exploring new techniques. Let’s dive into some exciting ways to experiment and elevate your cider-making journey.
Adding Unique Flavors (Spices, Fruits, and Herbs)
Adding unique flavors to your cider is one of the most enjoyable parts of the process. Spices, fruits, and herbs can transform your cider into something extraordinary. Whether you’re aiming for a warm, spiced cider or a refreshing fruit-infused drink, the possibilities are endless.
- Spices: Cinnamon sticks, cloves, nutmeg, or even star anise can add depth and warmth to your cider. Start small—add a single cinnamon stick or a few cloves to your secondary fermentation. Taste your cider after a week or two, then adjust as needed. Overpowering your cider with spices can mask the natural apple flavors, so moderation is key.
- Fruits: Fresh or dried fruits like blueberries, peaches, or cherries can bring vibrant, fruity notes to your cider. Chop the fruit into small pieces and add it during secondary fermentation. The sugars in the fruit may even kickstart a slight secondary fermentation, adding complexity to the flavor.
- Herbs: Rosemary, thyme, or mint can give your cider a sophisticated twist. These herbs pair beautifully with the crispness of apples. Add a sprig or two during secondary fermentation and taste-test regularly to ensure the flavors don’t become too strong.
Expert Tip: According to flavor experts, secondary fermentation is the perfect stage to introduce these additions. It allows the flavors to meld without interfering with the primary fermentation process.
Experimenting with these ingredients not only enhances your cider but also helps you develop your palate. Take notes on what works and what doesn’t, so you can refine your recipes in future batches.
Trying Different Yeasts for Flavor Variations
The type of yeast you use plays a significant role in shaping the flavor profile of your cider. Different yeasts produce different results, from crisp and clean to bold and complex. Exploring various yeast strains can help you discover new dimensions in your cider.
- Cider-Specific Yeast: These strains are designed to highlight the natural apple flavors in your cider. They produce a clean, crisp finish that’s perfect for traditional hard cider.
- Wine Yeast: Wine yeasts, such as Champagne or Sauvignon Blanc strains, can add a touch of elegance to your cider. They often result in higher alcohol content and more robust flavors.
- Beer Yeast: For a unique twist, try using ale or lager yeast. These yeasts can introduce malty or fruity notes, giving your cider a beer-like character.
- Wild Yeast: If you’re feeling adventurous, consider using wild yeast. Found naturally on apple skins or in the air, wild yeast creates unpredictable and complex flavors. However, it requires careful monitoring to avoid spoilage.
Fun Fact: Yeast experimentation is a common practice among cider makers. By trying different strains, you can create ciders that range from dry and tart to sweet and aromatic.
When experimenting with yeast, always follow the manufacturer’s instructions for rehydration and pitching. Keep detailed records of the yeast strains you use and the results they produce. This will help you replicate your successes and learn from your experiments.
Exploring Wild Fermentation for a Unique Twist
Wild fermentation is an exciting technique that relies on naturally occurring yeast and bacteria to ferment your cider. This method can produce complex, one-of-a-kind flavors that are impossible to achieve with commercial yeast. It’s a nod to traditional cider-making practices and a chance to embrace the unpredictable.
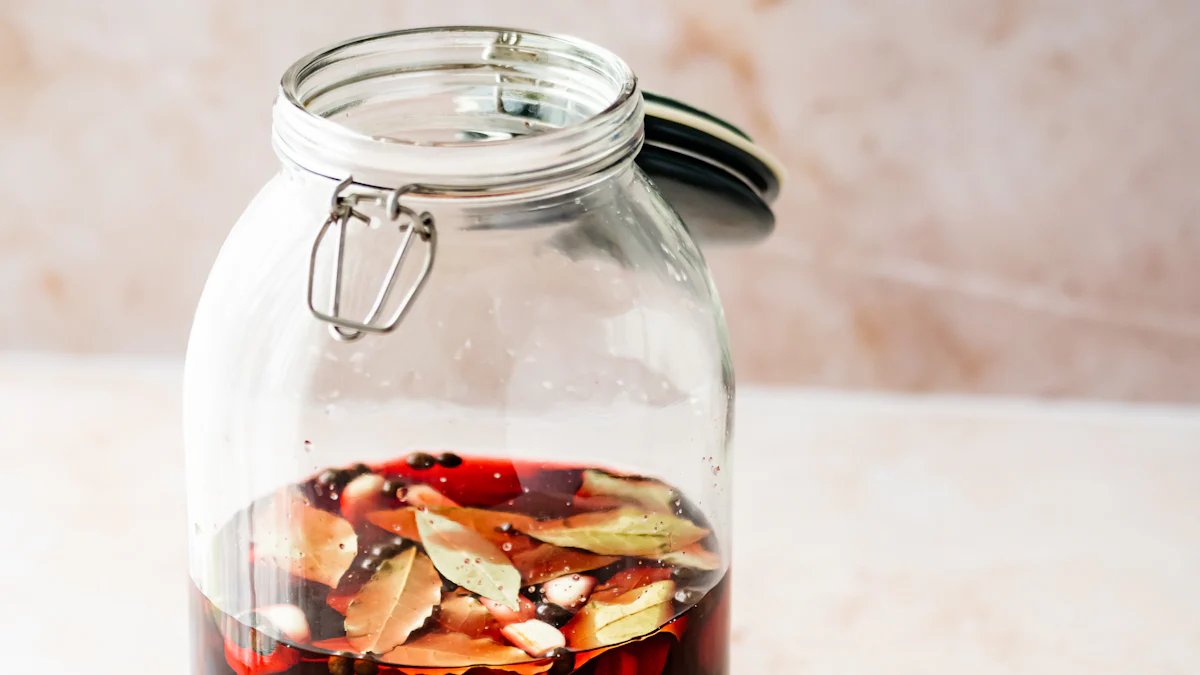
To try wild fermentation, start with unpasteurized apple juice or freshly pressed apples. Avoid adding Campden tablets, as they kill the wild yeast needed for fermentation. Transfer the juice to your cider fermenting container and cover it loosely with a clean cloth or towel. This allows the wild yeast to enter while keeping contaminants out.
Wild fermentation requires patience and close observation. The process may take longer than using commercial yeast, and the results can vary widely. You might end up with a cider that’s funky, tangy, or even slightly sour.
Pro Tip: Wild fermentation works best in a clean, controlled environment. Sanitize your equipment thoroughly to minimize the risk of unwanted bacteria taking over.
While wild fermentation can be unpredictable, it’s also incredibly rewarding. Each batch is a reflection of your local environment, capturing the unique characteristics of the wild yeast and bacteria in your area.
Experimenting with your cider fermenting container is all about pushing boundaries and discovering what you love. Whether you’re adding bold flavors, trying new yeast strains, or diving into wild fermentation, each experiment brings you closer to mastering the art of cider-making. So, grab your container, get creative, and enjoy the journey!
Making hard cider at home is a journey filled with creativity and satisfaction. By following the key steps—cleaning your fermenting container, selecting quality ingredients, and monitoring fermentation—you set yourself up for success. Cleanliness ensures safety, patience allows flavors to develop, and creativity lets you craft a cider that’s uniquely yours. The process may seem simple, but it carries a rich heritage and cultural significance. As you make hard cider, you’ll discover the joy of creating something personal and meaningful. Start today, and enjoy the rewarding experience of homemade cider.
FAQ
What are the three main ways to ferment cider?
You can ferment cider using three primary methods. The first involves using fresh-pressed, non-pasteurized apple cider, which you can often find at farmer’s markets during the fall. This method allows for a natural fermentation process. The second method uses commercial yeast, giving you more control over the flavor and fermentation speed. The third option relies on wild fermentation, where natural yeast from the apples or the environment drives the process. Each method offers unique results, so you can choose based on your preferences and experience level.
Can I use natural yeast on apples for cider fermentation?
Yes, you can use the natural yeast found on apples for fermentation. This approach is simple and can produce ciders with complex and nuanced flavors. However, it comes with risks. Natural yeast can sometimes lead to spoilage if not monitored carefully. If you’re new to cider-making, you might want to start with commercial yeast for more predictable results before experimenting with natural yeast.
What should the potential alcohol level be when fermenting cider?
When fermenting cider, the potential alcohol level typically falls between 1.050 and 1.060 on the specific gravity scale. You can measure this using a hydrometer before adding yeast. This range ensures a balanced cider with a moderate alcohol content. If the reading is too low, you might need to add sugar to boost fermentation. Always sterilize your fermenter and use an airlock to maintain a controlled environment.
How long does cider fermentation take?
Fermentation usually takes about 1–3 weeks, depending on the temperature and yeast used. Cooler temperatures may slow the process, while warmer conditions can speed it up. You’ll know fermentation is complete when the airlock bubbles less than once per minute or when the specific gravity stabilizes for a few days. Patience is key—rushing this step can affect the flavor and quality of your cider.
Do I need to pasteurize my cider before fermentation?
Pasteurizing cider before fermentation isn’t necessary, especially if you’re using fresh-pressed, non-pasteurized juice. However, if you’re concerned about wild yeast or bacteria, you can treat the juice with Campden tablets. These tablets kill unwanted microorganisms while preserving the natural flavors. Let the juice sit for 24 hours after treatment before adding your chosen yeast.
What’s the best way to store cider during fermentation?
Store your fermenting cider in a cool, dark place. A temperature range of 60–75°F works well for most yeast strains. Avoid direct sunlight, as it can harm the yeast and alter the cider’s flavor. Use a container with an airlock to allow carbon dioxide to escape while keeping oxygen and contaminants out. Consistent conditions help ensure a smooth fermentation process.
Can I add flavors during fermentation?
Yes, you can add flavors during secondary fermentation. Spices like cinnamon or cloves, fruits such as berries or citrus, and even herbs like rosemary can enhance your cider. Add these ingredients in small amounts and taste-test regularly to avoid overpowering the natural apple flavors. Secondary fermentation is the perfect time to experiment with unique flavor combinations.
Why is sanitation so important in cider-making?
Sanitation is crucial because it prevents contamination that could spoil your cider. Harmful bacteria or wild yeast can outcompete your chosen yeast, leading to off-flavors or unsafe cider. Always clean and sanitize your fermenting container, tools, and bottles before use. This extra effort ensures a safe and delicious final product.
How do I know if my cider has spoiled?
Spoiled cider often has a vinegar-like smell or taste, indicating acetobacter contamination. Cloudiness or sediment isn’t necessarily a sign of spoilage, but mold or unusual colors are red flags. If you suspect spoilage, it’s best to discard the batch. Proper sanitation and sealing during fermentation can help prevent this issue.
Can I carbonate my cider naturally?
You can carbonate your cider naturally by adding priming sugar before bottling. The remaining yeast will consume the sugar, producing carbon dioxide that creates fizz. Use about 1 teaspoon of sugar per 16-ounce bottle. Seal the bottles tightly and store them in a cool, dark place for 1–2 weeks. Monitor the carbonation process to avoid over-carbonation, which can cause bottles to burst.


