Cider tanks revolutionize homebrewing by giving you precise control over fermentation. This control ensures your cider develops consistent flavor and quality every time. Without the need for constant guesswork, even beginners can confidently produce impressive results. The simplicity of using a cider tank allows you to focus on creativity rather than troubleshooting. With the growing popularity of cider, now is the perfect time to explore this rewarding craft. Whether you’re starting small or aiming for perfection, cider tanks make the process approachable and enjoyable.
Why Use Cider Tanks for Homebrewing?
Simplifying the Fermentation Process
Cider tanks streamline the fermentation process by creating an optimal environment for yeast activity. Yeast converts sugars into alcohol and carbon dioxide, a critical step in cider production. These tanks maintain consistent conditions, such as temperature and airflow, which are essential for proper fermentation. Unlike traditional methods that require constant monitoring, cider tanks reduce the need for manual adjustments. This simplicity allows you to focus on crafting your cider rather than troubleshooting issues. With a cider tank, you can achieve professional-level results without the complexity.
Ensuring Consistency and Quality in Every Batch
Consistency is key when brewing cider, especially if you want to replicate your favorite flavors. Cider tanks ensure uniformity by preventing external factors, like contamination or temperature fluctuations, from affecting the fermentation process. Stainless steel tanks, in particular, are non-reactive and corrosion-resistant, preserving the natural taste of your cider. They also prevent unwanted flavors or contaminants from altering the final product. By using a cider tank, you can confidently produce high-quality cider with the same great taste every time.
Making Homebrewing Accessible for Beginners
Homebrewing can feel intimidating, but cider tanks make it approachable for beginners. These tanks simplify the process by eliminating much of the guesswork involved in traditional methods. Their user-friendly design allows you to focus on learning the basics of cider making without worrying about technical challenges. Additionally, the controlled environment they provide reduces the risk of common mistakes, such as contamination or improper fermentation. Whether you’re experimenting with small batches or refining your technique, cider tanks give you the tools to succeed from the start.
Choosing the Right Cider Tank
Determining the Ideal Size for Your Needs
Selecting the right size for your cider tank depends on how much cider you plan to brew. Small-scale homebrewers often start with tanks that hold 5 to 10 gallons, which are perfect for experimenting with recipes or producing cider for personal use. If you aim to brew larger quantities, consider tanks with capacities of 20 gallons or more. These larger tanks allow you to scale up production without compromising quality.
Think about your available space as well. A compact tank fits better in smaller brewing areas, while larger tanks require more room. Always account for the additional equipment you’ll need, such as airlocks and tubing, when planning your setup. Choosing the right size ensures you can brew efficiently without overcrowding your workspace.
Comparing Materials: Stainless Steel vs. Plastic
The material of your cider tank plays a crucial role in the brewing process. Stainless steel tanks offer unmatched durability and hygiene. They resist corrosion, making them ideal for cider’s natural acidity. These tanks also provide excellent temperature control, which is essential for consistent fermentation. Many stainless steel tanks feature airtight seals that prevent oxygen from entering, preserving the cider’s flavor and quality.
On the other hand, plastic tanks are lightweight and budget-friendly. They are easy to clean and suitable for beginners who want to start small. However, plastic tanks may lack the durability and temperature control features of stainless steel. Over time, they can absorb odors or flavors from previous batches, which might affect the taste of your cider.
Key Insight: If you prioritize long-term use and professional results, stainless steel is the better choice. For those just starting or working with limited budgets, plastic tanks offer a practical alternative.
Key Features to Look For in a Cider Tank
When choosing a cider tank, focus on features that enhance your brewing experience. Look for tanks with:
- Airtight seals: Prevent oxygen from entering and spoiling your cider.
- Temperature control options: Maintain consistent fermentation conditions for better results.
- Ease of cleaning: Simplify maintenance with smooth surfaces and accessible components.
- Durability: Ensure the tank withstands repeated use and exposure to acidic cider.
- Capacity flexibility: Choose a tank that matches your brewing goals, whether small batches or larger productions.
Some tanks also include additional features like conical bottoms for easy sediment removal or built-in thermometers for precise monitoring. Investing in a tank with these features saves time and effort while improving the quality of your cider.
How to Brew Apple Cider with a Cider Tank
Preparing Your Ingredients and Equipment
Start by gathering fresh, high-quality apple juice. The juice should have a high sugar concentration and low acidity to ensure a balanced flavor profile. Avoid juices with added preservatives, as they can interfere with fermentation. If you’re pressing your own apples, use a mix of sweet and tart varieties to achieve a complex taste. Filter the juice to remove any pulp or debris that could affect the fermentation process.
Next, prepare your equipment. Clean and sanitize your cider tank thoroughly to eliminate any bacteria or contaminants. Use food-grade sanitizers to ensure safety. Assemble all necessary tools, such as airlocks, thermometers, and tubing, to streamline the brewing process. Proper preparation sets the stage for a successful fermentation.
Transferring Juice to the Tank
Once your juice is ready, carefully transfer it into the cider tank. Use a funnel or siphon to minimize spills and exposure to air. Oxygen can spoil the juice and lead to off-flavors, so work quickly and efficiently. Fill the tank to the recommended level, leaving some headspace for the fermentation process. This space allows carbon dioxide to escape without causing overflow.
Ensure the tank’s airtight seal is secure. This prevents unwanted oxygen from entering and protects the juice during fermentation. A well-sealed tank maintains the integrity of your cider, preserving its natural flavors and aromas.
Adding Yeast and Starting Fermentation
Select a yeast strain suitable for cider making. Different strains produce varying flavor profiles, so choose one that complements your desired taste. Rehydrate the yeast according to the manufacturer’s instructions to activate it. Add the yeast to the juice in the tank, ensuring even distribution for consistent fermentation.
Monitor the temperature inside the tank. Yeast thrives within specific temperature ranges, typically between 60°F and 75°F. Use the tank’s temperature control features, if available, to maintain optimal conditions. Fermentation begins as the yeast converts sugars into alcohol and carbon dioxide. This process usually takes one to two weeks, depending on the yeast and environmental factors.
During fermentation, check the airlock regularly to ensure it’s functioning properly. The airlock allows gases to escape while preventing contaminants from entering. Patience is key at this stage. Let the yeast work its magic, and soon you’ll have a delicious batch of cider ready for the next steps.
Setting Up Your Cider Tank for Success
Setting up your cider tank properly ensures a smooth brewing process and high-quality results. By following these steps, you can create the ideal environment for fermentation and avoid common pitfalls.
Cleaning and Sanitizing the Tank
Cleaning and sanitizing your cider tank is the first and most crucial step. Any residue or bacteria left in the tank can spoil your cider, leading to off-flavors or contamination. Use a food-grade cleaning solution to remove dirt, grime, or leftover particles from previous batches. Scrub all surfaces thoroughly, paying close attention to corners and seams where debris might accumulate.
After cleaning, sanitize the tank to eliminate any remaining microorganisms. A sanitizing solution, such as a no-rinse sanitizer, works well for this purpose. Coat the interior of the tank evenly, ensuring every surface is treated. Let the sanitizer sit for the recommended time before draining it completely. This step guarantees a sterile environment, which is essential for successful fermentation.
Historical Note: The importance of cleanliness in fermentation dates back centuries. Early cider makers in Europe and America understood that clean equipment was key to producing safe and enjoyable beverages. Cider’s popularity grew partly because it was safer to drink than water in many regions.
Assembling Components for Proper Functionality
Once your tank is clean and sanitized, assemble its components to ensure proper functionality. Start by attaching any necessary fittings, such as airlocks, valves, or thermometers. These tools help you monitor and control the fermentation process. Make sure each component is securely fastened to prevent leaks or malfunctions.
If your tank includes a conical bottom, check that the sediment removal valve operates smoothly. This feature simplifies the process of separating yeast and other sediments from your cider. For tanks with built-in temperature controls, verify that the system is working correctly. Proper assembly not only streamlines your brewing process but also protects your cider from potential issues.
Ensuring an Airtight Seal for Fermentation
An airtight seal is critical for successful fermentation. Oxygen exposure can spoil your cider by encouraging the growth of unwanted bacteria or yeast. To create a secure seal, inspect the tank’s lid and gaskets for any signs of wear or damage. Replace worn-out parts to maintain a tight fit.
After filling the tank with juice, close the lid firmly and attach the airlock. The airlock allows carbon dioxide to escape while preventing oxygen from entering. Check the seal periodically during fermentation to ensure it remains intact. A properly sealed tank preserves the natural flavors and aromas of your cider, resulting in a superior final product.
Pro Tip: Hermetically sealed tanks have been used for centuries to protect food and beverages. The Romans, for example, discovered that sealing fermented apple juice in containers preserved its quality, laying the foundation for modern cider-making techniques.
By following these steps, you set yourself up for success with your cider tank. Cleanliness, proper assembly, and an airtight seal are the cornerstones of a smooth and rewarding brewing experience.
Using Cider Tanks for Fermentation
Monitoring the Fermentation Process
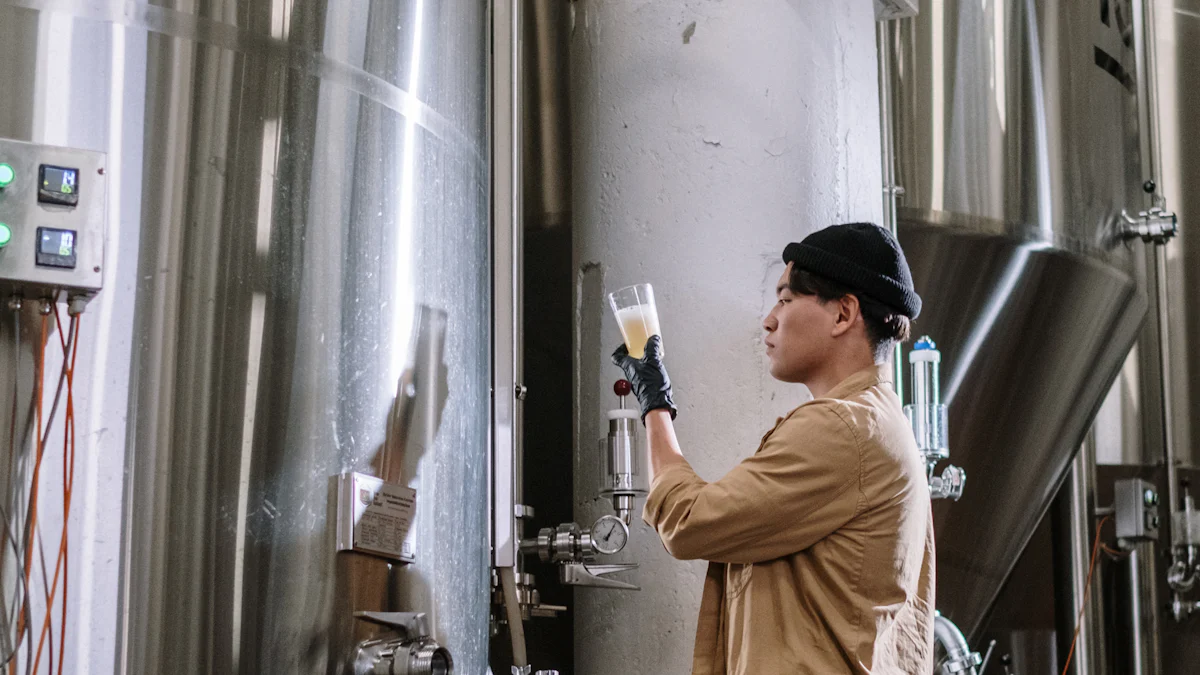
Monitoring the fermentation process ensures your cider develops the desired flavor and quality. During this stage, yeast converts sugars into alcohol and carbon dioxide. Regularly check the airlock to confirm it is functioning properly. A bubbling airlock indicates active fermentation, while a lack of activity may signal an issue.
Use a hydrometer to measure the specific gravity of your cider. This tool helps track the progress of fermentation by showing how much sugar remains in the liquid. A steady reading over several days suggests fermentation has completed. Keep a log of these readings to better understand the timeline and characteristics of your cider.
Visual cues also provide valuable insights. Look for signs like foam or sediment formation, which indicate healthy yeast activity. If you notice unusual odors or discoloration, investigate immediately to prevent spoilage. By staying attentive, you can address potential problems early and ensure a successful batch.
Expert Tip: Sweetness often changes during fermentation. Most ciders ferment dry, but you can adjust sweetness later if needed. Stabilizing the cider or storing it cold can help maintain the desired flavor profile.
Controlling Temperature and Airflow
Temperature control plays a crucial role in achieving consistent results. Yeast thrives within a specific temperature range, typically between 60°F and 75°F. Use the temperature control features of your cider tank to maintain these conditions. Fluctuations can stress the yeast, leading to off-flavors or incomplete fermentation.
Place your tank in a location with stable temperatures. Avoid areas exposed to direct sunlight or drafts, as these can disrupt the fermentation process. If your tank includes a built-in thermometer, monitor it regularly to ensure optimal conditions. For tanks without this feature, consider using an external thermometer for accuracy.
Airflow management is equally important. The airlock on your tank allows carbon dioxide to escape while keeping oxygen out. Check the airlock frequently to ensure it remains unobstructed. Oxygen exposure can spoil your cider by encouraging unwanted bacterial growth. A properly sealed tank with controlled airflow preserves the natural flavors and aromas of your cider.
Transferring and Storing Finished Cider
Once fermentation is complete, transfer your cider carefully to avoid disturbing the sediment. Use a siphon or spigot to move the liquid into a clean container. This step, known as racking, separates the cider from the yeast and other solids that settle at the bottom of the tank. Clear cider not only looks more appealing but also tastes better.
If you plan to carbonate your cider, add priming sugar before sealing the bottles. This sugar feeds the remaining yeast, creating natural carbonation. For still cider, skip this step and seal the bottles immediately. Always use sterilized equipment to prevent contamination during the transfer process.
Store your finished cider in a cool, dark place. Proper storage conditions extend the shelf life and preserve the flavor. If you prefer sweeter cider, stabilize it before bottling to halt fermentation. Cold storage below the yeast’s fermentation range also helps maintain sweetness. With careful handling, your cider will be ready to enjoy or share with others.
Cleaning and Maintaining Your Cider Tank
Best Practices for Cleaning After Each Use
Cleaning your cider tank after every use is essential for maintaining the quality of your cider. Residue from previous batches can harbor bacteria or yeast, which may spoil future brews. To clean your tank effectively, follow these steps:
- Rinse Immediately: After transferring your cider, rinse the tank with warm water. This prevents residue from drying and becoming harder to remove.
- Use a Food-Grade Cleaner: Apply a cleaning solution designed for brewing equipment. Scrub all surfaces, including corners and seams, to remove any remaining particles.
- Pay Attention to Valves and Fittings: Disassemble components like spigots, airlocks, and gaskets. Clean these parts separately to ensure no debris remains.
- Rinse Thoroughly: After scrubbing, rinse the tank and its components with clean water. Ensure no cleaning solution lingers, as it could affect the taste of your cider.
- Dry Completely: Allow the tank to air dry or use a clean towel. Moisture can encourage mold or bacteria growth, so ensure the tank is completely dry before storing.
Pro Tip: Avoid using abrasive tools or harsh chemicals that could damage the tank’s surface, especially if it’s made of stainless steel. Gentle cleaning preserves the tank’s integrity and extends its lifespan.
Long-Term Maintenance Tips
Proper maintenance keeps your cider tank in excellent condition for years. Regular care prevents wear and ensures consistent performance. Here are some long-term maintenance tips:
- Inspect Regularly: Check for signs of wear, such as scratches, dents, or damaged seals. Address these issues promptly to avoid compromising the tank’s functionality.
- Polish Stainless Steel Tanks: If you use a stainless steel tank, polish it occasionally to maintain its smooth surface. This prevents residue buildup and enhances hygiene.
- Replace Worn Components: Gaskets, airlocks, and valves can wear out over time. Replace these parts as needed to maintain an airtight seal and proper functionality.
- Sanitize Periodically: Even when not in use, sanitize your tank every few months. This ensures it remains ready for brewing and prevents contamination.
- Monitor Temperature Control Systems: If your tank includes temperature control features, test them regularly. Ensure they function correctly to maintain optimal fermentation conditions.
Key Insight: Consistent maintenance not only extends the life of your tank but also ensures the quality of your cider remains uncompromised.
Storing Your Tank to Prevent Damage
Proper storage protects your cider tank from damage and keeps it ready for your next brewing session. Follow these guidelines to store your tank safely:
- Choose a Dry Location: Store your tank in a cool, dry place. Avoid areas with high humidity, as moisture can lead to rust or mold growth.
- Avoid Direct Sunlight: Prolonged exposure to sunlight can weaken plastic tanks and affect the finish of stainless steel tanks. Keep your tank in a shaded or enclosed space.
- Protect Against Physical Damage: Place your tank on a stable surface to prevent tipping or falling. Avoid stacking heavy items on top of it, as this could cause dents or cracks.
- Cover the Tank: Use a clean cloth or plastic cover to shield your tank from dust and debris. This reduces the need for additional cleaning before use.
- Store Components Separately: Remove detachable parts, such as airlocks and valves, and store them in a labeled container. This prevents loss and makes reassembly easier.
Historical Note: Early cider makers often stored their fermentation vessels in cellars to protect them from environmental damage. Modern storage practices build on this tradition, ensuring tanks remain in optimal condition.
By following these cleaning, maintenance, and storage practices, you can preserve your cider tank’s quality and functionality. A well-maintained tank not only simplifies your brewing process but also guarantees consistent, high-quality results every time.
Common Mistakes and Troubleshooting
Avoiding Overfilling and Spills
Overfilling your cider tank can lead to messy spills and wasted cider. When filling your tank, always leave enough headspace to accommodate the expansion caused by fermentation. As yeast converts sugars into alcohol and carbon dioxide, the liquid inside the tank becomes more active. Without adequate space, foam and gas can push the cider out of the tank.
To avoid this issue, follow these steps:
- Measure Your Juice Volume: Calculate the amount of juice you plan to ferment. Ensure it does not exceed 80-90% of your tank’s total capacity.
- Mark the Fill Line: Use a marker or tape to indicate the maximum fill level on your tank. This visual guide helps you stay within safe limits.
- Monitor During Fermentation: Check the tank regularly during the first few days of fermentation. If foam approaches the top, consider using a blow-off tube to redirect excess gas and foam safely.
Pro Tip: Using a conical tank can help manage spills. The conical design allows sediment and foam to settle at the bottom, reducing the risk of overflow.
By managing your tank’s fill level, you ensure a cleaner brewing process and preserve more of your cider for enjoyment.
Preventing Contamination Through Proper Cleaning
Contamination is one of the most common issues in homebrewing. It can ruin your cider by introducing unwanted bacteria or wild yeast. Proper cleaning and sanitizing of your equipment are essential to prevent this problem.
Here’s how you can maintain a contamination-free environment:
- Clean Immediately After Use: Rinse your tank and tools with warm water as soon as you finish brewing. This prevents residue from hardening and becoming difficult to remove.
- Use Food-Grade Cleaners: Choose cleaning solutions specifically designed for brewing equipment. These cleaners effectively remove organic matter without leaving harmful residues.
- Sanitize Before Each Use: Apply a no-rinse sanitizer to all surfaces that come into contact with your cider. Let the sanitizer air dry to ensure complete coverage.
- Inspect for Residue: Check corners, seams, and fittings for leftover particles. Even small amounts of residue can harbor bacteria.
Historical Insight: Early cider makers often boiled their equipment to kill bacteria. Modern sanitizers achieve the same result more efficiently, ensuring safer brewing practices.
By prioritizing cleanliness, you protect your cider from contamination and ensure a pure, high-quality final product.
Addressing Fermentation Issues and Off-Flavors
Fermentation problems can lead to off-flavors, which affect the taste and quality of your cider. Common issues include stuck fermentation, excessive acidity, or unpleasant odors. Identifying and addressing these problems early ensures a successful batch.
Stuck Fermentation
Stuck fermentation occurs when yeast stops converting sugars into alcohol. This can happen due to low temperatures, insufficient nutrients, or inactive yeast. To resolve this:
- Check the Temperature: Ensure the tank maintains a consistent temperature between 60°F and 75°F. Adjust the environment if needed.
- Add Yeast Nutrients: Provide additional nutrients to support yeast activity. Follow the manufacturer’s instructions for proper dosing.
- Rehydrate Yeast: If the yeast appears inactive, rehydrate a fresh batch and add it to the tank.
Excessive Acidity
High acidity can make your cider taste sour or harsh. To balance the flavor:
- Blend Juices: Mix your cider with a sweeter juice to reduce acidity.
- Use Calcium Carbonate: Add small amounts of calcium carbonate to neutralize excess acid. Test the cider frequently to avoid overcorrecting.
Unpleasant Odors
Unpleasant odors, such as sulfur or vinegar-like smells, often indicate fermentation issues. To address this:
- Aerate the Cider: Stir the cider gently to release trapped gases.
- Use Campden Tablets: Add Campden tablets to neutralize unwanted bacteria or wild yeast.
Expert Tip: Keep detailed notes during fermentation. Record temperature, specific gravity, and any observations. This helps you identify patterns and improve future batches.
By troubleshooting fermentation issues promptly, you ensure your cider develops the desired flavor and aroma.
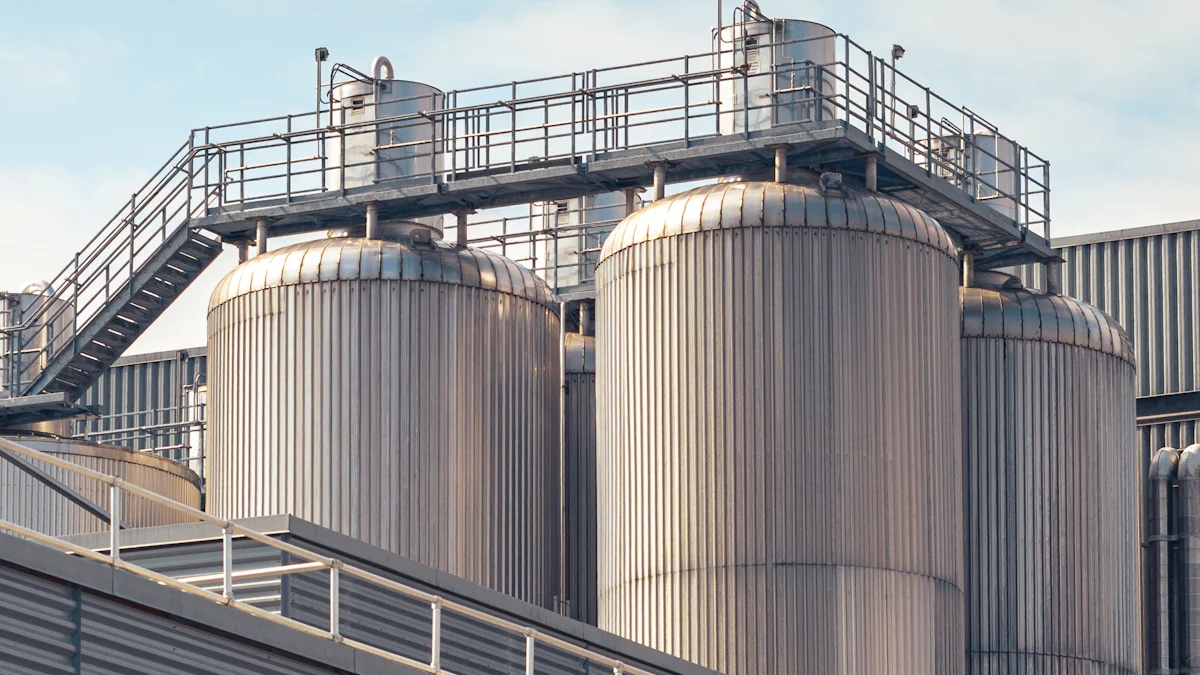
Benefits of Stainless Steel Cider Tanks
Durability and Hygiene Advantages
Stainless steel cider tanks stand out for their exceptional durability. These tanks resist corrosion, even when exposed to the acidic nature of cider. This resistance ensures a long lifespan, making them a reliable investment for your homebrewing journey. Unlike other materials, stainless steel maintains its structural integrity under high pressure, which is especially important during the carbonation process.
Hygiene is another key advantage. The smooth surface of stainless steel prevents bacteria and yeast from clinging to the tank. Cleaning becomes effortless, as there are no pores or crevices where contaminants can hide. Additionally, stainless steel tanks meet strict sanitation standards, ensuring your cider remains pure and free from unwanted flavors. By choosing stainless steel, you create a safe and clean environment for fermentation, which directly impacts the quality of your cider.
Quick Tip: Regular cleaning with food-grade solutions will keep your stainless steel tank in pristine condition, further enhancing its hygiene benefits.
Why Stainless Steel is Ideal for Cider’s Acidity
Cider’s natural acidity can pose challenges for some materials, but stainless steel handles it with ease. Tanks made from AISI 304 stainless steel offer excellent resistance to acidic environments. For even higher corrosion resistance, AISI 316L stainless steel is available. This ensures that the tank remains unaffected by the cider’s pH levels, preserving its structural integrity over time.
The non-reactive nature of stainless steel also plays a crucial role. It prevents chemical reactions between the tank and the cider, safeguarding the beverage’s natural flavors. Unlike plastic or other materials, stainless steel does not absorb odors or flavors from previous batches. This ensures that each batch of cider tastes exactly as intended, without any interference from residual elements.
Did You Know? The use of stainless steel in fermentation dates back decades, as its properties make it the preferred choice for acidic beverages like cider and wine.
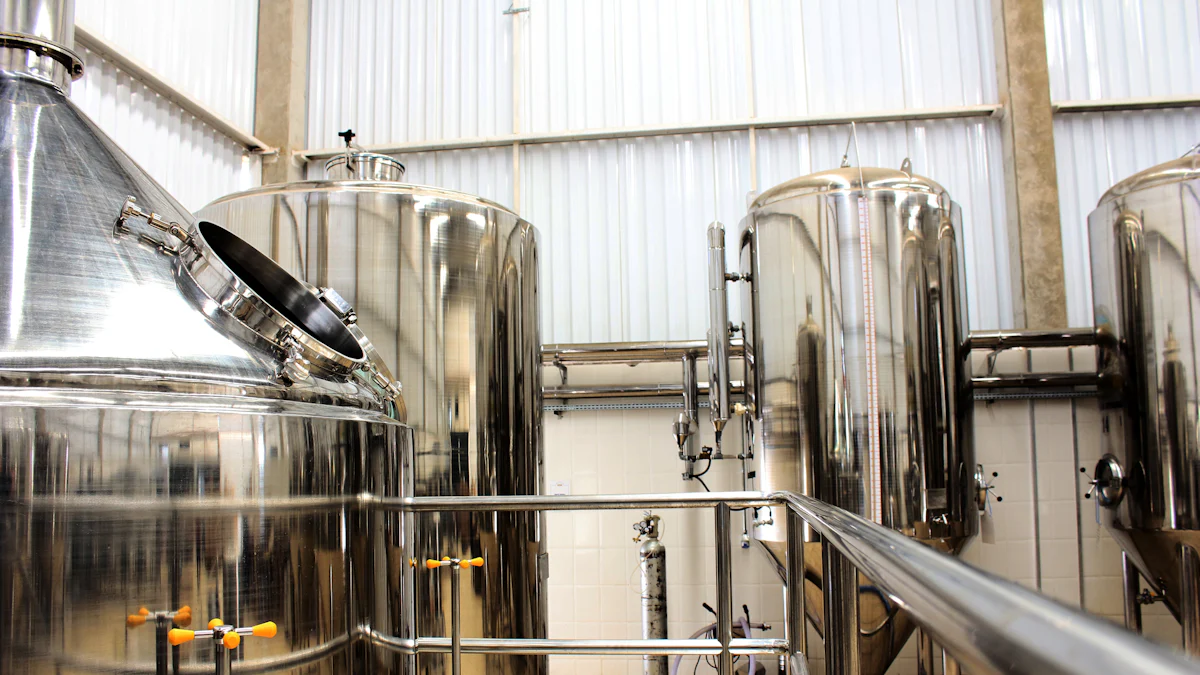
Customization Options for Homebrewers
Stainless steel cider tanks offer a range of customization options to suit your brewing needs. Whether you’re brewing small batches or scaling up production, these tanks come in various sizes to accommodate your goals. You can choose tanks with capacities ranging from a few gallons to several hundred gallons, depending on your requirements.
Additional features enhance the functionality of these tanks. Cooling jackets or insulation options allow precise temperature control, which is vital for consistent fermentation. Conical bottoms simplify sediment removal, while built-in thermometers provide accurate monitoring. For homebrewers seeking a tailored experience, manufacturers like Chenma offer customizable designs. You can request specific fittings, such as valves or airlocks, to match your brewing setup.
Pro Insight: Investing in a customized stainless steel tank ensures that your equipment aligns perfectly with your brewing process, making each step more efficient and enjoyable.
By choosing stainless steel cider tanks, you gain access to unmatched durability, superior hygiene, and versatile customization options. These benefits not only simplify the brewing process but also elevate the quality of your cider, making them an essential tool for any homebrewer.
Tips for Beginners on How to Brew Apple Cider
Starting with Small Batches
Starting small is the best way to begin your cider-making journey. Brewing one-gallon batches allows you to experiment without the risk of wasting large quantities if something goes wrong. This approach is especially helpful for beginners who are still learning the nuances of fermentation. Smaller batches also give you the freedom to try different methods and ingredients without committing to a larger volume.
For example, many homebrewers have shared stories of their early attempts at cider-making. Some batches turned out vinegary, while others were too sweet or lacked balance. These experiences highlight the importance of starting small. By working with manageable quantities, you can refine your process and learn from mistakes without feeling overwhelmed.
Personal Insight: One cider enthusiast began their journey with one-gallon batches after being inspired by a friend’s successful IPA brewing. They found that smaller batches not only reduced waste but also encouraged creativity in recipe development.
Small-scale brewing also simplifies equipment needs. A basic setup, including a sanitized fermentation bucket, airlock, and siphon, is sufficient for one-gallon batches. This minimal investment makes it easier to get started and build confidence as you learn how to make apple cider at home.
Experimenting with Recipes and Ingredients
Experimentation is key to discovering your unique cider style. Start by trying different apple varieties. A mix of sweet and tart apples often creates a balanced flavor profile. If you’re using store-bought juice, ensure it’s free of preservatives, as these can interfere with fermentation. For those pressing their own apples, blending different types can add complexity to your cider.
Beyond apples, consider incorporating additional ingredients to enhance flavor. Spices like cinnamon, cloves, or nutmeg can add warmth, especially in fall-inspired ciders. Fruits such as berries, pears, or cherries introduce new dimensions to the taste. Honey or brown sugar can adjust sweetness while contributing subtle notes to the final product.
Pro Tip: Keep detailed notes on each batch. Record the type of apples, additional ingredients, fermentation time, and any adjustments made. This practice helps you replicate successful recipes and avoid repeating mistakes.
Experimentation doesn’t stop at ingredients. You can also explore different yeast strains. Each strain produces unique flavor profiles, ranging from crisp and dry to fruity and aromatic. By experimenting with recipes and ingredients, you’ll develop a deeper understanding of cider-making and discover combinations that suit your taste.
Learning from Mistakes to Improve Your Process
Mistakes are an inevitable part of learning, but they’re also valuable opportunities for growth. Many experienced cider makers recall early batches that didn’t turn out as expected. Some faced issues like stuck fermentation, excessive acidity, or off-flavors. Instead of giving up, they used these challenges to refine their techniques.
For instance, if your cider tastes too sour, you might adjust the apple blend or fermentation time in future batches. If fermentation stalls, you can troubleshoot by checking temperature, adding yeast nutrients, or rehydrating fresh yeast. Each mistake teaches you something new about the process.
Historical Note: Early cider makers often relied on trial and error to perfect their craft. They didn’t have modern tools like hydrometers or temperature controls, yet their persistence led to the development of timeless cider-making traditions.
To improve, focus on consistency. Sanitize your equipment thoroughly to prevent contamination. Monitor fermentation closely, using tools like hydrometers to track progress. Keep a journal of your observations, including what worked and what didn’t. Over time, these records will help you identify patterns and refine your approach.
Key Takeaway: Every mistake brings you closer to mastering the art of cider-making. Embrace the learning process, and don’t be afraid to experiment. With patience and practice, you’ll gain the skills needed to produce high-quality cider.
How Chenma Cider Tanks Support Homebrewing Success
High-Quality Stainless Steel Tanks for Durability
Chenma’s cider tanks are crafted from premium stainless steel, ensuring exceptional durability and reliability. Stainless steel resists corrosion, even when exposed to the natural acidity of cider, making it an ideal material for long-term use. This durability allows you to brew batch after batch without worrying about wear or damage to your equipment. The robust construction also withstands the pressure of carbonation, ensuring your cider maintains its quality throughout the process.
The smooth surface of stainless steel enhances hygiene by preventing bacteria and yeast from clinging to the tank. Cleaning becomes straightforward, as there are no crevices where contaminants can hide. This feature ensures that every batch of cider you produce is pure and free from unwanted flavors. Chenma’s tanks meet the latest safety and quality standards, including ISO9001 and EU CE certifications, giving you confidence in their performance and reliability.
Quick Fact: Stainless steel tanks have been a preferred choice for cider makers for decades due to their ability to preserve the beverage’s natural flavors while maintaining structural integrity.
Customizable Designs to Fit Your Brewing Needs
Chenma understands that every homebrewer has unique requirements. That’s why their cider tanks come with customizable options to suit your specific brewing goals. Whether you’re brewing small batches or scaling up production, Chenma offers tanks in various sizes to match your needs. You can choose from compact tanks for limited spaces or larger capacities for ambitious projects.
Additional features, such as conical bottoms for easy sediment removal or built-in thermometers for precise monitoring, enhance the functionality of these tanks. Chenma’s talented engineers can adapt tanks to your unique situation, offering modifications or completely custom designs upon request. This flexibility ensures that your equipment aligns perfectly with your brewing process, making each step more efficient and enjoyable.
Pro Insight: Variable capacity tanks, like those with floating lids, are excellent for cider makers who work with varying volumes. These designs allow you to adjust the tank’s capacity based on the amount of cider you’re fermenting, providing versatility and convenience.
Technical Support and Training for Beginners
Chenma goes beyond manufacturing by offering comprehensive technical support and training for beginners. If you’re new to homebrewing, this guidance can make a significant difference in your success. Their team of experts provides step-by-step instructions on setting up and using your cider tank, ensuring you feel confident throughout the process.
The company also offers system turnkey projects, including process design, equipment installation, and commissioning. This holistic approach simplifies the transition from planning to brewing, especially for those unfamiliar with the technical aspects of cider making. With Chenma’s support, you can focus on perfecting your craft rather than troubleshooting equipment issues.
Key Takeaway: Investing in a cider tank from Chenma means gaining access to not only high-quality equipment but also a wealth of knowledge and expertise. This combination sets you up for long-term homebrewing success.
Cider tanks simplify the homebrewing process, offering you a reliable way to achieve consistent and high-quality results. By selecting a tank that matches your brewing needs, you create an environment where cider can mature and develop its unique flavors. Following best practices, such as maintaining cleanliness and controlling fermentation conditions, ensures success with every batch. Customized tanks, like those from Chenma, provide added flexibility to meet your specific goals. Start your cider brewing journey today with confidence, knowing you have the tools to craft exceptional cider at home.
FAQ
What should you consider when choosing a cider tank?
When selecting a cider tank, focus on factors that align with your brewing goals. Consider the production volume you plan to achieve. Smaller tanks work well for homebrewers, while larger tanks suit commercial-scale operations. Evaluate your budget and decide whether stainless steel or plastic fits your financial plan. Think about temperature control requirements, as maintaining consistent fermentation conditions is crucial for quality cider. Lastly, consider the flavor characteristics you want to achieve. The tank material and design can influence the final taste of your cider.
Pro Tip: Stainless steel tanks are ideal for preserving cider’s natural flavors due to their non-reactive properties.
How do you choose the best quality cider tank for cider-making equipment?
To find the best quality cider tank, start by assessing the size and capacity you need. Tanks come in various volumes, so choose one that matches your batch size. Research reputable manufacturers with a history of producing high-quality tanks. Read reviews from other cider makers to learn about their experiences. Pay attention to feedback on construction quality, functionality, and customer satisfaction. A well-reviewed tank often ensures durability and ease of use.
Key Insight: Investing in a tank from a trusted brand like Chenma guarantees reliability and long-term performance.
Why is stainless steel preferred for cider tanks?
Stainless steel offers unmatched durability and hygiene, making it the preferred choice for cider tanks. It resists corrosion caused by cider’s natural acidity, ensuring a long lifespan. The smooth surface prevents bacteria and yeast from clinging, simplifying cleaning and maintaining sanitation. Stainless steel also preserves the cider’s natural flavors by preventing chemical reactions between the tank and the beverage.
Did You Know? Stainless steel tanks have been used for decades in cider and wine production due to their ability to maintain beverage quality.
Can beginners use cider tanks effectively?
Yes, cider tanks are beginner-friendly and simplify the brewing process. Their user-friendly design eliminates much of the guesswork involved in traditional methods. Features like airtight seals and temperature control create an optimal environment for fermentation. These tanks reduce the risk of common mistakes, such as contamination or improper fermentation, making them ideal for those new to cider making.
Insight: Many beginners find that starting with small batches in a cider tank helps them learn the basics without feeling overwhelmed.
What are the key features to look for in a cider tank?
When choosing a cider tank, prioritize features that enhance your brewing experience. Look for:
- Airtight seals to prevent oxygen from spoiling your cider.
- Temperature control options for consistent fermentation.
- Ease of cleaning with smooth surfaces and accessible components.
- Durability to withstand repeated use and exposure to acidic cider.
- Capacity flexibility to match your brewing goals.
Some tanks also include conical bottoms for easy sediment removal or built-in thermometers for precise monitoring.
How do cider tanks improve the fermentation process?
Cider tanks create a controlled environment that optimizes yeast activity. They maintain consistent temperature and airflow, which are essential for proper fermentation. The airtight seal prevents oxygen from entering, reducing the risk of spoilage. These tanks also simplify monitoring, allowing you to focus on crafting your cider rather than troubleshooting issues.
Quick Fact: Tanks with conical bottoms make it easier to separate sediment, resulting in clearer and better-tasting cider.
How do you clean and maintain a cider tank?
Cleaning and maintaining your cider tank ensures its longevity and the quality of your cider. Follow these steps:
- Rinse the tank immediately after use to remove residue.
- Use a food-grade cleaner to scrub all surfaces thoroughly.
- Disassemble and clean components like airlocks and valves separately.
- Sanitize the tank before each use to eliminate microorganisms.
- Allow the tank to dry completely before storing it in a cool, dry place.
Pro Tip: Regular maintenance, such as inspecting seals and polishing stainless steel, keeps your tank in excellent condition.
Can cider tanks be customized for specific brewing needs?
Yes, many manufacturers, including Chenma, offer customizable cider tanks. You can choose tanks with specific capacities, conical bottoms, or built-in thermometers. Some tanks include cooling jackets or insulation for precise temperature control. Customization ensures your equipment aligns perfectly with your brewing process, making each step more efficient.
Key Takeaway: Customizable tanks provide flexibility, allowing you to adapt your setup as your brewing goals evolve.
What are cider storage tanks, and how do they differ from fermentation tanks?
Cider storage tanks, also known as cider storage vessels, are designed to store and age cider after fermentation. These tanks provide a controlled environment where cider can mature, developing its flavors and aromas over time. Unlike fermentation tanks, which focus on active yeast activity, storage tanks prioritize stability and preservation.
Historical Note: Early cider makers used wooden barrels for storage, but modern tanks offer better control and hygiene.
How does Chenma support homebrewers with cider tanks?
Chenma provides high-quality stainless steel tanks tailored to homebrewers’ needs. Their tanks meet strict safety and quality standards, ensuring durability and reliability. Chenma also offers technical support and training for beginners, guiding you through the setup and brewing process. Their customizable designs allow you to create a tank that fits your specific goals.
Quick Fact: Chenma’s tanks are manufactured in a state-of-the-art facility, ensuring precision and quality in every product.