A cider fermenting container plays a vital role in transforming fresh apple juice into delicious hard cider. It provides the perfect environment for yeast to convert sugars into alcohol, ensuring a smooth fermentation process. Using the right container helps you avoid contamination and maintain consistent results. Making cider at home allows you to experiment with flavors and create a beverage tailored to your taste. The growing popularity of homemade cider reflects its appeal, with enthusiasts worldwide embracing the craft. By choosing the right tools, you can make hard cider that rivals any store-bought option.
What is a Cider Fermenting Container?
A cider fermenting container is a specialized vessel designed to create the ideal environment for turning apple juice into hard cider. It plays a crucial role in the fermentation process by maintaining the right conditions for yeast to thrive and convert sugars into alcohol. Choosing the right container ensures a smooth fermentation process and helps you achieve consistent results.
Purpose and Functionality
The primary purpose of a cider fermenting container is to provide a controlled space for fermentation. It prevents contamination by keeping unwanted bacteria and wild yeast out while allowing carbon dioxide, a byproduct of fermentation, to escape safely. This is typically achieved using an airlock system. The container also helps maintain a stable temperature, which is essential for proper fermentation. By using a well-designed fermentation vessel, you can ensure that your cider develops the desired flavors and characteristics.
Types of Cider Fermenting Containers
When selecting a cider fermenting container, you’ll find several options available. Each type has its own advantages and considerations, depending on your needs and preferences.
Glass vs. Plastic Containers
Glass containers, such as carboys, are popular for their durability and non-porous nature. They do not retain odors or flavors from previous batches, making them ideal for long-term use. Glass also allows you to monitor the fermentation process visually. However, glass containers can be heavy and prone to breakage, so handle them with care.
Plastic containers, often used as fermenting buckets, are lightweight and more affordable. They are easy to handle and come in various sizes, ranging from 1 gallon to 6.5 gallons. While plastic is convenient, it may absorb odors over time and is more susceptible to scratches, which can harbor bacteria. If you choose plastic, ensure it is food-grade and free from harmful chemicals.
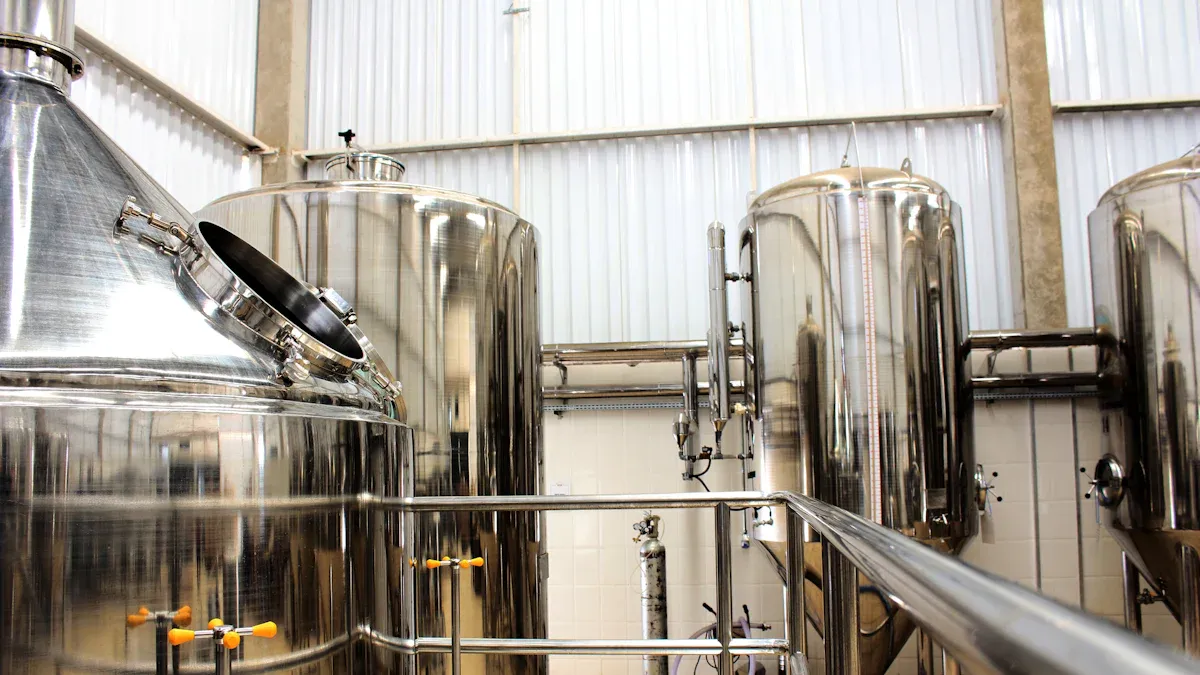
Stainless Steel Options and Their Advantages
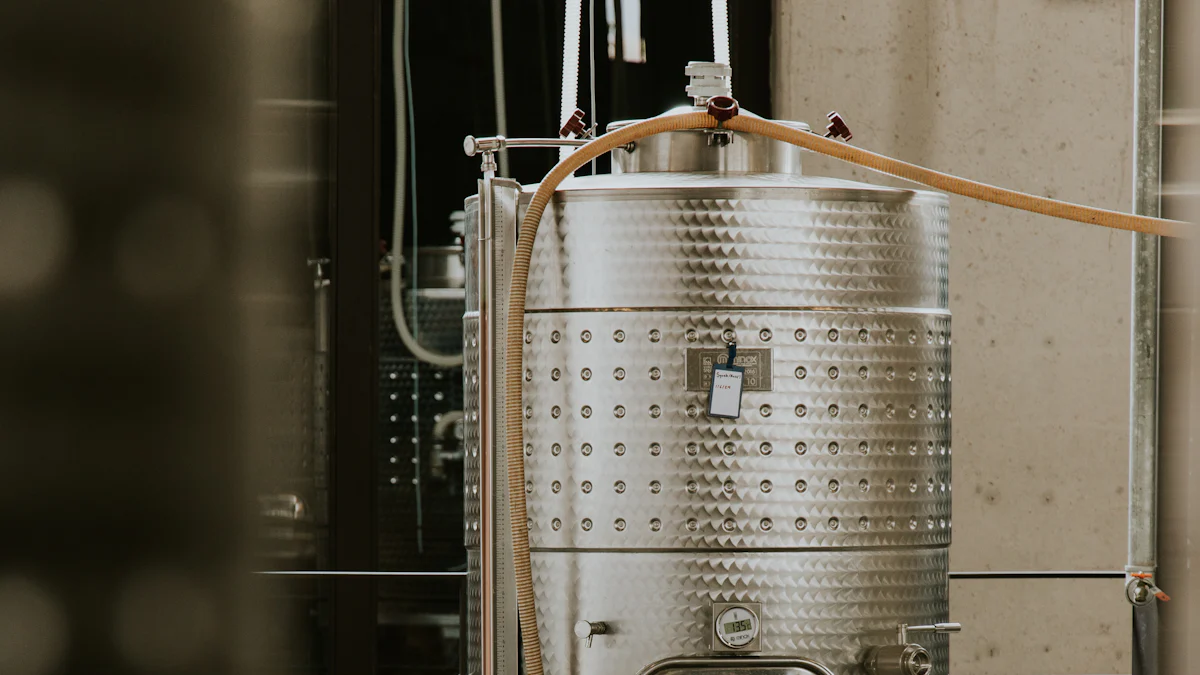
Stainless steel fermentation vessels offer a premium option for cider makers. These containers are highly durable, resistant to corrosion, and easy to clean. They maintain a consistent temperature and provide excellent protection against light, which can affect the quality of your cider. Stainless steel fermenters often come with advanced features like built-in thermometers and spigots for easy transfer. While they may require a higher initial investment, their longevity and performance make them a worthwhile choice for serious cider enthusiasts.
Features to Look for in a Cider Fermenting Container
When choosing a cider fermenting container, consider the following features to ensure a successful fermentation process:
- Size: Select a container that matches the volume of cider you plan to make. Common sizes range from 1 gallon for small batches to 6.5 gallons for larger productions.
- Airlock Compatibility: Ensure the container can accommodate an airlock system to release carbon dioxide while preventing contamination.
- Material: Opt for materials like glass, food-grade plastic, or stainless steel, depending on your budget and preferences.
- Ease of Cleaning: Choose a container with a smooth interior surface to simplify cleaning and sanitizing.
- Durability: Look for a sturdy container that can withstand repeated use without compromising quality.
By understanding the purpose, types, and features of cider fermenting containers, you can make an informed decision and set yourself up for cider-making success.
Essential Tools and Materials for Cider Fermentation
To create hard cider at home, you need the right tools and materials. These essentials ensure a smooth fermentation process and help you achieve the best results. Whether you’re a beginner or an experienced homebrew enthusiast, having the proper equipment and ingredients is key to success.
Tools You’ll Need
Fermenting container with an airlock
A fermenting container is the cornerstone of your cider-making setup. It provides a controlled environment for fermenting fruit juice, allowing the yeast to work its magic. Pairing it with an airlock is essential. The airlock releases carbon dioxide while preventing contaminants from entering the container. This simple yet effective tool ensures your cider ferments safely and without interference.
Hydrometer for sugar level measurement
A hydrometer measures the sugar content in your apple juice before and during fermentation. This tool helps you monitor the progress of fermentation and determine when it’s complete. By tracking sugar levels, you can also estimate the alcohol content of your cider. Using a hydrometer ensures precision, giving you greater control over the final product.
Cleaning and sanitizing supplies
Cleanliness is critical in cider fermentation. Any leftover bacteria or wild yeast can spoil your batch. Use cleaning supplies to remove debris from your equipment and sanitizing solutions to eliminate harmful microorganisms. Properly sanitized tools and containers protect your cider from contamination, ensuring a successful fermentation process.
“An acid measuring kit can also be a valuable addition to your toolkit. It helps you assess the acidity of your cider, allowing advanced adjustments for flavor balance.”
Ingredients for Making Hard Cider
Fresh apple juice or cider
The foundation of any hard cider is high-quality apple juice. Choose fresh, preservative-free juice for the best results. If you prefer a more hands-on approach, press your own apples to extract juice. The natural sugars in apple juice fuel the fermentation process, creating the alcohol content in your cider.
Yeast (wine yeast or cider-specific yeast)
Yeast is the driving force behind fermentation. It converts the sugars in apple juice into alcohol and carbon dioxide. For cider, use wine yeast or cider-specific yeast. These strains are designed to enhance the flavor and aroma of your cider. Adding yeast nutrient can further support the fermentation process, ensuring the yeast remains active and healthy.
Optional additives like sugar or spices
To customize your cider, consider adding sugar or spices. Sugar increases the alcohol content, while spices like cinnamon or cloves add unique flavors. For a sweeter cider, you can add sugar before fermentation. Experimenting with these additives allows you to create a cider that matches your taste preferences.
“Airlocks and hydrometers are indispensable tools for balancing sweetness and carbonation. Adding carbonation can create a sparkling cider with a refreshing twist.”
By gathering these tools and ingredients, you set yourself up for a rewarding cider-making experience. With the right preparation, you can transform simple apple juice into a delicious homebrew that reflects your creativity and skill.
How to Use a Cider Fermenting Container
Preparing Your Equipment
Cleaning and sanitizing the fermenting container
Before you begin the cider-making process, clean and sanitize your fermenting container thoroughly. Any residue or bacteria left in the container can spoil your batch. Use warm water and a non-abrasive cleaning agent to scrub the interior. Rinse it well to remove any soap residue. After cleaning, apply a food-safe sanitizer to eliminate harmful microorganisms. This step ensures your equipment is ready to handle the fermentation process without contamination.
“Proper sanitation is the foundation of successful brewing. It protects your cider from unwanted bacteria and wild yeast.”
Setting up the airlock system
Once your container is sanitized, set up the airlock system. The airlock allows carbon dioxide to escape while preventing air and contaminants from entering. Fit the airlock securely into the lid or stopper of your fermenting container. Fill the airlock with a sanitizing solution or water to create a barrier. This setup ensures a controlled environment for the fermentation process, allowing the yeast to work efficiently.
Starting the Fermentation Process
Adding apple juice, yeast, and optional sugar
Pour fresh apple juice into the sanitized fermenting container. Ensure the juice is free from preservatives, as these can hinder fermentation. Add your chosen yeast, such as wine yeast or cider-specific yeast, to kickstart the process. If you want to increase the alcohol content or adjust the sweetness, mix in sugar at this stage. Stir gently to combine the ingredients evenly. This step marks the beginning of transforming raw juice into hard cider.
“Selecting the right yeast strain is crucial. It not only drives fermentation but also influences the flavor profile of your cider.”
Monitoring sugar levels and fermentation progress
Use a hydrometer to measure the sugar content of the juice before fermentation begins. This reading, known as the original gravity, helps you track the progress of fermentation. As the yeast consumes the sugars, the gravity will decrease. Check the levels periodically to ensure the process is on track. Monitoring sugar levels allows you to estimate the alcohol content and determine when fermentation is complete.
Managing the Fermentation
Maintaining the right temperature
Temperature plays a vital role in the cider-making process. Keep the fermenting container in a location where the temperature remains stable, ideally between 60°F and 75°F. Yeast metabolism depends on the temperature, and fluctuations can affect the flavor and aroma of your cider. For low-temperature fermentation, hybrid yeast strains like S. eubayanus and S. cerevisiae perform exceptionally well, ensuring quality results.
“The fermentation temperature directly impacts the aromatic profile of your cider. Consistency is key to achieving the desired flavor.”
Checking for signs of active fermentation
During fermentation, look for signs of activity. Bubbles in the airlock indicate that carbon dioxide is being released. You may also notice foam forming on the surface of the fermented liquid. These signs confirm that the yeast is actively converting sugars into alcohol. If activity slows down or stops prematurely, check the temperature and sugar levels to identify potential issues. Active fermentation is essential for producing high-quality hard cider.
By following these steps, you can confidently make hard cider at home. Managing each stage of the fermentation process ensures a smooth transition from raw ingredients to a flavorful, fermented liquid. With attention to detail and proper care, you can create cider from scratch that rivals professional brews.
Tips for Successful Cider Fermentation
Maintaining Optimal Temperature and Environment
Temperature control is one of the most critical factors in cider fermentation. Yeast thrives within a specific temperature range, typically between 60°F and 75°F. Keeping your fermenting container in a stable environment ensures the yeast works efficiently, producing a balanced flavor profile. Fluctuating temperatures can stress the yeast, leading to off-flavors or stalled fermentation.
Choose a location that maintains consistent conditions. Avoid areas exposed to direct sunlight or drafts. Basements or insulated rooms often provide ideal settings. If you live in a region with extreme temperatures, consider using a temperature-controlled fermentation chamber or a heating wrap to maintain stability.
“The fermentation temperature directly impacts the aromatic profile of your cider. Consistency is key to achieving the desired flavor.”
Historically, cider makers relied on natural cellars to regulate temperature. This practice highlights the importance of maintaining an optimal environment for fermentation. By replicating these traditional methods with modern tools, you can craft cider with exceptional taste and aroma.
Preventing Contamination
Contamination poses a significant risk to your cider-making process. Wild yeast, bacteria, or mold can spoil your batch, rendering it undrinkable. To prevent this, prioritize cleanliness at every stage of fermentation.
Start by thoroughly cleaning and sanitizing all equipment, including the fermenting container, airlock, and utensils. Use food-safe sanitizers to eliminate harmful microorganisms. Avoid using abrasive cleaning tools that could scratch surfaces, as scratches can harbor bacteria.
When handling ingredients, ensure your hands and workspace are clean. Cover your fermenting container with an airlock to create a barrier against airborne contaminants. This simple step protects your cider while allowing carbon dioxide to escape.
“Proper sanitation is the foundation of successful brewing. It protects your cider from unwanted bacteria and wild yeast.”
Colonial cider makers faced challenges with contamination due to limited sanitation practices. Despite these hurdles, they crafted cider that became a staple in early America. By applying modern sanitation techniques, you can achieve even better results with your homemade cider.
Recognizing When Fermentation is Complete
Knowing when fermentation is complete is essential for crafting high-quality cider. Active fermentation produces visible signs, such as bubbles in the airlock or foam on the liquid’s surface. As the process nears completion, these signs diminish.
Use a hydrometer to measure the cider’s specific gravity. Take an initial reading before fermentation begins, known as the original gravity. As fermentation progresses, the gravity decreases as yeast consumes sugars. When the gravity stabilizes over several days, fermentation is complete.
Taste testing also provides valuable insight. Fully fermented cider tastes dry, with little to no residual sweetness. If the cider still tastes sweet, fermentation may need more time. Avoid bottling prematurely, as this can lead to over-carbonation or exploding bottles.
“Patience is key in cider making. Rushing the process can compromise the quality of your craft.”
Cider’s long history, from ancient times to its popularity in early America, reflects the patience and care required to perfect the craft. By monitoring fermentation closely, you can ensure your cider reaches its full potential.
Adjusting Flavor and Sweetness After Fermentation
After fermentation, your cider may need adjustments to achieve the perfect balance of flavor and sweetness. This step allows you to refine the taste, ensuring it aligns with your preferences. By making thoughtful modifications, you can elevate your cider from good to exceptional.
Balancing Sweetness
Fermented cider often tastes dry because the yeast consumes most of the sugars during the process. If you prefer a sweeter cider, you can back-sweeten it after fermentation. To do this:
- Stabilize the Cider: Add a stabilizing agent like potassium sorbate or Campden tablets to prevent the yeast from restarting fermentation when you introduce additional sugar.
- Choose Your Sweetener: Use sugar, honey, or apple juice concentrate to sweeten your cider. Each option adds a unique flavor profile. For example, honey imparts a floral note, while apple juice concentrate enhances the natural apple taste.
- Add Gradually: Introduce the sweetener in small amounts, tasting as you go. This ensures you don’t over-sweeten the cider.
“Experienced cider makers often emphasize the importance of adjusting sweetness to personal taste rather than relying on strict measurements.”
Enhancing Flavor
Sometimes, cider may lack depth or complexity after fermentation. You can enhance its flavor by incorporating additional elements:
- Acidity: Add malic acid or citric acid to brighten the cider and give it a crisp finish. Acidity balances sweetness and prevents the cider from tasting flat.
- Tannins: If your cider feels thin, add tannins to improve its body and mouthfeel. You can use powdered tannins or steep tea leaves for a natural source.
- Spices: Introduce spices like cinnamon, cloves, or nutmeg for a warm, aromatic touch. These work well for seasonal or holiday-themed ciders.
Blending for Complexity
Blending is another effective way to adjust flavor. Combine your cider with another finished cider to create a unique profile. For example:
- Mix a dry cider with a sweeter one to achieve a balanced taste.
- Blend a tart cider with a milder one to soften the acidity.
Experienced cider makers recommend testing blends on a small scale first. This approach ensures the flavors complement each other before committing to a larger batch.
Final Tasting and Adjustments
Once you’ve made your adjustments, let the cider rest for a few days. This allows the flavors to meld together. Afterward, taste the cider again to ensure it meets your expectations. If needed, make minor tweaks to perfect the balance.
“Adjusting cider post-fermentation is an art. It’s about experimenting and trusting your palate to guide you toward the ideal flavor.”
By taking the time to adjust flavor and sweetness, you can transform your cider into a beverage that reflects your creativity and taste. This step not only enhances the quality but also makes the cider truly your own.
Troubleshooting Common Cider Fermentation Issues
Even with careful preparation, challenges can arise during cider fermentation. Identifying and addressing these issues promptly ensures your cider turns out as intended. Below, you’ll find solutions to some of the most common problems.
Why Isn’t My Cider Fermenting?
If your cider shows no signs of fermentation, such as bubbling in the airlock or foam on the surface, several factors could be at play. Here’s how to troubleshoot:
Check the Yeast
Ensure the yeast you used is fresh and viable. Expired or improperly stored yeast may not activate. If you suspect the yeast is the issue, rehydrate a new batch of yeast according to the package instructions and add it to the cider.Verify the Temperature
Fermentation requires the right temperature range. Most yeast strains work best between 60°F and 75°F. If the temperature is too low, the yeast may become dormant. Move the fermenter to a warmer location and monitor for activity. Avoid temperatures above 80°F, as excessive heat can kill the yeast.Check for Preservatives in the Juice
Some store-bought apple juices contain preservatives like potassium sorbate or sodium benzoate, which inhibit yeast activity. Always use preservative-free juice for fermentation. If preservatives are present, you may need to start over with fresh juice.Oxygenate the Juice
Yeast needs oxygen during the initial stages of fermentation. If you didn’t aerate the juice before adding the yeast, the fermentation might stall. Gently stir the juice with a sanitized spoon to introduce oxygen and encourage yeast activity.Measure the Sugar Content
Use a hydrometer to check the sugar levels in the juice. If the sugar content is too low, the yeast may not have enough fuel to start fermentation. Adding a small amount of sugar or honey can help kickstart the process.
“Fermentation is a delicate balance of yeast health, temperature, and sugar levels. Addressing these factors ensures a successful start.”
What to Do If the Cider Tastes Off
Off-flavors can develop during fermentation due to various reasons. Identifying the cause helps you salvage your cider and improve future batches.
Sulfur or Rotten Egg Smell
This odor often results from stressed yeast. High fermentation temperatures or insufficient nutrients can cause this issue. To fix it, degas the cider by stirring it gently to release trapped sulfur compounds. Adding yeast nutrient to future batches can prevent this problem.Vinegar-Like Taste
A vinegar taste indicates acetic acid bacteria contamination. This usually happens when the cider is exposed to air for too long. Unfortunately, once this occurs, the batch is difficult to save. To avoid this in the future, ensure your fermenter is sealed properly with an airlock.Medicinal or Plastic Flavor
These flavors often stem from poor sanitation or the use of non-food-grade plastic equipment. Always sanitize your tools thoroughly and use food-safe materials. If the flavor is mild, aging the cider for a few weeks may help reduce the off-taste.Overly Sweet Cider
If your cider tastes too sweet, fermentation may have stopped prematurely. Check the specific gravity with a hydrometer. If fermentation has stalled, reintroduce yeast or yeast nutrient to restart the process. For future batches, ensure the yeast has enough time to fully ferment the sugars.Flat or Bland Flavor
A lack of complexity in flavor can result from using low-quality juice or insufficient acidity. Enhance the cider by adding malic acid or blending it with a more flavorful batch. Spices like cinnamon or cloves can also add depth.
“Off-flavors are often preventable with proper sanitation, ingredient quality, and fermentation management. Learning from these issues improves your cider-making skills.”
Fixing Over-Carbonation or Flat Cider
Carbonation plays a significant role in the final presentation of your cider. Whether it’s too fizzy or completely flat, you can take steps to correct it.
Over-Carbonation
Over-carbonation can lead to overly fizzy cider or, in extreme cases, exploding bottles. Here’s how to address it:
Release Excess Pressure
If you’ve bottled the cider, carefully open each bottle to release some of the pressure. Do this over a sink to avoid spills. Reseal the bottles immediately after venting.Chill the Bottles
Store the bottles in the refrigerator. Cold temperatures slow down yeast activity, reducing the risk of further carbonation.Prevent Over-Carbonation in Future Batches
Measure the sugar carefully when priming your cider for bottling. Use a priming sugar calculator to determine the correct amount based on your batch size and desired carbonation level. Ensure fermentation is complete before bottling by checking that the specific gravity remains stable for several days.
Flat Cider
Flat cider lacks the effervescence many people enjoy. To fix this issue:
Add Priming Sugar
If the cider is already bottled, dissolve a small amount of sugar in water and add it to each bottle. Reseal the bottles and allow them to sit at room temperature for one to two weeks to develop carbonation.Reintroduce Yeast
If the yeast is no longer active, add a small amount of fresh yeast to the cider along with the priming sugar. This ensures the carbonation process restarts.Use Carbonation Drops
For a simple solution, use pre-measured carbonation drops. Add one drop to each bottle before sealing it.Consider Forced Carbonation
If you have access to a kegging system, force-carbonating the cider provides precise control over the carbonation level. This method eliminates the guesswork involved in bottle conditioning.
“Carbonation issues often stem from incomplete fermentation or incorrect priming. Careful monitoring and precise measurements ensure consistent results.”
By addressing these common fermentation issues, you can refine your cider-making process and produce a beverage you’ll be proud to share. Each challenge offers an opportunity to learn and improve, bringing you closer to mastering the art of cider fermentation.
Storing and Enjoying Your Hard Cider
Once you’ve completed the fermentation process, it’s time to bottle, store, and enjoy your hard cider. Proper bottling and storage techniques ensure your cider maintains its quality and flavor. Serving it the right way enhances the experience, making all your hard work worthwhile.
Bottling Your Cider
Choosing the right bottles for storage
Selecting the right bottles is crucial for preserving your cider. Common options include 64-ounce growlers, 12-ounce beer bottles, and swing-top bottles. Growlers work well for short-term storage and immediate consumption. For long-term storage, standard beer bottles with pop-off caps or champagne bottles are ideal. These options provide a secure seal, preventing air from spoiling your cider.
When bottling, ensure the bottles are food-grade and designed to handle carbonation. Swing-top bottles offer convenience with reusable closures, while cap-style bottles require a bottle capper for sealing. If you plan to carbonate your cider, choose bottles that can withstand the pressure to avoid breakage.
“Proper bottle selection not only preserves the flavor but also ensures safety during storage.”
Adding carbonation for sparkling cider
If you prefer sparkling cider, you can add carbonation during the bottling process. This step, known as bottle conditioning, involves introducing a small amount of sugar before sealing the bottles. The residual yeast consumes the sugar, producing carbon dioxide that creates the fizz.
To carbonate your cider:
- Dissolve priming sugar in water and add it to your cider before bottling.
- Use a priming sugar calculator to determine the correct amount based on your batch size.
- Seal the bottles tightly and store them at room temperature for one to two weeks.
Monitor the carbonation process carefully. Over-carbonation can lead to excessive pressure, causing bottles to explode. To prevent this, ensure fermentation is complete before bottling by checking the specific gravity with a hydrometer.
“Adding carbonation gives your cider a refreshing sparkle, perfect for celebrations or casual enjoyment.”
Storing for Aging or Immediate Consumption
After bottling, decide whether to age your cider or enjoy it immediately. Aging allows the flavors to develop and mellow, resulting in a more complex and refined taste. Store your bottles in a cool, dark place, such as a basement or cellar, to maintain a stable temperature. Avoid exposing them to direct sunlight or fluctuating temperatures, as these can degrade the quality.
For immediate consumption, refrigerate the bottles to halt any remaining fermentation activity. Chilling the cider also enhances its crispness, making it more refreshing. If you’ve added carbonation, refrigeration prevents over-carbonation and ensures the cider remains safe to drink.
“Hard cider can stay at its prime for years when stored properly, allowing you to savor your creation over time.”
Serving Tips for the Best Experience
Serving your hard cider correctly elevates the drinking experience. Follow these tips to enjoy your cider at its best:
- Chill Before Serving: Serve cider cold, ideally between 45°F and 55°F. This temperature range highlights its crispness and flavor.
- Use the Right Glassware: Pour cider into a tulip glass or pint glass to enhance its aroma and presentation. These glasses allow the cider’s bouquet to develop, enriching the tasting experience.
- Pour Gently: Tilt the glass and pour slowly to minimize foam. If sediment has settled at the bottom of the bottle, leave a small amount behind to avoid cloudiness.
- Pair with Food: Hard cider pairs well with a variety of dishes, from cheese and charcuterie to roasted meats and desserts. Experiment with pairings to find combinations that complement your cider’s flavor profile.
“Serving cider with care transforms it from a simple beverage into a memorable experience.”
By bottling, storing, and serving your cider thoughtfully, you can fully appreciate the fruits of your labor. Whether you enjoy it fresh or aged, your homemade cider will reflect the effort and creativity you’ve invested in the process.
Experimenting with Flavors in Hard Cider
Experimenting with flavors in hard cider opens up endless possibilities for creating unique and personalized beverages. By incorporating fruits, spices, or blending techniques, you can craft ciders that stand out with distinct taste profiles. This section explores how to enhance your cider-making process with creative flavor combinations.
Adding Fruits or Spices During Fermentation
Adding fruits or spices during fermentation transforms the flavor of your cider. Fruits like berries, cherries, or pears introduce natural sweetness and acidity, while spices such as cinnamon, cloves, or ginger add warmth and complexity. Each ingredient contributes unique characteristics, allowing you to tailor the cider to your preferences.
To incorporate fruits:
Choose Fresh or Frozen Fruits
Select fruits that complement the base apple flavor. For example, raspberries add tartness, while peaches bring a mellow sweetness. Frozen fruits work well because freezing breaks down cell walls, releasing more juice and flavor during fermentation.Prepare the Fruits
Wash and chop the fruits into small pieces. This increases surface area, helping the flavors infuse into the cider. Avoid using fruits treated with preservatives, as they can interfere with fermentation.Add to the Fermenting Container
Place the prepared fruits directly into the fermenting container after adding the apple juice and yeast. Monitor the fermentation process closely, as fruits can increase sugar levels, potentially extending fermentation time.
For spices:
- Use whole spices like cinnamon sticks or cloves for a subtle infusion.
- Add them during the primary fermentation stage for a balanced flavor.
- Remove the spices after a few days to prevent overpowering the cider.
“The type of fruit or spice you choose significantly impacts the cider’s balance, acidity, and tannin levels. Experimenting with these ingredients allows you to create a cider that reflects your creativity.”
Creating Sparkling vs. Still Cider
The choice between sparkling and still cider depends on your personal preference. Sparkling cider offers a refreshing fizz, while still cider provides a smooth and mellow drinking experience. Both styles have their own appeal, and you can easily create either at home.
Sparkling Cider
To make sparkling cider, you need to carbonate it. This involves introducing carbon dioxide, which creates the bubbles. The most common method is bottle conditioning:
Add Priming Sugar
Dissolve a small amount of sugar in water and mix it into the cider before bottling. The residual yeast consumes the sugar, producing carbon dioxide.Seal the Bottles
Use bottles designed to withstand pressure, such as swing-top or champagne bottles. Seal them tightly to trap the carbon dioxide.Store at Room Temperature
Allow the bottles to sit at room temperature for one to two weeks. This gives the yeast time to carbonate the cider.
Still Cider
For still cider, skip the carbonation step. Once fermentation is complete, bottle the cider without adding sugar. This preserves its natural, uncarbonated state. Still cider pairs well with meals, as its smooth texture complements a variety of dishes.
“Creating sparkling or still cider is a simple yet impactful way to customize your beverage. Each style offers a unique drinking experience.”
Blending Ciders for Unique Flavor Profiles
Blending ciders is an advanced technique that enhances complexity and balance. By combining different batches, you can create a cider with layered flavors and improved harmony. This method works well for adjusting sweetness, acidity, or tannin levels.
Steps for Blending:
Evaluate Individual Batches
Taste each batch separately. Note their strengths and weaknesses, such as sweetness, tartness, or body.Experiment with Ratios
Start with small-scale tests. Mix different proportions of the batches to find the ideal blend. For example, combine a dry cider with a sweeter one to achieve balance.Incorporate Additives if Needed
If the blend lacks depth, consider adding spices, acids, or tannins. These elements enhance the overall profile.Scale Up
Once satisfied with the test blend, scale up the proportions for the entire batch.
Blending also allows you to salvage imperfect batches. For instance, mixing an overly tart cider with a milder one can soften the acidity. This technique not only improves flavor but also reduces waste.
“Blending ciders is both an art and a science. It requires experimentation and a keen palate, but the results are worth the effort.”
By experimenting with fruits, spices, carbonation, and blending, you can elevate your cider-making skills. These techniques encourage creativity and help you craft beverages that reflect your unique taste. Whether you prefer a fruity, spiced, sparkling, or blended cider, the possibilities are endless.
Safety Considerations for Cider Fermentation
Handling Fermentation Safely
Fermentation involves biological processes that require careful handling to ensure safety. You must prioritize cleanliness and proper equipment use to avoid contamination or accidents. Start by sanitizing all tools and containers before use. This step eliminates harmful bacteria or wild yeast that could spoil your cider.
When working with fermentation, always monitor the pressure inside your fermenting container. Carbon dioxide builds up during the process, and without a proper airlock system, this pressure can cause the container to burst. Use an airlock to release gas safely while keeping contaminants out. Ensure the airlock is securely fitted and filled with a sanitizing solution or water.
Store your fermenting container in a stable environment. Keep it away from direct sunlight and areas with fluctuating temperatures. High temperatures can stress the yeast, while low temperatures may stall fermentation. Aim for a consistent range between 60°F and 75°F for optimal results.
“Proper handling of fermentation equipment not only ensures safety but also improves the quality of your cider.”
Recognizing Signs of Spoilage
Spoilage can ruin your cider and pose health risks. Recognizing the signs early helps you take corrective action. Inspect your cider regularly during fermentation. Look for unusual smells, such as vinegar or rotten eggs. These odors often indicate bacterial contamination or stressed yeast.
Check the surface of your cider for mold or unusual growths. Mold appears as fuzzy patches and signals contamination. If you notice this, discard the batch immediately. Cloudiness in cider is normal during fermentation, but if it persists after the process, it may suggest spoilage.
Taste testing provides another way to identify issues. Spoiled cider often tastes sour, medicinal, or overly bitter. If the flavor seems off, avoid consuming it. Always trust your senses when evaluating the safety of your cider.
“Understanding spoilage signs protects you from consuming unsafe cider and helps you refine your fermentation process.”
Proper Disposal of Failed Batches
Not every batch of cider will turn out as planned. When a batch fails, dispose of it responsibly to prevent environmental harm or safety hazards. Pour the spoiled cider down the drain with plenty of water to dilute it. Avoid dumping large quantities into septic systems, as this can disrupt their balance.
If your cider contains additives or preservatives, check local regulations for proper disposal methods. Some areas may have specific guidelines for disposing of liquids with chemical content. For example, the TTB Regulations on Flavored Wines emphasize the importance of adhering to production and disposal standards for flavored or altered beverages.
Clean and sanitize your equipment thoroughly after disposing of a failed batch. This step removes any lingering contaminants and prepares your tools for the next attempt. Learning from failed batches helps you improve your cider-making skills and achieve better results in the future.
“Responsible disposal of failed cider batches ensures safety for both you and the environment.”
Chenma Stainless Steel Tanks for Cider Fermentation
Why Choose Stainless Steel for Fermentation?
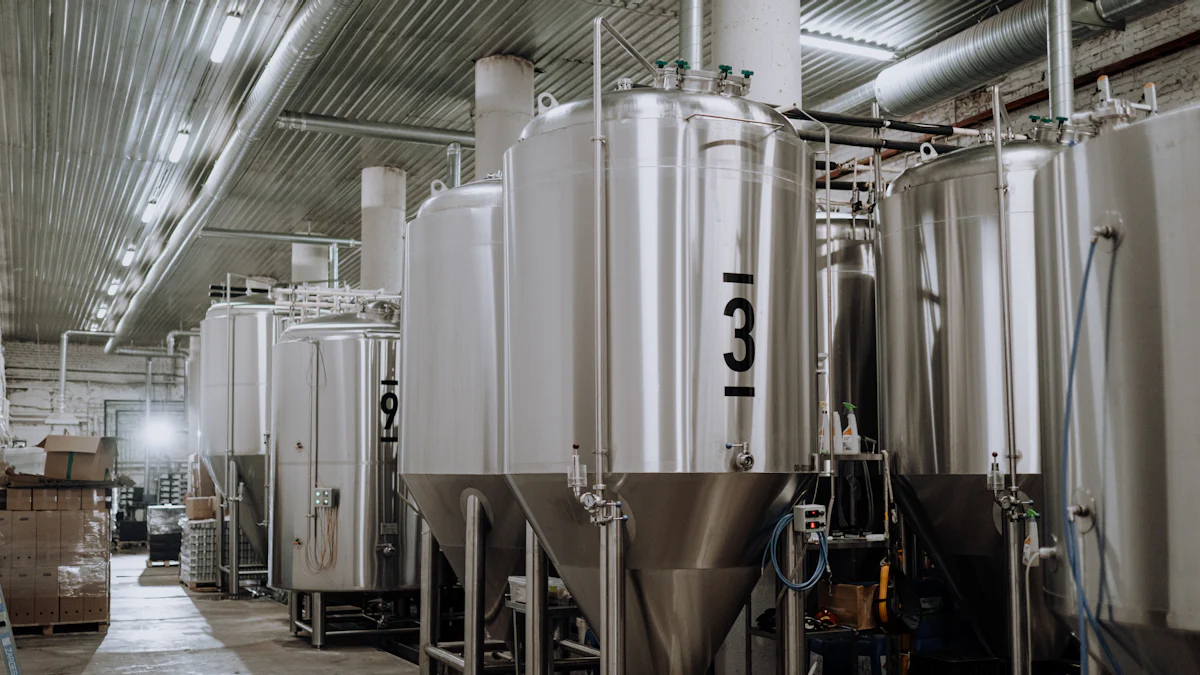
Stainless steel stands out as a top choice for cider fermentation due to its durability, efficiency, and ability to maintain the quality of your cider. Unlike other materials, stainless steel resists corrosion and does not react with acidic liquids like apple juice. This ensures that your cider retains its natural flavors without any unwanted metallic or chemical taste.
Temperature control is another significant advantage. Stainless steel tanks often come with built-in cooling jackets or temperature control systems. These features allow you to maintain a consistent fermentation temperature, which is crucial for achieving the desired flavor profile. By using stainless steel, you can create an environment where yeast thrives, leading to a smoother and more predictable fermentation process.
Additionally, stainless steel tanks are easy to clean and sanitize. Their non-porous surface prevents bacteria and wild yeast from lingering, reducing the risk of contamination. This makes them ideal for both beginners and experienced cider makers who prioritize hygiene and quality.
“Stainless steel fermentation tanks provide unmatched reliability and precision, making them a preferred choice for professional and home cider makers alike.”
Features of Chenma Fermenting Containers
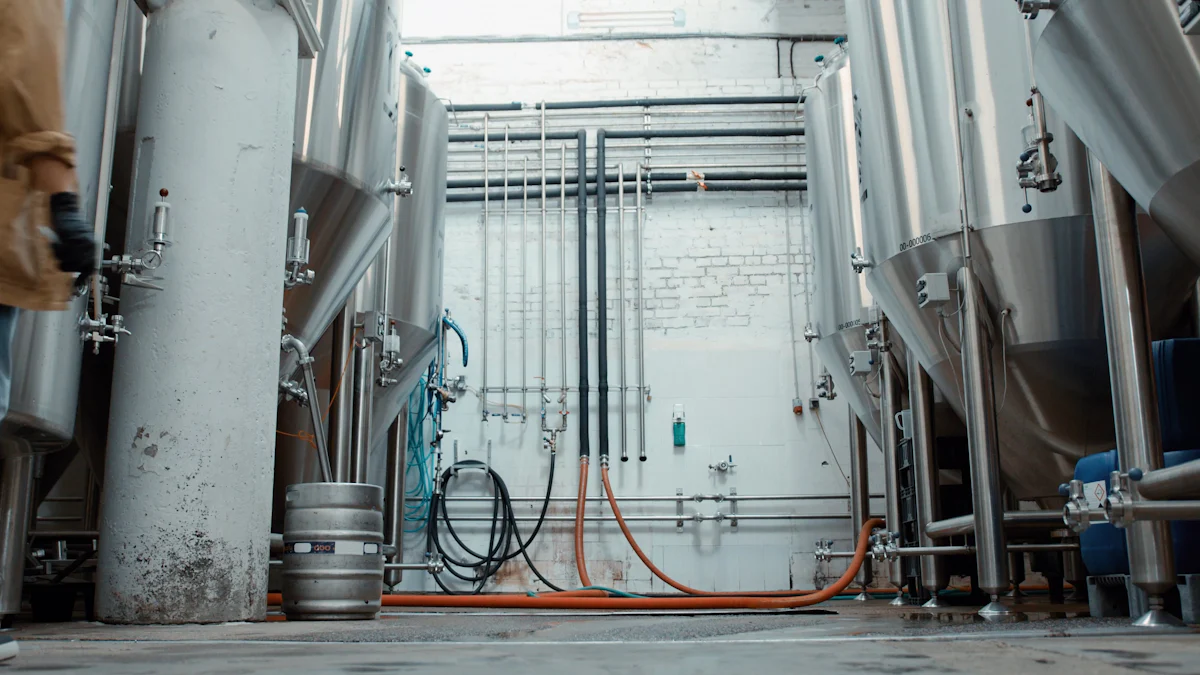
Chenma Stainless Steel Tanks are designed to meet the diverse needs of cider makers. These tanks combine advanced engineering with user-friendly features, ensuring a seamless fermentation experience. Here are some key features that set them apart:
- Wide Size Range: Chenma tanks are available in sizes ranging from 2 BBL to 300 BBL. Whether you’re crafting small batches at home or producing cider on a commercial scale, you can find a tank that fits your requirements.
- Durable Construction: Made from high-quality stainless steel, these tanks resist wear and tear, ensuring long-term use. Their robust design withstands the demands of repeated fermentation cycles.
- Advanced Temperature Control: Many Chenma tanks include built-in cooling jackets or temperature regulation systems. These features help you maintain the optimal fermentation temperature, enhancing the flavor and consistency of your cider.
- Ease of Use: Chenma fermenters often come with practical additions like spigots for easy liquid transfer, pressure gauges, and airlock compatibility. These features simplify the fermentation process, saving you time and effort.
- Light Protection: Stainless steel blocks light exposure, which can degrade the quality of your cider. This ensures that your cider ferments in a controlled and protected environment.
“Chenma fermenting containers combine functionality and innovation, making them a reliable partner in your cider-making journey.”
Customization Options for Your Fermentation Needs
Chenma understands that every cider maker has unique requirements. To cater to these needs, Chenma offers customization options that allow you to tailor your fermentation tank to your specific preferences. This flexibility ensures that you get the most out of your equipment.
Custom Sizes
If standard sizes don’t meet your needs, Chenma can manufacture tanks in custom dimensions. This is particularly beneficial for commercial cider makers who require tanks that align with their production capacity.Specialized Features
You can request additional features such as built-in thermometers, sampling ports, or extra valves. These enhancements make it easier to monitor and manage the fermentation process.Design Modifications
Chenma engineers can adapt the tank design to fit your workspace or brewing setup. Whether you need a compact tank for a small space or a larger one with specific fittings, Chenma can accommodate your requests.Turnkey Solutions
Chenma offers complete system solutions, including process design, equipment installation, and technical training. This ensures that you have everything you need to start fermenting cider with confidence.
“With Chenma’s customization options, you can create a fermentation setup that aligns perfectly with your goals and workflow.”
By choosing Chenma Stainless Steel Tanks, you invest in high-quality equipment that enhances your cider-making process. Their durability, advanced features, and customization options make them an excellent choice for anyone looking to produce exceptional cider.
Using a cider fermenting container to make hard cider at home is a rewarding process. You’ve learned how to prepare your equipment, manage fermentation, and adjust flavors to craft a cider that suits your taste. Experimenting with fruits, spices, or blending techniques adds a personal touch, making each batch unique. The joy of creating your own cider lies not only in the final product but also in the journey of discovery and creativity. By investing in quality tools like Chenma stainless steel tanks, you ensure consistent results and elevate your cider-making experience.
FAQ
Do you need to add anything to preserve the cider when bottling?
Yes, ensuring safety during bottling is essential. Before sealing your cider, confirm that all sugar has been consumed during fermentation. Any remaining sugar can restart fermentation inside the bottle, creating pressure that may cause the bottle to explode. To avoid this, use a hydrometer to check the specific gravity and ensure fermentation is complete. If you plan to back-sweeten your cider, stabilize it with potassium sorbate or Campden tablets to prevent further fermentation.
Pro Tip: Always use bottles designed to handle carbonation if you’re making sparkling cider. This precaution ensures safety and preserves the quality of your beverage.
Is it possible to let the cider sit on the sediment for too long?
Yes, leaving cider on the sediment for an extended period can lead to undesirable flavors. The sediment, also known as lees, contains dead yeast cells and other particles that settle during fermentation. Over time, these can break down and release off-flavors, such as a yeasty or sulfuric taste, into your cider. To avoid this, transfer your cider to a clean container, a process called racking, once fermentation slows down or completes.
Racking your cider not only improves its flavor but also enhances its clarity, giving it a polished appearance.
How do you know when fermentation is complete?
You can determine fermentation completion by using a hydrometer. Take an initial reading before fermentation begins, known as the original gravity. As fermentation progresses, the gravity decreases as yeast consumes the sugars. When the specific gravity stabilizes over several days, fermentation is complete. Additionally, signs like the absence of bubbles in the airlock or foam on the cider’s surface indicate that fermentation has slowed or stopped.
Remember: Patience is key. Rushing to bottle before fermentation finishes can lead to over-carbonation or exploding bottles.
Can you use store-bought apple juice for cider fermentation?
Yes, store-bought apple juice works well for cider fermentation, provided it is free from preservatives like potassium sorbate or sodium benzoate. These chemicals inhibit yeast activity and can prevent fermentation. Look for juice labeled as 100% pure or preservative-free. If you want to enhance the flavor, consider blending it with fresh-pressed apple juice or adding spices during fermentation.
Fresh-pressed juice often provides a richer flavor profile, but store-bought juice offers convenience and consistency.
What is the best temperature for fermenting cider?
The ideal temperature for cider fermentation ranges between 60°F and 75°F. Yeast thrives within this range, ensuring a smooth and efficient fermentation process. Temperatures below 60°F can slow down yeast activity, while those above 75°F may stress the yeast, leading to off-flavors. To maintain a stable temperature, store your fermenting container in a cool, dark place, such as a basement or insulated room.
For precise control, consider using a temperature-controlled fermentation chamber or a heating wrap.
How long does cider fermentation take?
Cider fermentation typically takes 10 to 14 days, depending on factors like temperature, yeast strain, and sugar content. Primary fermentation, where most of the sugar converts to alcohol, occurs during this period. However, allowing the cider to age for several weeks or months after fermentation enhances its flavor and clarity. Aging helps mellow the cider and develop a more complex taste.
Tip: Taste your cider periodically during aging to monitor its progress and decide when it’s ready to bottle.
Can you make cider without an airlock?
Yes, you can ferment cider without an airlock, but it’s not recommended for long-term fermentation. A simple setup, like a balloon with a pinhole over the container’s opening, can work for short-term fermentation. However, an airlock provides better protection by allowing carbon dioxide to escape while preventing contaminants from entering. Investing in an airlock ensures a safer and more controlled fermentation process.
Using an airlock minimizes the risk of spoilage and helps maintain the cider’s quality.
What should you do if your cider isn’t fermenting?
If your cider shows no signs of fermentation, troubleshoot the following:
- Check the yeast: Ensure it’s fresh and properly activated. Expired or improperly stored yeast may not work.
- Verify the temperature: Keep the fermenter within the yeast’s optimal range, typically 60°F to 75°F.
- Inspect the juice: Ensure it’s preservative-free. Preservatives can inhibit yeast activity.
- Oxygenate the juice: Stir the juice gently to introduce oxygen, which yeast needs during the initial stages.
If fermentation still doesn’t start, rehydrate a new batch of yeast and add it to the cider.
Can you adjust the sweetness of cider after fermentation?
Yes, you can adjust the sweetness of cider after fermentation through a process called back-sweetening. To do this:
- Stabilize the cider with potassium sorbate or Campden tablets to prevent further fermentation.
- Add sweeteners like sugar, honey, or apple juice concentrate in small amounts, tasting as you go.
- Let the cider rest for a few days to allow the flavors to meld.
Back-sweetening gives you control over the final flavor, allowing you to create a cider that suits your taste.
How should you store bottled cider?
Store bottled cider in a cool, dark place to maintain its quality. For sparkling cider, refrigeration halts any remaining fermentation and prevents over-carbonation. If you plan to age your cider, keep it at a stable temperature, ideally between 45°F and 55°F. Avoid exposing the bottles to direct sunlight or fluctuating temperatures, as these can degrade the cider’s flavor.
Proper storage ensures your cider remains enjoyable for months or even years.