Making your own cider at home has never been easier, thanks to the convenience of a cider fermentation kit. This handy tool simplifies the process, allowing you to transform apple juice into delicious hard cider with minimal effort. Imagine the joy of crafting your own drink, tailored to your taste, right in your kitchen. Plus, the results are incredibly rewarding—homemade cider offers a unique flavor and freshness that store-bought options just can’t match. Whether you’re a seasoned brewer or a curious beginner, this kit makes the experience both fun and satisfying.
What Is a Cider Fermentation Kit and Why Use One?
A cider fermentation kit is your gateway to crafting delicious cider at home. It includes all the essential tools you need to turn apple juice into a refreshing beverage. Whether you’re new to cider making or looking to refine your skills, this kit simplifies the process and ensures consistent results. By using a cider fermentation kit, you can enjoy the satisfaction of creating your own drink while controlling its flavor, sweetness, and carbonation levels. Plus, it’s a fun and rewarding hobby that lets you experiment with different ingredients and techniques.
Components of a Cider Fermentation Kit
A typical cider fermentation kit comes with everything you need to get started. Here’s what you’ll usually find:
- Fermentation Vessel: This is where the magic happens. It could be a glass carboy or a siphonless fermenting bucket, designed to hold your cider during fermentation.
- Airlock and Lid: These components allow gases to escape while keeping contaminants out, ensuring a clean fermentation process.
- Hydrometer: This tool measures the specific gravity of your cider, helping you track fermentation progress and determine when it’s complete.
- Sanitizer: Keeping your equipment clean is crucial. Most kits include a no-rinse sanitizer to make this step easy and effective.
- Yeast Packets: Yeast is the key ingredient that transforms apple juice into hard cider. Kits often include high-quality yeast like EC-1118 for reliable fermentation.
- Siphon or Auto-Siphon: This helps you transfer your cider from one container to another without disturbing the sediment.
Some kits, like the Hard Cider Brewing Kit, even include extras like clamps and perforated lids for added convenience. These components work together to make cider making straightforward and enjoyable.
Benefits of Using a Kit for Homemade Cider
Using a cider fermentation kit offers several advantages that make it an excellent choice for beginners and seasoned brewers alike:
- Ease of Use: Kits simplify the cider-making process by providing all the necessary tools and clear instructions. You don’t need prior experience to get started.
- Consistency: With pre-measured ingredients and specialized equipment, you can achieve consistent results every time.
- Customization: A kit allows you to experiment with flavors, sweetness levels, and carbonation. For example, the Hard Cider Recipe Kit includes optional mulling spices, letting you create unique blends.
- Cost-Effectiveness: Making cider at home is often more affordable than buying premium store-bought options. Plus, you can reuse the equipment for future batches.
- Satisfaction: There’s something deeply rewarding about crafting your own drink. It’s a creative process that lets you enjoy the fruits of your labor—literally!
By investing in a cider fermentation kit, you’re not just making cider; you’re starting a journey into a fun and flavorful hobby. Whether you’re aiming for a dry sparkling cider or a sweet, spiced blend, the right kit makes it all possible.
Essential Ingredients for Making Hard Cider
When it comes to crafting your own hard cider, the ingredients you choose play a huge role in the final flavor and quality. From selecting the perfect apple juice to picking the right yeast, every decision shapes your cider-making journey. Let’s dive into the essentials you’ll need to create a delicious batch of hard apple cider.
Choosing the Right Apple Juice
The foundation of any great cider is the apple juice. Not all juices are created equal, so choosing the right one is key. Look for juice that is free from preservatives like potassium sorbate or sodium benzoate, as these can interfere with fermentation. Fresh-pressed apple juice from an orchard is an excellent choice if you want a rich, authentic flavor. Pasteurized orchard cider is another great option, offering convenience without sacrificing quality. If you’re shopping at the grocery store, make sure the juice is 100% pure and doesn’t contain added sugars or artificial flavors.
For a more traditional approach, consider using cider apples. These apples are specifically grown for cider making and are known for their unique balance of sugar, acidity, and tannins. They often have a tart, bitter, or astringent taste, which adds complexity to your hard cider. Whether you go for fresh-pressed juice or store-bought options, the quality of the juice will directly impact the taste of your final product.
Selecting the Best Yeast for Cider
Yeast is the magic ingredient that transforms apple juice into hard cider. The type of yeast you use significantly affects the flavor, aroma, and overall profile of your cider. You have two main options: cultured yeast and wild yeast. Cultured yeast, such as EC-1118 or cider-specific strains, provides a predictable fermentation process and consistent results. It’s ideal for beginners or anyone looking for a clean, crisp cider.
Wild yeast, on the other hand, occurs naturally in fresh-pressed apple juice. It can create unique and complex flavors, but it’s less predictable and may require more monitoring. If you’re feeling adventurous, experimenting with wild yeast can lead to some truly one-of-a-kind ciders. For a foolproof method, many cider makers recommend using Campden tablets to sterilize the juice before adding a commercial yeast strain. This ensures a controlled fermentation process and reduces the risk of unwanted flavors.
Optional Additives for Flavor and Sweetness
While apple juice and yeast are the core ingredients, optional additives can elevate your cider to the next level. If you prefer a sweeter cider, you can add sugar, honey, or even maple syrup before fermentation. These sweeteners not only boost the alcohol content but also enhance the flavor. For those who enjoy spiced or flavored ciders, mulling spices, cinnamon sticks, or vanilla beans can be added during fermentation or aging.
Acid blends or malic acid can help balance the sweetness and add a refreshing tartness to your cider. Tannin powder or oak chips can introduce a dry, complex character, mimicking the qualities of traditional cider apples. If you’re aiming for a sparkling hard cider, priming sugar can be added just before bottling to create natural carbonation. These additives allow you to customize your cider and experiment with different flavor profiles.
By carefully selecting your ingredients and experimenting with optional additions, you can create a hard cider that’s uniquely yours. Whether you’re going for a classic dry cider or a sweet, spiced blend, the possibilities are endless.
Additional Equipment You’ll Need Beyond the Kit
While a cider fermentation kit provides the essentials, a few additional tools can make your cider-making process smoother and more efficient. These items not only enhance your experience but also help you achieve better results with each batch.
Tools for Preparation and Fermentation
To take your cider-making skills to the next level, consider adding these tools to your setup:
- Hydrometer and Testing Jar: A hydrometer measures the sugar content in your cider, helping you track fermentation progress and determine alcohol levels. Pair it with a testing jar for accurate readings. This tool ensures you know exactly when fermentation is complete.
- pH Meter or Test Strips: Monitoring the pH of your cider allows you to maintain the right acidity levels. Proper acidity enhances flavor and ensures a stable fermentation process.
- Siphon or Auto-Siphon: Transferring cider between containers without disturbing the sediment is crucial. A siphon or auto-siphon makes this task quick and mess-free.
- Fermentation Bucket: If you’re making larger batches, a dedicated fermentation bucket is a must. It provides ample space for your cider to ferment and often includes a spigot for easy transfers.
- Measuring Tools: Accurate measurements are key to consistent results. Keep a set of measuring cups and spoons handy for adding sugar, sweeteners, or other ingredients.
These tools give you more control over your cider-making process, allowing you to fine-tune every detail for the perfect batch.
Bottling and Storage Equipment
Once your cider has fermented, bottling and storing it properly ensures it stays fresh and flavorful. Here’s what you’ll need:
- Glass Bottles: Choose amber-colored glass bottles to protect your cider from light, which can degrade its quality. Sizes like 12 oz, 22 oz, or 750 ml work well. Recycle beer bottles by cleaning and removing labels, or invest in new ones for a polished look.
- Bottle Caps and Capper: Secure your cider with crown caps. A capper tool makes sealing bottles easy and ensures an airtight fit. For 12 oz and 22 oz bottles, use 26 mm caps, while 750 ml bottles require 29 mm caps.
- Priming Sugar: If you want sparkling cider, add priming sugar before bottling. This creates natural carbonation during storage.
- Storage Space: Store your bottles in a cool, dark place to age. Proper storage conditions enhance the flavor and allow carbonation to develop fully.
By investing in the right bottling and storage equipment, you’ll preserve the quality of your cider and enjoy it at its best. These tools also make the process more enjoyable, giving you confidence in every step.
How to Prepare Your Cider Fermentation Kit
Before diving into the cider-making process, you need to prepare your cider fermentation kit properly. This step ensures a smooth fermentation process and helps you achieve the best possible results. Let’s break it down into two essential parts: cleaning and sanitizing your equipment and preparing the apple juice for fermentation.
Cleaning and Sanitizing the Equipment
Cleaning and sanitizing your equipment is the foundation of successful cider making. Any leftover residue or microorganisms can spoil your cider, leading to off-flavors or even failed fermentation. To avoid this, follow these steps:
Start with Cleaning: Remove any visible dirt or organic residue from your equipment. Use warm water and a mild detergent to scrub surfaces thoroughly. Pay special attention to hard-to-reach areas like the inside of the fermentation vessel or the airlock. Rinse everything well to ensure no soap remains.
Sanitize Everything: Once your equipment is clean, it’s time to sanitize. Use a food-grade sanitizer or a home brewing sanitizing solution. These products kill any remaining microorganisms that could interfere with fermentation. Follow the instructions on the sanitizer packaging for the correct dilution and contact time. Common options include no-rinse sanitizers, which are convenient and effective.
Don’t Forget Small Tools: Items like hydrometers, siphons, and measuring spoons also need attention. Submerge them in the sanitizing solution or spray them thoroughly. Even a small oversight can introduce unwanted bacteria or yeast into your cider.
Dry and Store Properly: After sanitizing, let your equipment air dry on a clean surface. Avoid using towels, as they can introduce contaminants. Once dry, keep everything in a clean, dust-free area until you’re ready to use it.
Pro Tip: Cleaning removes dirt, while sanitizing eliminates microorganisms. Both steps are crucial for a safe and successful fermentation process.
By taking the time to clean and sanitize your equipment, you set the stage for a contamination-free fermentation. This simple yet vital step ensures your cider will taste fresh and delicious.
Preparing the Apple Juice for Fermentation
With your equipment ready, it’s time to prepare the apple juice. The quality of your juice directly impacts the flavor of your cider, so choose wisely and handle it with care.
Select High-Quality Juice: Use 100% pure apple juice without preservatives like potassium sorbate or sodium benzoate. These chemicals can inhibit fermentation. Fresh-pressed juice from an orchard is ideal, but pasteurized juice from the store works well too. If you’re feeling adventurous, try blending different apple varieties for a unique flavor profile.
Sterilize the Juice (Optional): If you’re using fresh-pressed juice, consider sterilizing it to eliminate wild yeast or bacteria. Add Campden tablets (potassium metabisulfite) to the juice and let it sit for 24 hours before adding your yeast. This step ensures a controlled fermentation process.
Adjust Sugar Levels: Check the sugar content of your juice using a hydrometer. If you want a higher alcohol content, you can add sugar, honey, or another sweetener. Dissolve the sweetener in a small amount of warm water before mixing it into the juice.
Balance Acidity: Test the pH of your juice using pH strips or a meter. The ideal range for cider fermentation is between 3.2 and 3.8. If the juice is too acidic, you can dilute it with water. If it’s not acidic enough, add malic acid to achieve the right balance.
Pour into the Fermentation Vessel: Transfer the prepared juice into your sanitized fermentation vessel. Leave some headspace at the top to allow for foam and gas buildup during fermentation.
Quick Reminder: Always sanitize any tools or containers that come into contact with the juice. This extra step prevents contamination and keeps your cider-making process on track.
By carefully preparing your apple juice, you create the perfect environment for fermentation. This attention to detail ensures your cider will have a clean, crisp taste that you’ll be proud to share.
Step-by-Step Guide on How to Make Hard Cider
Setting Up the Fermentation Vessel
The fermentation vessel is where your cider transforms into hard cider. Setting it up correctly ensures a smooth process and prevents contamination. Follow these steps to get started:
Sanitize the Vessel: Before anything else, clean and sanitize your fermentation vessel thoroughly. Use a food-grade sanitizer to eliminate any microorganisms that could spoil your cider. Let it air dry on a clean surface.
Position the Vessel: Place the vessel in a location with a stable temperature between 20-27°C (68-80°F). Temperature control is crucial for fermentation. Avoid areas with direct sunlight or fluctuating temperatures, as these can disrupt the process.
Pour in the Apple Juice: Transfer your prepared apple juice into the sanitized vessel. Leave about 2-3 inches of headspace at the top. This space allows foam and gases to form during fermentation without spilling over.
Install the Airlock: Secure the lid on the vessel and attach the airlock. Fill the airlock with water or sanitizer solution. This setup lets carbon dioxide escape while keeping oxygen and contaminants out.
Pro Tip: If you’re using a glass carboy, consider using a funnel to pour the juice without spilling. For buckets, ensure the lid seals tightly to maintain an anaerobic environment.
By setting up your fermentation vessel properly, you create the ideal conditions for making hard cider. This step lays the foundation for a successful fermentation process.
Adding Yeast and Starting Fermentation
Yeast is the powerhouse behind cider fermentation. It converts the sugars in apple juice into alcohol and carbon dioxide. Here’s how to add yeast and kickstart the process:
Choose Your Yeast: Select a high-quality yeast suitable for cider. Cultured yeast like EC-1118 is a reliable choice for beginners. It ferments cleanly and produces consistent results.
Rehydrate the Yeast (Optional): Some yeast packets recommend rehydration before use. Dissolve the yeast in warm water (around 95°F) and let it sit for 10-15 minutes. This step activates the yeast and ensures a strong start.
Add Yeast to the Juice: Sprinkle the yeast directly onto the surface of the apple juice or pour in the rehydrated yeast. Avoid stirring at this stage. The yeast will naturally disperse and begin working.
Seal the Vessel: Once the yeast is added, secure the lid and airlock on the fermentation vessel. This setup keeps the environment sterile and allows fermentation gases to escape.
Mark the Start Date: Write down the date you added the yeast. This helps you track the fermentation timeline and know when to check for progress.
Quick Reminder: Always sanitize any tools or containers that come into contact with the yeast or juice. Cleanliness ensures a healthy fermentation process.
When you add yeast, you initiate the transformation of apple juice into hard cider. This step is where the magic begins, so take care to follow the instructions closely.
Monitoring the Fermentation Process
Fermentation is an active process that requires attention. Monitoring it helps you ensure everything is progressing as it should. Here’s what to do:
Watch the Airlock: Within 24-48 hours, you should see bubbles in the airlock. This indicates that fermentation has started. The bubbling will slow down as the process nears completion.
Check the Temperature: Use a thermometer to monitor the temperature around the vessel. Keep it within the recommended range of 20-27°C (68-80°F). If the temperature drops too low, fermentation may stall. If it gets too high, the yeast could produce off-flavors.
Use a Hydrometer: Take hydrometer readings every few days to measure the specific gravity of your cider. Fermentation is complete when the specific gravity reaches 1.000 or below. This tool also helps you calculate the alcohol content.
Inspect for Issues: Look for signs of contamination, such as unusual smells or mold. If you notice anything off, act quickly to address the issue. Proper cleaning and sanitizing reduce the risk of problems.
Be Patient: Primary fermentation usually takes 5-14 days. Don’t rush the process. Let the yeast work at its own pace to fully convert the sugars.
Did You Know? Some cider makers transfer their brew to a secondary vessel for cider secondary fermentation. This step refines the flavor and allows sediment to settle, resulting in a clearer final product.
By monitoring the fermentation process, you ensure your cider develops properly. Paying attention to these details helps you avoid common pitfalls and achieve a delicious result.
Bottling and Storing Your Homemade Cider
After fermentation, bottling and storing your cider properly ensures it tastes its best and stays fresh. This stage is where your hard cider transforms into a polished, ready-to-drink beverage. Let’s walk through the steps to prepare your bottles, transfer your cider safely, and store it under ideal conditions.
Preparing Bottles and Adding Priming Sugar
Before bottling, you need to prepare your bottles and decide if you want sparkling cider. Cleanliness is key here, as any leftover residue or bacteria can spoil your cider.
Clean and Sanitize Bottles: Wash your bottles thoroughly with warm water and a mild detergent. Use a bottle brush to scrub the insides. After cleaning, sanitize them using a no-rinse sanitizer or a home brewing sanitizing solution. Let the bottles air dry upside down on a clean rack.
Choose the Right Bottles: Use amber glass bottles to protect your cider from light, which can degrade its flavor. Recycled beer bottles work well, but ensure they’re free of cracks or chips. Swing-top bottles are another great option for ease of use.
Add Priming Sugar (Optional): If you want sparkling cider, dissolve priming sugar in a small amount of boiling water. Let it cool, then add it to your sanitized bottling bucket before transferring the cider. The sugar will ferment in the sealed bottles, creating natural carbonation. Use about 1 teaspoon of sugar per 16-ounce bottle for a gentle fizz.
Pro Tip: Always measure priming sugar carefully. Too much can cause over-carbonation, leading to bottle explosions.
By preparing your bottles and adding priming sugar correctly, you set the stage for a crisp, refreshing cider with just the right amount of sparkle.
Transferring Cider to Bottles Safely
Transferring your cider from the fermentation vessel to bottles requires care to avoid disturbing the sediment and introducing oxygen. Follow these steps for a smooth process:
Set Up Your Siphon: Use a sanitized siphon or auto-siphon to transfer the cider. Place the fermentation vessel on a raised surface and the bottling bucket or bottles on a lower surface to allow gravity to assist the flow.
Avoid Sediment: Position the siphon above the sediment layer at the bottom of the fermentation vessel. This keeps your cider clear and free of unwanted particles. Move the siphon gently as needed to avoid stirring up the sediment.
Fill the Bottles: Insert the siphon tube into each bottle, filling it to about an inch below the top. This headspace allows room for carbonation while minimizing oxygen exposure. If you’re using a bottling wand, it will stop the flow automatically when you lift it from the bottle.
Seal the Bottles: Cap the bottles immediately using sanitized caps and a capper tool. For swing-top bottles, ensure the rubber gasket is clean and secure before sealing.
Quick Reminder: Oxygen exposure can lead to oxidation, which affects the taste of your cider. Work quickly and carefully to minimize contact with air during bottling.
By transferring your cider with precision, you preserve its flavor and clarity, ensuring a professional-quality result.
Ideal Storage Conditions for Aging
Proper storage plays a crucial role in enhancing the flavor of your cider over time. Aging allows the flavors to mellow and develop complexity, giving you a smoother, more refined drink.
Choose a Cool, Dark Place: Store your bottles in a location with a consistent temperature around 15°C (59°F). Avoid sharp temperature fluctuations, as they can disrupt the aging process and affect the cider’s taste. A basement or pantry works well.
Keep Bottles Upright: Store your bottles standing upright. This position minimizes the surface area exposed to air inside the bottle, reducing the risk of oxidation. It also prevents sediment from spreading throughout the cider.
Allow Time to Age: While you can enjoy your cider immediately, aging it for at least two weeks improves its flavor. For a more complex taste, let it age for several months. Over time, the cider’s fruity notes will become more pronounced, and any harsh edges will soften.
Monitor for Carbonation: If you added priming sugar, check the carbonation level after two weeks. Open one bottle to test the fizz. If it’s not carbonated enough, give it more time. Once it reaches your desired level, move the bottles to a cooler environment to slow down the fermentation.
Did You Know? Proper storage conditions can prevent your cider from turning into vinegar. Keeping it away from light and air ensures it retains its fresh, fruity character.
By storing your cider under the right conditions, you allow it to reach its full potential. Whether you prefer a young, vibrant cider or a well-aged, complex one, patience and proper care make all the difference.
Troubleshooting Common Issues with Your Kit
Even with the best preparation, challenges can arise during cider making. Don’t worry—most issues have simple solutions. Let’s tackle some common problems you might face during fermentation and bottling.
Problems During Fermentation
Fermentation is the heart of cider making, but it doesn’t always go as planned. Here are some typical issues and how to resolve them:
Stuck Fermentation: If fermentation stops prematurely, your yeast might need a little help. First, check the temperature. Yeast thrives between 68°F and 80°F (20°C to 27°C). If it’s too cold, move your fermenter to a warmer spot. If the temperature is fine, try gently stirring the cider to redistribute the yeast. Adding yeast nutrients can also revive the process.
No Bubbling in the Airlock: A lack of bubbling doesn’t always mean fermentation isn’t happening. Check the lid and airlock for a tight seal. If air escapes elsewhere, the airlock won’t bubble. Use a hydrometer to confirm fermentation progress. If the specific gravity is dropping, your cider is fermenting, even without visible bubbles.
Foaming Over: Vigorous fermentation can cause foam to overflow from the fermenter. To prevent messes, place the fermenter on newspaper or a tray. If this happens, clean the outside of the fermenter and ensure the airlock is still functioning. Once fermentation slows, top off the fermenter with more juice or water to minimize air exposure.
Quick Tip: Always sanitize any tools or equipment you use to fix fermentation issues. This prevents contamination and keeps your cider safe.
By addressing these problems promptly, you can keep your fermentation on track and ensure a successful batch.
Bottling and Storage Challenges
Bottling and storing cider can present their own set of challenges. Here’s how to handle them:
Weak Carbonation: If your cider lacks fizz, the yeast might need more time to create carbon dioxide. Bring the bottles to room temperature for 3-5 days, then test one. If carbonation improves, chill the rest. Weak carbonation can also result from too much headspace, insufficient priming sugar, or improperly sealed caps. For future batches, measure priming sugar carefully and use high-quality caps.
Over-Carbonation: Too much fizz can lead to bottle explosions. If you notice excessive pressure, refrigerate the bottles immediately to slow fermentation. Open them carefully over a sink to release excess gas. For next time, reduce the amount of priming sugar or ensure fermentation is fully complete before bottling.
Cloudy Cider: Sediment in your bottles can make your cider appear cloudy. While harmless, it’s not always appealing. To avoid this, use a siphon to transfer cider carefully, leaving sediment behind. Cold-crashing your cider (chilling it before bottling) can also help sediment settle.
Off-Flavors: If your cider tastes strange, it could be due to contamination or oxidation. Always sanitize your equipment thoroughly and minimize oxygen exposure during bottling. Store your cider in a cool, dark place to preserve its flavor.
Pro Tip: Label your bottles with the date and any notes about the batch. This helps you track aging and identify patterns for future improvements.
By troubleshooting these bottling and storage challenges, you’ll ensure your cider is not only drinkable but also enjoyable. With practice, you’ll master the art of cider making and overcome any obstacles with ease.
Tips for Enhancing Your Cider-Making Experience
Experimenting with Flavors and Ingredients
One of the most exciting parts of making cider is experimenting with flavors. You can transform a simple batch into something extraordinary by adding unique ingredients. Think of your cider as a blank canvas, ready for your creative touch.
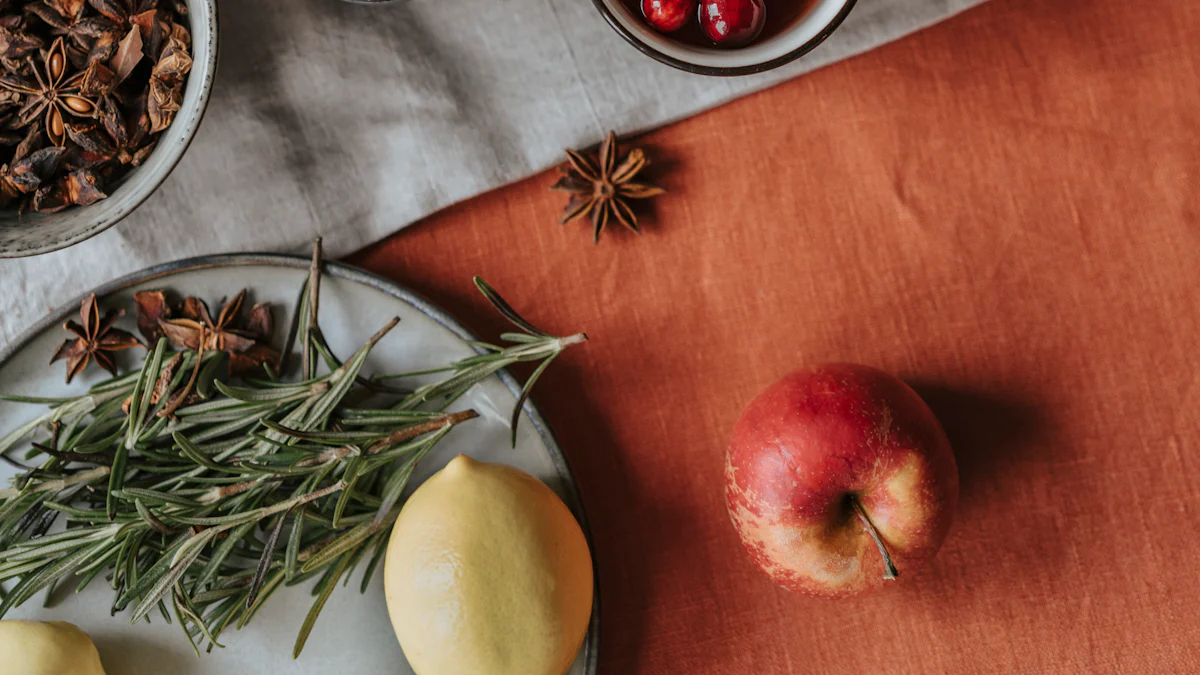
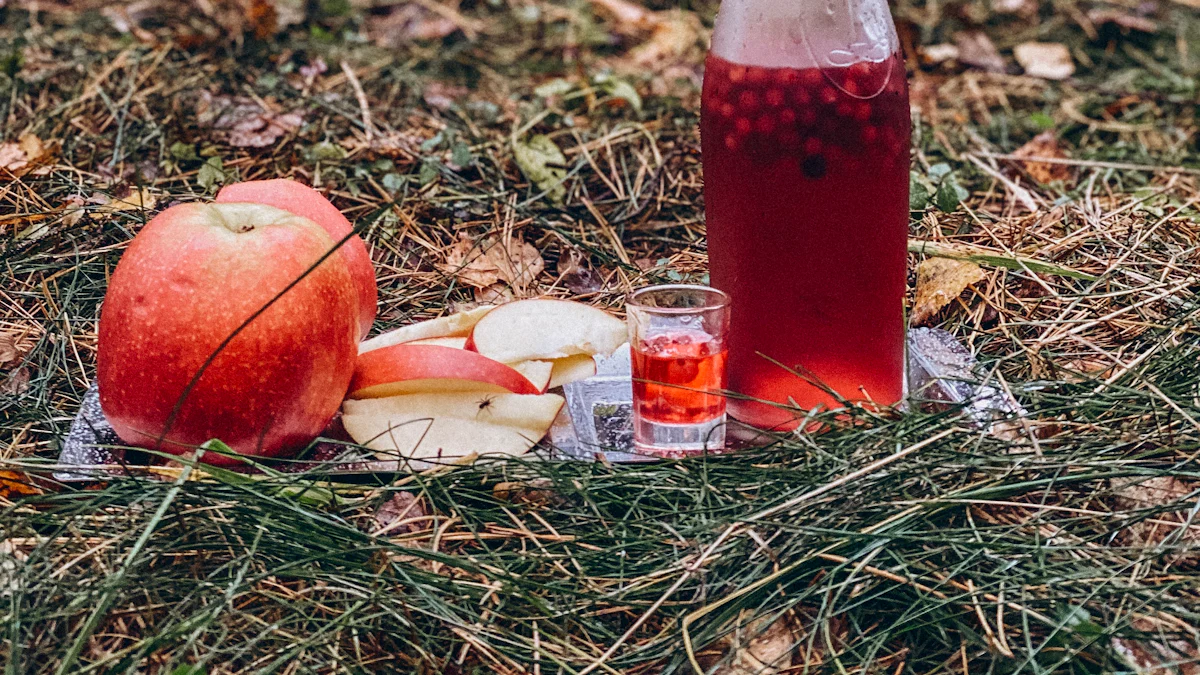
Start with spices. Toss in cinnamon sticks, nutmeg, or cloves during fermentation to create warm, spiced notes. Vanilla beans or crystallized ginger can add a smooth, aromatic twist. If you enjoy fruity flavors, try adding fresh fruit or fruit purees like cherries, oranges, or even lime juice. These additions blend beautifully with the natural apple base, giving your cider a refreshing complexity.
For a bolder approach, consider blending other juices or infusions. Cherry juice, honey, or molasses can enhance sweetness and depth. Some adventurous cider makers even add hot peppers for a spicy kick or hops for a bitter edge. If you’re feeling experimental, you could infuse your cider with tea blends or fortified spirits for a unique twist.
“You can put almost anything in a cider,” as some seasoned cider makers say. The possibilities are endless, so don’t hesitate to try something new. Whether you’re aiming for a classic spiced cider or a bold, unconventional flavor, your creativity will make each batch special.
Adjusting Sweetness and Carbonation Levels
Fine-tuning the sweetness and carbonation of your cider allows you to craft a drink that perfectly suits your taste. These adjustments can elevate your cider from good to exceptional.
To adjust sweetness, you have several options. If you prefer a sweeter cider, add sugar, honey, or maple syrup before fermentation. Keep in mind that these sweeteners will also increase the alcohol content as the yeast consumes the sugars. For a sweeter finish without boosting alcohol, consider back-sweetening after fermentation. This involves adding non-fermentable sweeteners like stevia or lactose, which won’t restart fermentation.
Carbonation adds a lively fizz to your cider, making it more refreshing. If you’re wondering how to carbonate hard cider, the process is straightforward. Add priming sugar to your cider just before bottling. The remaining yeast will consume this sugar, producing carbon dioxide that creates natural carbonation. Use about one teaspoon of sugar per 16-ounce bottle for a gentle sparkle. For a still cider, skip the priming sugar and bottle it as is.
Pro Tip: Always test your cider’s sweetness and carbonation levels in small batches before committing to the entire batch. This ensures you achieve the perfect balance without risking over-carbonation or overly sweet results.
By experimenting with flavors and mastering adjustments, you’ll take your cider-making skills to the next level. Each batch becomes an opportunity to refine your craft and enjoy the fruits of your labor—literally!
Why Choose Chenma for Your Fermentation Needs?
When it comes to fermentation equipment, choosing the right provider can make all the difference in your cider-making journey. Shandong Chenma Machinery Co., Ltd. stands out as a trusted name in the industry, offering high-quality solutions tailored to your needs. Whether you’re a homebrewer experimenting with a cider fermentation kit or a professional looking to scale up production, Chenma has the expertise and tools to support you.
Overview of Chenma’s Expertise in Fermentation Equipment
Shandong Chenma Machinery Co., Ltd. is more than just a manufacturer. Located in Shandong Province, the company combines innovation, technical expertise, and a commitment to quality. With a focus on research and development, Chenma designs fermentation equipment that meets the demands of modern cider makers.
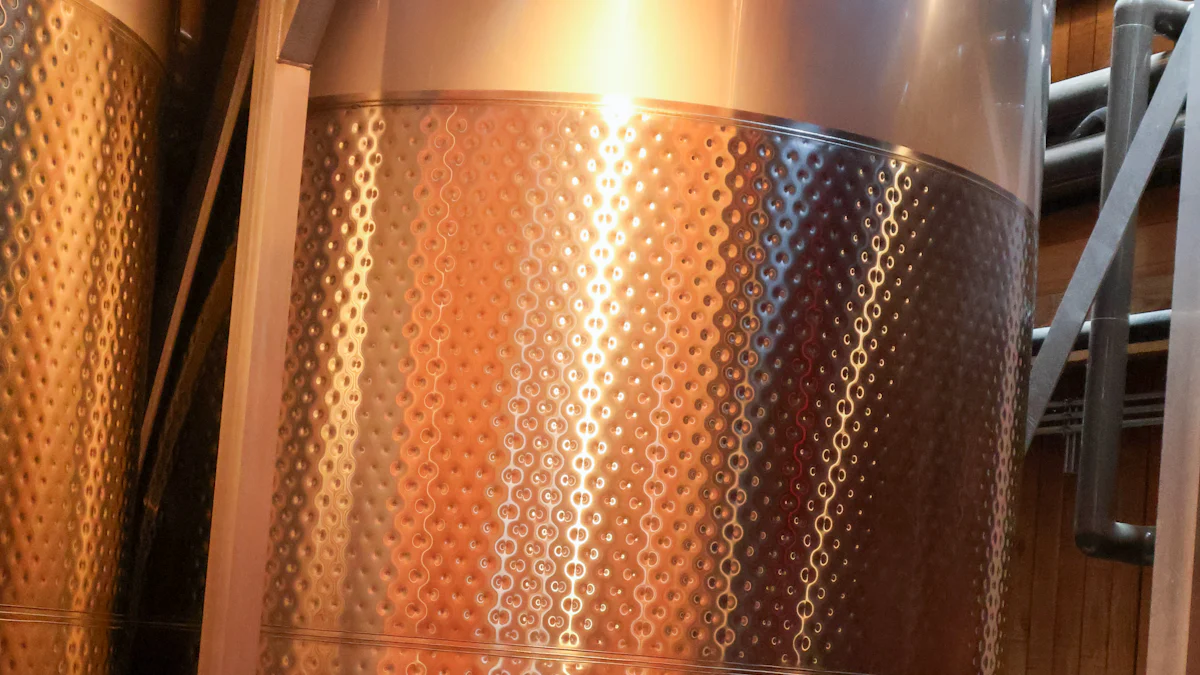
The company specializes in stainless steel tanks and processing equipment, catering to industries like alcohol, food, and beverages. This focus allows Chenma to adapt its products to suit specific needs, whether you’re crafting hard cider at home or producing large-scale batches. Their team of over 200 professionals works in a state-of-the-art 20,000 m² facility, ensuring every product meets the highest standards.
“Chenma doesn’t just sell equipment; they provide solutions,” as many satisfied customers have noted. From process design to installation and technical training, Chenma supports you every step of the way.
Benefits of Using Chenma Stainless Steel Tanks
Chenma’s stainless steel tanks are a game-changer for cider makers. These tanks are designed with precision and durability in mind, making them ideal for fermentation. Here’s why they’re a great choice:
- Durability: Stainless steel resists corrosion, ensuring your tank lasts for years without compromising the quality of your cider.
- Hygiene: The smooth surface of stainless steel makes cleaning easy, reducing the risk of contamination during fermentation.
- Temperature Control: Many Chenma tanks come with features that help maintain consistent temperatures, which is crucial for producing high-quality cider.
- Versatility: Whether you’re fermenting small batches or scaling up, Chenma offers tanks in various sizes to fit your needs.
These benefits make Chenma tanks a reliable choice for anyone serious about making cider. They’re not just tools; they’re investments in the quality of your craft.
Customization and Quality Assurance by Chenma
Every cider maker has unique needs, and Chenma understands that. Their talented engineers specialize in customizing tanks to fit your specific requirements. Whether you need a tank with a unique design or additional features, Chenma can deliver. They also offer completely custom tanks for those with specialized demands.
Quality assurance is at the heart of Chenma’s operations. The company adheres to the latest safety and quality standards, holding certifications like ISO9001-2005, ISO14001-2015, and EU CE certification. These certifications ensure that every product meets rigorous quality benchmarks, giving you peace of mind.
“With Chenma, you’re not just buying equipment; you’re investing in reliability and excellence.” Their commitment to quality ensures your cider-making process runs smoothly from start to finish.
By choosing Chenma, you’re partnering with a company that values your success. Their expertise, high-quality tanks, and dedication to customization make them a top choice for fermentation equipment. Whether you’re using a kit at home or running a commercial operation, Chenma has the tools to help you craft exceptional cider.
Using a cider fermentation kit makes the process of making hard cider at home simple and enjoyable. With everything you need in one convenient package, you can easily start crafting your own cider, whether you’re a beginner or an experienced brewer. The kit’s versatility allows you to experiment with flavors, sweetness levels, and carbonation, giving you endless opportunities to customize your drink. Making hard cider at home is not only accessible but also a rewarding hobby that lets you enjoy fresh, flavorful results. So, grab your kit and start your cider-making journey today!
FAQ
How long can I store my homemade cider?
You can store your cider for several months if you follow proper bottling and storage practices. Keep it in a cool, dark place with a stable temperature, ideally around 59°F (15°C). This helps preserve its flavor and prevents spoilage. If you notice bubbles in the airlock slowing down to one every 30 seconds or less, fermentation is likely complete, and your cider is safe to bottle. Properly sealed bottles can keep your cider fresh for up to a year or more.
Can I use any type of apple juice for cider making?
Not all apple juices work well for cider making. Choose 100% pure apple juice without preservatives like potassium sorbate or sodium benzoate, as these can interfere with fermentation. Fresh-pressed juice from an orchard offers the best flavor, but pasteurized juice from the store works too. Avoid juices with added sugars or artificial flavors, as they can alter the taste of your cider.
Why isn’t my fermentation bubbling?
A lack of bubbling in the airlock doesn’t always mean fermentation isn’t happening. Check if the lid and airlock are sealed tightly. Sometimes, gas escapes through small gaps instead of the airlock. Use a hydrometer to measure the specific gravity of your cider. If the gravity is dropping, fermentation is active even without visible bubbles. Ensure the temperature stays between 68°F and 80°F (20°C to 27°C) for optimal yeast activity.
How do I know when fermentation is complete?
Fermentation is complete when the specific gravity of your cider reaches 1.000 or below. You can confirm this using a hydrometer. Additionally, the airlock will stop bubbling, or bubbles will appear very infrequently (e.g., one every 30 seconds or more). At this stage, the yeast has consumed most of the sugars, and your cider is ready for bottling.
Can I make sparkling cider at home?
Yes, you can make sparkling cider by adding priming sugar before bottling. Dissolve the sugar in a small amount of boiling water, let it cool, and mix it into your cider. Use about one teaspoon of sugar per 16-ounce bottle. The remaining yeast will ferment the sugar in the sealed bottles, creating natural carbonation. Be sure to monitor the carbonation levels to avoid over-carbonation.
What should I do if my cider tastes too sour?
If your cider tastes too sour, it might have high acidity. You can balance the flavor by back-sweetening with non-fermentable sweeteners like stevia or lactose. Adding a small amount of honey or sugar can also help, but ensure fermentation is complete to avoid restarting the process. Aging your cider for a few weeks or months can mellow the sourness and improve the overall taste.
Why is my cider cloudy after bottling?
Cloudy cider often results from sediment in the bottles. While harmless, it can affect the appearance. To avoid this, use a siphon to transfer your cider carefully, leaving the sediment behind in the fermentation vessel. Cold-crashing your cider (chilling it before bottling) can also help sediment settle at the bottom, resulting in a clearer final product.
Can I reuse bottles from store-bought beverages?
Yes, you can reuse bottles from store-bought beverages, but make sure they’re clean and free of cracks or chips. Wash them thoroughly with warm water and a mild detergent, then sanitize them before use. Amber glass bottles are ideal because they protect your cider from light, which can degrade its flavor. Swing-top bottles are another great option for ease of sealing.
What’s the best way to experiment with cider flavors?
Experimenting with flavors is one of the most enjoyable parts of cider making. Add spices like cinnamon, nutmeg, or cloves during fermentation for a warm, spiced cider. Fresh fruits, fruit purees, or juices like cherry or orange can enhance the flavor. For a unique twist, try infusing your cider with vanilla beans, ginger, or even tea blends. Start with small batches to test your ideas before scaling up.
How can I avoid bottle explosions?
Bottle explosions usually happen due to over-carbonation. To prevent this, ensure fermentation is fully complete before bottling. Use a hydrometer to confirm the specific gravity is stable for a few days. Measure priming sugar carefully and avoid adding too much. Store your bottles in a cool, dark place, and check carbonation levels after two weeks. Refrigerate the bottles once they reach your desired level of fizz to slow down further fermentation.