Making hard cider at home is a fun and rewarding experience. With just a few tools and some fresh ingredients, you can transform apples or apple juice into a crisp, flavorful drink. Apples naturally contain fermentable sugars and aromatic compounds, making them perfect for cider. Even if you’ve never tried it before, the process feels surprisingly simple. Many people start because they have an apple tree overflowing with fruit, and instead of letting it go to waste, they turn to cider fermenters for a creative solution. The result? A delicious beverage that’s uniquely yours.
Essential Equipment for Cider Fermenters
When making cider at home, having the right tools ensures a smooth and enjoyable process. The equipment you choose directly impacts the quality of your cider. Let’s explore the essentials you’ll need to get started.
Choosing the Right Fermenter
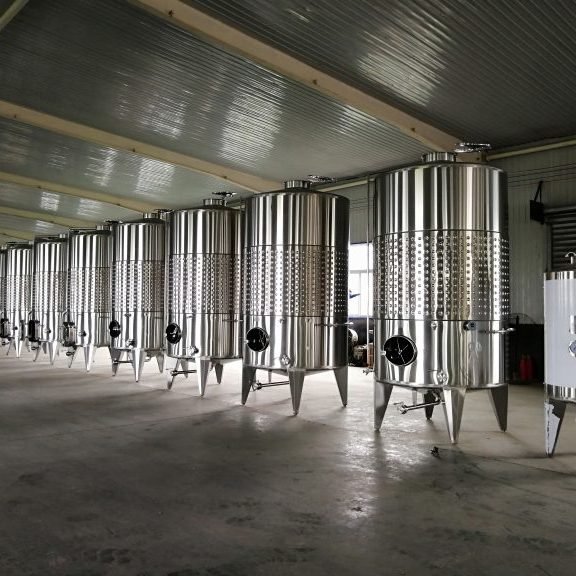
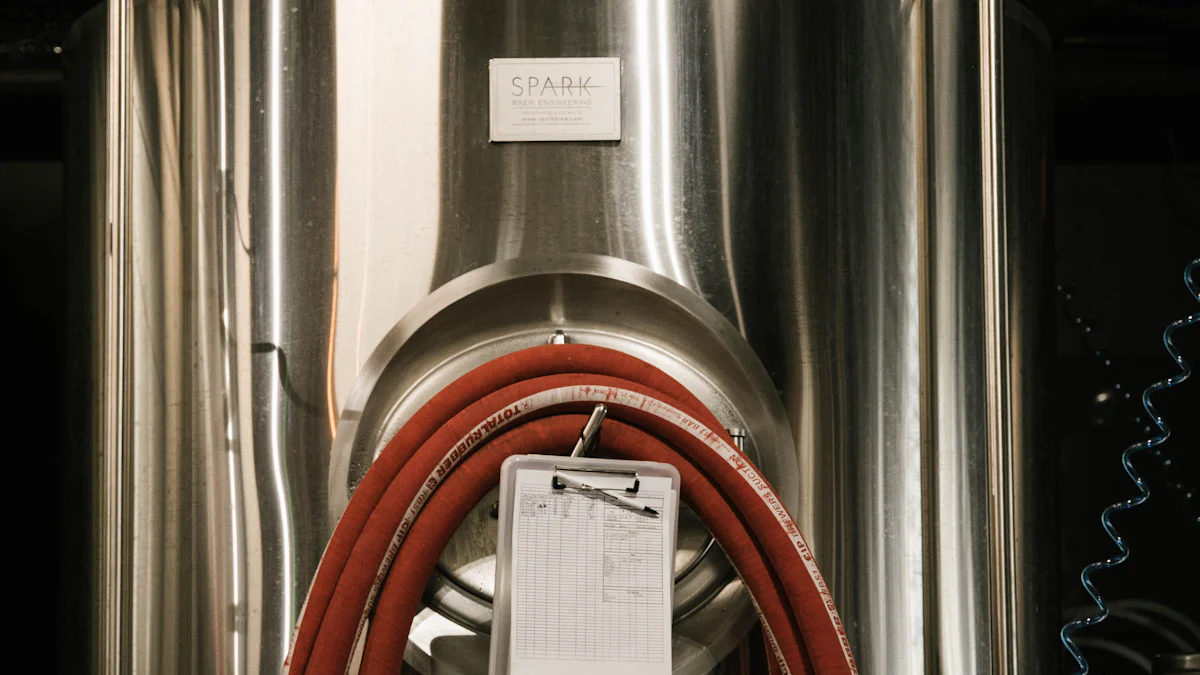
The fermenter is the heart of your cider-making setup. It’s where the magic happens—where yeast transforms sugars into alcohol. You’ll find various options, but stainless steel fermenters stand out for their durability and ease of cleaning. They resist corrosion and don’t retain odors, making them ideal for repeated use. If you’re just starting, a FerMonster™ 3 Gallon Fermenter is a great choice for small batches. For those who prefer glass, a glass carboy with an airlock works perfectly, offering a clear view of the fermentation process. Whichever you choose, ensure it’s food-grade and airtight to prevent contamination.
Additional Tools: Airlocks, Hydrometers, and Bottles
Beyond the fermenter, a few additional tools make cider-making easier and more precise:
- Airlocks: These small devices allow gases to escape during fermentation while keeping oxygen and contaminants out. A 3-piece airlock or a water lock is perfect for creating an oxygen-free environment.
- Hydrometer and Testing Jar: These tools measure the sugar content in your cider, helping you track fermentation progress and estimate alcohol levels. They’re essential for ensuring your cider turns out just right.
- Pressure-Resistant Glass Bottles: Once fermentation is complete, you’ll need sturdy bottles to store your cider. These bottles can handle the pressure from carbonation, keeping your cider fresh and fizzy.
Why Stainless Steel Tanks Are Ideal for Fermentation
If you’re serious about cider-making, consider investing in a stainless steel fermentation vessel. These tanks offer several advantages:
- Temperature Control: Stainless steel allows for better temperature regulation, which is crucial for consistent fermentation.
- Durability: Unlike plastic or glass, stainless steel doesn’t crack or degrade over time.
- Hygiene: Its non-porous surface makes cleaning simple and prevents bacteria buildup.
- Customization: Many manufacturers, like Chenma, offer custom-designed tanks tailored to your needs, whether you’re making cider at home or on a larger scale.
Stainless steel tanks are a long-term investment that pays off with every batch of cider you make. They’re especially useful if you plan to experiment with different fermentation styles or scale up production.
By equipping yourself with the right tools, you set the stage for a successful cider-making journey. Each piece of equipment plays a role in ensuring your cider ferments properly and tastes amazing.
Ingredients for Making Hard Apple Cider
The ingredients you choose play a huge role in the flavor and quality of your hard apple cider. By carefully selecting apples, yeast, and optional additives, you can create a cider that perfectly matches your taste preferences.
Selecting Apples or Apple Juice
The foundation of any great hard apple cider starts with the apples. If you’re using fresh apples, focus on a mix of sweet, tart, and aromatic varieties. This blend ensures a balanced flavor profile. For example, Huaniu apples, derived from Red Delicious cultivars, are excellent for cider-making due to their rich aroma and natural sweetness. If you prefer a sharper, crisper cider, include apples high in acids, such as Granny Smith or Bramley.
If fresh apples aren’t available, high-quality apple juice works just as well. Look for juice labeled as “100% pure” with no added preservatives or sugar. Preservatives can interfere with fermentation, so avoid juices containing potassium sorbate or sodium benzoate. Whether you’re pressing apples yourself or buying juice, ensure proper juice extraction to retain the natural flavors and sugars essential for fermentation.
Yeast Options for Fermentation
Yeast is the powerhouse behind transforming apple juice into hard apple cider. The type of yeast you choose significantly impacts the final flavor. For a clean, crisp cider, go with a neutral yeast strain like Champagne yeast. It ferments efficiently and highlights the natural apple flavors. If you want a cider with more complexity, consider ale yeast or cider-specific strains. These add subtle fruity or spicy notes to your drink.
Each yeast strain brings its own character to the cider. Some enhance the apple’s natural sweetness, while others emphasize tartness or dryness. Experimenting with different strains can help you discover your favorite style. Always follow the yeast manufacturer’s instructions for the best results.
Optional Additives: Sugar, Spices, and Flavorings
While apples and yeast are the core ingredients, optional additives let you customize your cider. Adding sugar before fermentation increases the alcohol content. Common choices include brown sugar, honey, or even maple syrup for a unique twist. Be cautious with the amount, as too much sugar can overpower the apple’s natural taste.
Spices like cinnamon, cloves, or nutmeg can give your cider a warm, seasonal flavor. You can also experiment with fresh fruits like berries or pears to create flavored ciders. For a sharper, more vibrant cider, consider adding malic acid. This acid, naturally found in apples, enhances the cider’s crispness and balances the sweetness.
By thoughtfully selecting your ingredients, you can craft a hard apple cider that’s as simple or as complex as you like. Whether you stick to the basics or get creative with spices and fruits, the possibilities are endless.
Preparing and Cleaning Your Equipment
When it comes to cider making, preparing and cleaning your equipment is one of the most important steps. Proper sanitation ensures your cider ferments without contamination, giving you a clean and flavorful final product. Neglecting this step can lead to off-flavors or even spoilage, so it’s worth taking the time to do it right.
Importance of Sanitation in Cider Making
Sanitation plays a critical role in cider making. Every piece of equipment that touches your cider—whether it’s the fermenter, airlock, or bottles—needs to be thoroughly cleaned and sanitized. Harmful microorganisms, like wild yeasts and bacteria, can easily find their way into your cider if your tools aren’t properly prepared. These unwanted guests can spoil the fermentation process, leading to unpleasant flavors or even turning your cider into vinegar.
“Cleaning removes organic soils, while sanitizing kills harmful microorganisms that can affect cider flavor.”
Using sanitizers designed for food-grade equipment is essential. Products like Star San or iodine-based sanitizers are popular choices among home brewers. They effectively kill surface bacteria and microbes without leaving harmful residues. If you’re working with fresh apple juice, consider sterilizing it with Campden tablets to eliminate wild yeasts and prevent unwanted fermentation.
Temperature also matters during fermentation. Clean equipment ensures that nothing interferes with the yeast’s ability to work efficiently at the right temperature. This step is vital for achieving a high-quality cider with balanced flavors.
Step-by-Step Cleaning Guide for Fermenters and Tools
Cleaning your equipment doesn’t have to be complicated. Follow these simple steps to ensure everything is ready for cider making:
Rinse Immediately After Use
After using your fermenter, bottles, or tools, rinse them with warm water. This prevents residue from drying and becoming harder to remove later.Wash with a Mild Detergent
Use a non-abrasive sponge and a mild, unscented detergent to clean your equipment. Avoid harsh chemicals, as they can leave residues that affect your cider’s taste. Scrub all surfaces thoroughly, paying extra attention to corners and crevices.Rinse Thoroughly
Rinse off all soap and debris with warm water. Any leftover detergent can interfere with fermentation or alter the flavor of your cider.Sanitize Before Use
Prepare a sanitizing solution according to the product’s instructions. Submerge your tools and fermenter in the solution or spray it generously on all surfaces. Let the sanitizer sit for the recommended time to kill any remaining bacteria or yeast.Air Dry
Allow your equipment to air dry completely before use. Avoid using towels, as they can introduce lint or bacteria.Inspect Your Equipment
Before starting the cider-making process, double-check that everything is clean and free of damage. Cracks or scratches in fermenters or bottles can harbor bacteria, so replace any compromised items.
By following these steps, you create a clean environment for your cider to ferment. This not only improves the quality of your cider but also makes the entire process more enjoyable. Clean equipment ensures that your hard work pays off with a delicious, well-fermented drink.
How to Make Cider: Step-by-Step Process
Making hard cider at home is an exciting journey. By following a clear cider-making process, you can transform simple ingredients into a delicious drink. Let’s dive into the steps to help you create your own hard cider masterpiece.
Mixing Ingredients in the Fermenter
Start by preparing your fermentation vessel. Ensure it’s sanitized and completely dry before adding any ingredients. This step prevents contamination and sets the stage for a successful fermentation. Once ready, pour your apple juice or freshly pressed apple cider into the fermenter. If you’re using fresh apples, make sure the juice is free of preservatives like potassium sorbate, as these can interfere with fermentation.
For those looking to increase the alcohol content, now’s the time to add sugar. Brown sugar, honey, or even maple syrup can work well. Stir the mixture thoroughly to dissolve the sugar evenly. This ensures the yeast will have consistent access to the sugars during fermentation. If you’re feeling adventurous, you can also add spices like cinnamon or cloves at this stage to infuse your cider with unique flavors.
Pro Tip: Use a hydrometer to measure the original gravity of your cider. This helps you track the fermentation progress and estimate the final alcohol content.
Adding Yeast and Starting Fermentation
Once your ingredients are mixed, it’s time to add the yeast. Choose a yeast strain that matches your flavor preferences. Champagne yeast is a popular choice for a crisp and clean cider, while ale yeast can add complexity and fruity notes. Sprinkle the yeast directly into the fermenter or rehydrate it according to the manufacturer’s instructions.
After adding the yeast, seal the fermenter with an airlock. The airlock allows carbon dioxide to escape while keeping oxygen and contaminants out. Shake the fermenter gently to mix the yeast with the juice. This step ensures the yeast is evenly distributed and ready to start the fermentation process.
Place the fermenter in a warm, stable environment. A temperature between 60°F and 75°F works best for most yeast strains. Avoid exposing the fermenter to direct sunlight or extreme temperature changes, as these can disrupt the fermentation process.
“Cidermaking is not just a craft; it’s a blend of science and tradition,” shared a cidermaker during an interview. Understanding the fermentation process is key to achieving great results.
Monitoring Fermentation Progress
Fermentation begins within 24 to 48 hours. You’ll notice bubbles forming in the airlock, a sign that the yeast is actively converting sugars into alcohol and carbon dioxide. This bubbling is an exciting part of the hard cider making process, as it shows your cider is coming to life.
Check the fermenter daily to ensure the airlock is functioning properly. If the bubbling slows down significantly after a week or two, it’s a sign that the fermentation is nearing completion. Use a hydrometer to measure the specific gravity of the cider. When the readings remain consistent over a few days, the fermentation is complete.
At this stage, taste your cider. If you prefer a sweeter cider, you can back-sweeten it by adding sugar or fruit juice. However, remember to stabilize the cider first to prevent further fermentation. Once satisfied with the flavor, you can move on to bottling or letting it ferment a bit longer for additional complexity.
Fun Fact: Different regions produce diverse cider styles, each reflecting their unique heritage and landscape. Experimenting with fermentation times and ingredients can help you create a cider that reflects your personal taste.
By carefully following these steps, you’ll master how to make cider at home. The cider-making process is both an art and a science, offering endless opportunities for creativity. Enjoy the journey and the satisfaction of crafting your own hard cider.
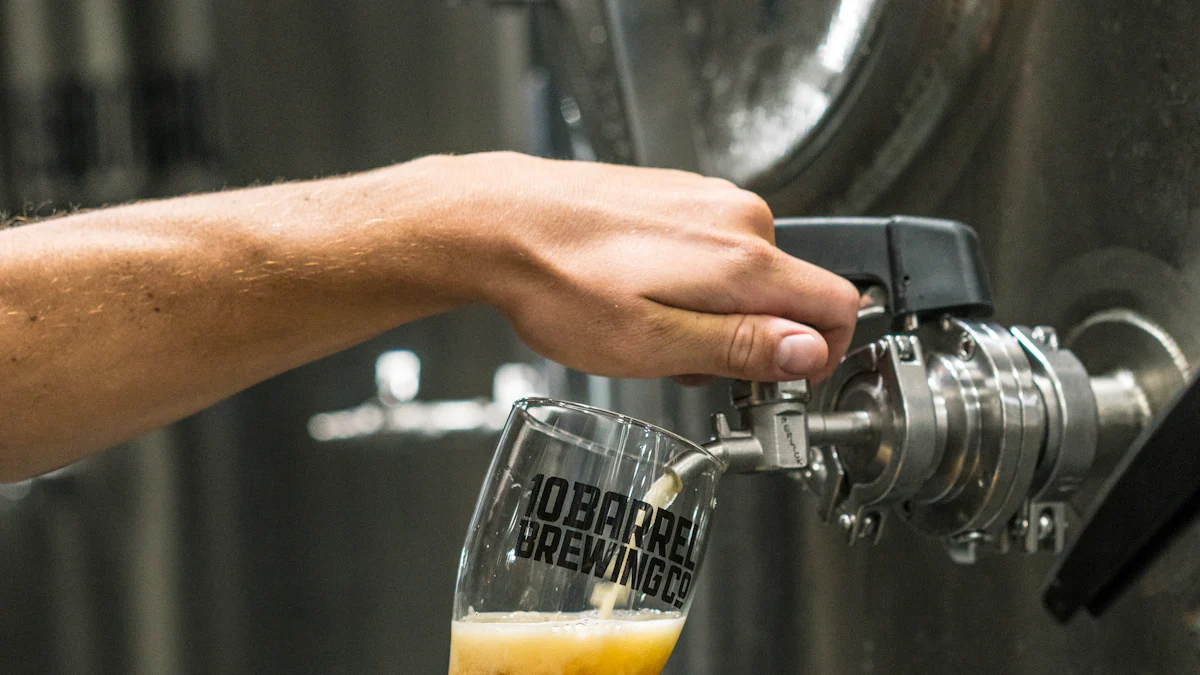
Bottling and Carbonating Your Cider
Bottling your cider is the final step in your cider-making journey. It’s where all your hard work comes together, and you prepare your cider for storage and enjoyment. Whether you prefer a fizzy, carbonated cider or a still, uncarbonated one, this step ensures your cider is ready to drink.
Preparing for Bottling
Before bottling, make sure your cider has finished fermenting. Use a hydrometer to confirm that the specific gravity has stabilized over several days. This ensures fermentation is complete and prevents unexpected pressure buildup in the bottles. Once confirmed, transfer your cider from the fermenter to a clean container, leaving behind any sediment at the bottom. This process, called racking, helps clarify your cider and improves its appearance and taste.
Sanitize all your bottling equipment, including bottles, caps, and siphoning tools. Proper sanitation prevents contamination and keeps your cider fresh during storage. Choose bottles that suit your preferences. Standard 12-ounce beer bottles with pop-off caps are a popular choice, but 64-ounce growlers with lids also work well for larger servings.
Adding Carbonation (Optional)
If you want a sparkling cider, you’ll need to carbonate it. This involves adding a small amount of sugar, known as priming sugar, to the cider before bottling. The sugar reactivates the yeast, which produces carbon dioxide during a secondary fermentation in the bottle. This gas creates the bubbles that give your cider its fizz.
Here’s how to carbonate your cider:
- Dissolve the priming sugar in a small amount of warm water to create a syrup. The amount of sugar depends on your desired carbonation level. For most ciders, 1 ounce of sugar per gallon works well.
- Gently stir the sugar syrup into the cider, ensuring even distribution without disturbing the sediment.
- Use a siphon to transfer the cider into your sanitized bottles, leaving about an inch of headspace at the top.
- Seal the bottles with caps or flip tops using a bottle capper.
Store the bottles at room temperature for 2 to 8 weeks to allow carbonation to develop. Check one bottle after two weeks to see if it has reached your desired level of fizz. Once carbonated, move the bottles to a cool, dark place to slow down fermentation and preserve the flavor.
Pro Tip: If you prefer a still cider, skip the priming sugar. Bottling without sugar prevents carbonation, giving you a smooth, uncarbonated drink.
Storing and Enjoying Your Cider
After bottling, store your cider in a cool, dark place to maintain its quality. Proper storage prevents oxidation and keeps your cider tasting fresh. When you’re ready to enjoy it, chill the bottle in the refrigerator for a few hours. Serve your cider in a glass to fully appreciate its aroma and flavor.
Whether you choose a sparkling or still cider, bottling is a rewarding step that brings your cider-making process to a satisfying close. With the right preparation and care, you’ll have a delicious homemade cider to share with friends or savor on your own.
Tips for Success When You Make Hard Cider
Maintaining Optimal Fermentation Temperatures
Temperature plays a crucial role in cider fermentation. The environment where your fermenter sits directly impacts the flavor and quality of your cider. Keeping the temperature steady ensures the yeast works efficiently without producing off-flavors.
For a clean and crisp cider, aim for cooler fermentation temperatures around 59°F (15°C). Cooler conditions help retain the fruity notes of the apples, giving your cider a refreshing taste. If you prefer a fuller-bodied cider with more complex flavors, slightly warmer temperatures—up to 68°F (20°C)—can encourage yeast activity and enhance the cider’s richness. However, avoid going above 68°F. Higher temperatures can lead to overly fruity or even unpleasant flavors.
To maintain the right temperature, place your fermenter in a cool, dark space like a basement or pantry. If your home tends to fluctuate in temperature, consider using a fermentation chamber or a temperature control wrap. These tools help regulate the environment, ensuring consistent results.
Fun Fact: Studies show that lower fermentation temperatures slow down yeast activity, allowing more delicate apple flavors to shine through. This is why many craft cider makers prefer cooler conditions for their batches.
Using a Hydrometer to Measure Alcohol Content
A hydrometer is an essential tool for any cider maker. It helps you measure the sugar content in your cider before and after fermentation. By tracking these readings, you can calculate the alcohol by volume (ABV) of your final product.
Here’s how to use a hydrometer:
- Take an Initial Reading: Before adding yeast, pour a small sample of your cider into a testing jar. Place the hydrometer in the liquid and note the specific gravity (SG). This number represents the amount of sugar in your cider.
- Monitor During Fermentation: As fermentation progresses, the yeast consumes the sugars, and the SG decreases. Check the SG periodically to track the process.
- Final Reading: Once fermentation slows down, take another reading. Subtract the final SG from the initial SG and use a simple formula to calculate the ABV.
Pro Tip: A stable SG reading over several days indicates that fermentation is complete. This ensures your cider is ready for bottling without risking over-carbonation.
Using a hydrometer not only helps you measure alcohol content but also gives you insight into the fermentation process. It’s a small investment that makes a big difference in the quality of your cider.
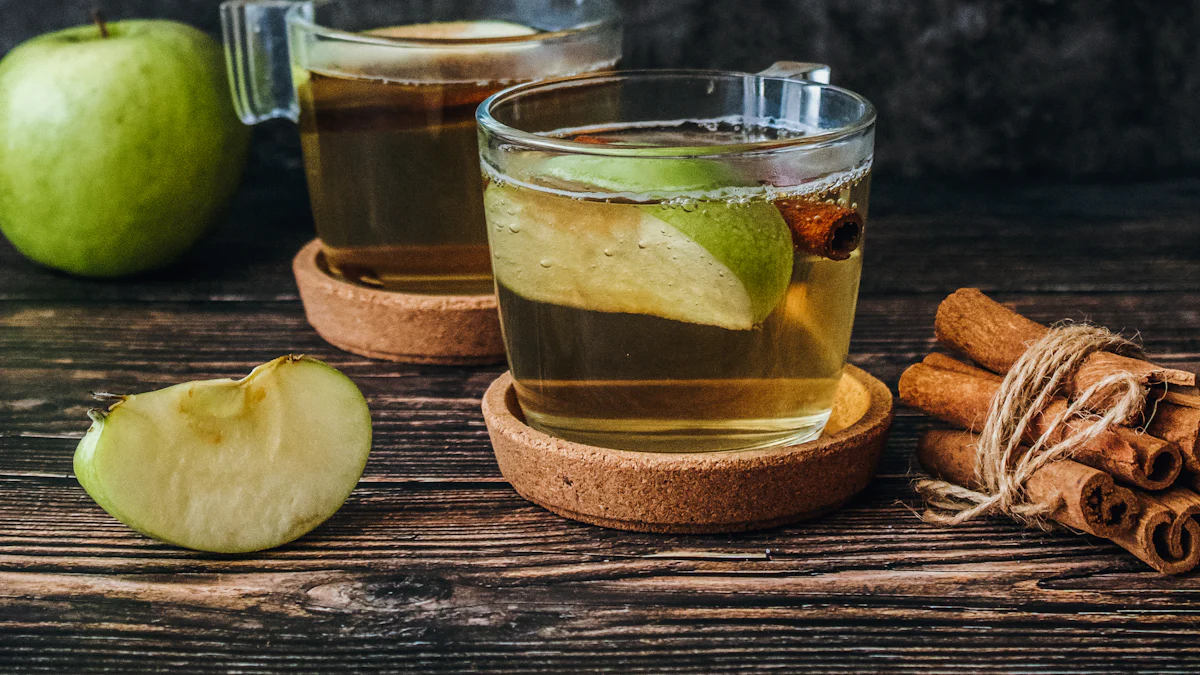
Enhancing Flavor with Spices and Fruits
One of the joys of making hard cider at home is the ability to customize flavors. Adding spices or fruits can elevate your cider, turning it into a unique creation that reflects your personal taste.
Spices for Seasonal Flair
Spices like cinnamon, cloves, nutmeg, and ginger can give your cider a warm, comforting flavor. These are especially popular for fall or winter batches. Add them during fermentation or steep them in the cider after fermentation for a more subtle infusion. Start with small amounts, as spices can quickly overpower the apple’s natural taste.
Fruits for a Fresh Twist
Fresh fruits or fruit juices can add vibrant flavors to your cider. Berries, pears, and cherries work well, complementing the apple base. For a tropical twist, try pineapple or mango. Chop the fruits and add them to the fermenter during secondary fermentation. This allows the cider to absorb the fruit’s essence without interfering with the primary fermentation process.
Balancing Sweetness and Acidity
If your cider tastes too dry, back-sweetening can help. Add honey, brown sugar, or even maple syrup to enhance sweetness. To balance the flavors, consider adding malic acid, which sharpens the cider’s crispness and highlights the apple’s natural tang.
Creative Tip: Experiment with combinations like cinnamon and pear or ginger and pineapple. These pairings can create complex, layered flavors that make your cider stand out.
By maintaining the right fermentation temperature, using a hydrometer, and experimenting with spices and fruits, you can craft a cider that’s truly your own. These tips not only improve the quality of your cider but also make the process more enjoyable and rewarding.
Troubleshooting Common Issues with Cider Fermenters
Even with careful preparation, challenges can arise during the cider-making process. Understanding how to address these issues ensures your cider turns out delicious and enjoyable. Let’s explore some common problems and how you can resolve them.
Addressing Fermentation Problems
Fermentation is the heart of cider making, but it doesn’t always go as planned. If your cider isn’t fermenting or seems off, don’t panic. Here are some common fermentation issues and how to fix them:
Fermentation Won’t Start
If you don’t see bubbling in the airlock within 48 hours, the yeast might not be active. This could happen due to improper yeast storage, low temperatures, or preservatives in the juice.- Solution: Check the temperature of your fermenter. Yeast thrives between 60°F and 75°F. If it’s too cold, move the fermenter to a warmer spot. Also, ensure your apple juice doesn’t contain preservatives like potassium sorbate, which can inhibit yeast activity. If needed, pitch a fresh batch of yeast.
Slow or Stuck Fermentation
Sometimes, fermentation starts strong but slows down or stops prematurely. This could result from low nutrient levels, incorrect pH, or insufficient yeast.- Solution: Test the cider’s pH. A pH below 3.0 or above 4.5 can hinder yeast performance. Adjust the pH using malic acid or calcium carbonate. Adding yeast nutrients can also help revive fermentation. Stirring the cider gently can reintroduce oxygen and encourage yeast activity.
Unpleasant Smells During Fermentation
A sulfur-like smell (resembling rotten eggs) can occur during fermentation. This often happens when yeast lacks nutrients.- Solution: Add yeast nutrients or diammonium phosphate (DAP) to the fermenter. These supplements provide essential nutrients for yeast health and reduce off-putting odors.
Pro Tip: Factors like fermentation temperature, initial pH, and yeast quantity significantly impact fermentation quality. Keeping these elements in check ensures a smoother process.
- Cloudy Cider After Fermentation
If your cider remains cloudy after fermentation, it might contain suspended yeast or fruit particles.- Solution: Rack the cider into a clean container, leaving sediment behind. For extra clarity, use a fining agent like bentonite or gelatin. Cold-crashing the cider by placing it in a refrigerator for a few days can also help particles settle.
By addressing these fermentation challenges promptly, you’ll maintain the quality of your cider and avoid unnecessary waste.
Preventing Bottling and Storage Issues
Bottling and storing cider come with their own set of challenges. Proper techniques ensure your cider stays fresh and safe to drink.
Over-Carbonation in Bottles
Over-carbonation can cause bottles to explode, creating a safety hazard. This usually happens when fermentation isn’t complete before bottling or when too much priming sugar is added.- Solution: Always confirm fermentation is complete by checking the specific gravity with a hydrometer. It should remain stable over several days. When adding priming sugar, measure carefully—1 ounce per gallon is a safe starting point.
Flat Cider After Bottling
If your cider lacks fizz, the yeast might not have enough sugar to produce carbon dioxide, or the bottles weren’t sealed properly.- Solution: Double-check your priming sugar measurements. Ensure the bottles are tightly sealed with caps or flip tops. Store the bottles at room temperature for at least two weeks to allow carbonation to develop.
Off-Flavors During Storage
Improper storage conditions can lead to oxidation, giving your cider a stale or cardboard-like taste.- Solution: Store your bottles in a cool, dark place. Avoid exposing them to sunlight or fluctuating temperatures. Use oxygen-absorbing caps for added protection.
Sediment in Bottles
Sediment at the bottom of your bottles is normal but can affect the drinking experience.- Solution: During bottling, leave the last bit of cider in the fermenter to avoid transferring sediment. Pour the cider gently when serving to keep the sediment undisturbed.
Quick Tip: Label your bottles with the bottling date. This helps you track aging and ensures you enjoy your cider at its peak flavor.
By staying vigilant during bottling and storage, you’ll preserve the quality of your cider and avoid common pitfalls. Troubleshooting these issues not only improves your cider-making skills but also makes the process more enjoyable.
Experimenting with Hard Cider Variations
Experimenting with hard cider opens up a world of creativity. You can transform a simple cider into something extraordinary by playing with flavors or trying new fermentation techniques. Let’s explore how you can take your cider-making skills to the next level.
Creating Flavored Ciders with Fruits and Spices
Adding fruits and spices to your cider is one of the easiest ways to create unique flavors. This step allows you to craft a drink that reflects your personal taste or matches a specific season.
Fruits for a Fresh Twist
Fruits can add vibrant, natural sweetness or tartness to your cider. Popular choices include berries, pears, and cherries. For a tropical vibe, try pineapple or mango. Chop the fruit into small pieces and add it during secondary fermentation. This method lets the cider absorb the fruit’s essence without interfering with the initial fermentation process.
For example, Huaniu apples, known for their rich aroma and sweetness, pair beautifully with tart fruits like cranberries. This combination creates a balanced cider with layers of flavor. If you’re feeling adventurous, mix multiple fruits to develop a more complex profile.
Spices for Seasonal Flair
Spices like cinnamon, cloves, nutmeg, and ginger can give your cider a warm, comforting touch. These are especially popular in fall or winter, evoking the cozy feeling of the holidays. Add spices during fermentation or steep them in the cider after fermentation for a subtler infusion. Start with small amounts to avoid overpowering the apple’s natural flavor.
Pro Tip: Combine cinnamon and pear for a fall-inspired cider or ginger and lime for a refreshing summer drink.
Balancing Sweetness and Acidity
If your cider tastes too dry, back-sweetening can help. Add honey, brown sugar, or maple syrup to enhance sweetness. To balance the flavors, consider adding malic acid. This sharpens the cider’s crispness and highlights the apple’s tangy notes.
By experimenting with fruits and spices, you can create ciders that stand out. Whether you aim for a bold, fruity punch or a subtle, spiced warmth, the possibilities are endless.
Exploring Different Fermentation Styles
Changing your fermentation style can dramatically alter the taste and texture of your cider. Each method brings its own character, allowing you to explore new dimensions of flavor.
Wild Fermentation
Wild fermentation relies on natural yeasts found on apple skins or in the air. This method produces a cider with complex, earthy flavors. It’s unpredictable but rewarding if you enjoy experimenting. To try this, skip adding commercial yeast and let the natural yeast take over. Keep in mind that wild fermentation may take longer and requires close monitoring.
Secondary Fermentation
Secondary fermentation involves transferring your cider to a new container after the initial fermentation. This step helps clarify the cider and allows you to add additional ingredients like fruits or spices. It also gives the cider more time to develop nuanced flavors. For example, adding Huaniu apple slices during secondary fermentation can enhance the cider’s natural sweetness and aroma.
Sparkling vs. Still Cider
Decide whether you want a sparkling or still cider. Sparkling cider requires adding priming sugar before bottling to create carbonation. Still cider skips this step, resulting in a smooth, flat drink. Both styles have their charm, so experiment to see which you prefer.
Temperature-Controlled Fermentation
Temperature plays a crucial role in fermentation. Cooler temperatures (around 59°F) produce a crisp, clean cider by slowing yeast activity. Warmer temperatures (up to 68°F) encourage faster fermentation and richer flavors. Using a stainless steel fermenter with temperature control can help you achieve consistent results.
Fun Fact: The global cider industry has grown significantly, with its value exceeding $500 million in 2020. This growth reflects the increasing popularity of diverse cider styles and flavors.
By exploring these fermentation techniques, you can discover new ways to enhance your cider. Each method offers unique opportunities to experiment and refine your craft.
Benefits of Making Hard Apple Cider at Home
Making homemade hard cider offers more than just a tasty beverage. It’s an experience that combines creativity, practicality, and enjoyment. Whether you’re looking to save money, explore unique flavors, or dive into a rewarding hobby, crafting your own cider at home has plenty of benefits.
Cost Savings Compared to Store-Bought Cider
Store-bought hard cider can be expensive, especially if you enjoy premium brands or specialty flavors. By making your own, you can significantly cut costs while still enjoying high-quality cider. The ingredients for a hard cider recipe are simple—apples or apple juice, yeast, and optional additives like sugar or spices. These are often much cheaper than purchasing pre-made cider.
If you have access to fresh apples, the savings become even greater. Many people start making cider at home to avoid wasting apples from their backyard trees. Instead of letting them rot, you can turn them into a delicious drink. Even if you don’t have your own apple supply, buying apples in bulk or using affordable apple juice makes homemade hard cider a budget-friendly option.
“Good hard cider can be made at home with minimal equipment and experience.” This means you don’t need to invest heavily in tools to get started. A basic fermenter, an airlock, and some bottles are enough to begin your cider-making journey. Over time, the money you save on store-bought cider will more than cover the cost of your equipment.
Customizing Flavors to Your Preferences
One of the best parts of making homemade hard cider is the ability to tailor it to your taste. Store-bought ciders often come in limited flavors, but when you make your own, the possibilities are endless. You control every aspect of the recipe, from the type of apples you use to the spices and sweeteners you add.
Do you prefer a tart cider with a crisp finish? Use Granny Smith apples or add malic acid to enhance the tanginess. Want something sweeter? Blend in honey, brown sugar, or even maple syrup. You can also experiment with fruits like berries or pears to create unique flavor combinations. For a seasonal twist, try adding cinnamon, cloves, or nutmeg to your recipe.
Pro Tip: Start with a basic hard cider recipe and tweak it with small adjustments. This way, you can discover what works best for your palate without overwhelming the natural apple flavors.
Customizing your cider also allows you to explore different fermentation styles. You can make a sparkling cider for a festive occasion or a still cider for a smooth, easy-drinking experience. The freedom to experiment ensures that every batch of cider you make is uniquely yours.
Enjoying a Fun and Rewarding Hobby
Cider-making isn’t just about the end product—it’s about the process. Turning simple ingredients into a flavorful drink feels incredibly satisfying. The steps, from selecting apples to bottling your cider, engage your creativity and teach you new skills. It’s a hobby that combines science and art, giving you a deeper appreciation for the craft.
For beginners, the simplicity of cider-making is encouraging. You don’t need advanced knowledge or expensive tools to get started. Even novice homebrewers can produce good cider with basic equipment and a straightforward recipe. As you gain experience, you can experiment with more complex techniques and ingredients, making the hobby even more exciting.
Sharing your homemade hard cider with friends and family adds another layer of enjoyment. It’s a great conversation starter and a way to showcase your creativity. Plus, the pride of saying, “I made this myself,” makes every sip taste even better.
Fun Fact: Many people find cider-making therapeutic. The process of measuring, mixing, and monitoring fermentation provides a relaxing escape from daily stress.
By making homemade hard cider, you’re not just saving money or creating a drink—you’re embracing a hobby that’s fun, fulfilling, and endlessly customizable. Whether you’re crafting a cider for a special occasion or experimenting with a new recipe, the journey is as rewarding as the destination.
Storing and Serving Your Homemade Hard Cider
Proper Storage Techniques for Bottled Cider
Storing your homemade hard cider correctly ensures it stays fresh and flavorful for as long as possible. After bottling, you need to take a few steps to maintain its quality and prevent spoilage.
First, always use clean and sanitized bottles. Whether you choose 64-ounce growlers with lids, flip-top Grolsch bottles, or standard 12-ounce bottles with pop-off caps, cleanliness is key. Wash the bottles thoroughly with warm water and a mild detergent, then sanitize them using a food-grade sanitizer like Star San. This step eliminates bacteria and wild yeast that could spoil your cider.
When filling your bottles, leave minimal headspace. A brim-full container reduces air contact, which helps prevent oxidation. Oxidation can dull the cider’s flavor and give it an unpleasant, stale taste. If you’re planning to store your cider for an extended period, consider adding Campden tablets before bottling. These tablets help stabilize the cider and reduce the risk of spoilage.
Store your bottled cider in a cool, dark place. Direct sunlight and fluctuating temperatures can degrade the cider’s quality. A basement or pantry works well, as long as the temperature remains stable. Ideally, keep the cider at around 50°F to 60°F. If you’ve carbonated your cider, refrigeration after the carbonation process is complete will help preserve its fizz and flavor.
Pro Tip: Label your bottles with the bottling date and any unique ingredients or flavors you added. This makes it easier to track aging and experiment with different batches.
By following these storage techniques, you’ll ensure your cider tastes just as good weeks or even months after bottling.
Serving Suggestions and Food Pairings
Serving your homemade hard cider is an opportunity to showcase your creation and elevate the drinking experience. The way you serve it and the foods you pair it with can make all the difference.
Serving Your Cider
Chill your cider before serving. A temperature of 45°F to 50°F brings out the crisp, refreshing flavors without muting the apple’s natural aroma. Use a clean glass to serve your cider. A tulip-shaped glass or a wine glass works best, as it concentrates the aromas and enhances the tasting experience. Pour the cider gently to avoid disturbing any sediment at the bottom of the bottle.
If you’ve made a sparkling cider, pour slowly to preserve the bubbles. For still cider, focus on the clarity and color as you pour. Both styles have their charm, so choose the one that suits the occasion.
“Presentation matters as much as taste,” as many cider enthusiasts say. A well-served cider feels more special and enjoyable.
Perfect Food Pairings
Pairing your cider with the right food can enhance its flavors and create a memorable meal. The versatility of hard cider makes it an excellent companion for a variety of dishes.
- Cheese Platters: Hard cider pairs beautifully with cheese. A crisp, dry cider complements sharp cheddar or aged gouda, while a sweeter cider balances the creaminess of brie or camembert.
- Grilled Meats: The smoky flavors of grilled chicken, pork, or sausages work well with cider’s fruity notes. For a bold pairing, try cider with barbecue ribs or pulled pork.
- Seafood: Light, sparkling ciders enhance the delicate flavors of seafood like shrimp, scallops, or grilled salmon. Add a squeeze of lemon for an extra burst of freshness.
- Desserts: Sweet ciders shine when paired with desserts. Apple pie, caramel tarts, or cinnamon-spiced pastries create a harmonious match. For a unique twist, serve cider with dark chocolate or fruit sorbet.
Fun Fact: In traditional cider-making regions like Normandy, cider is often served with crepes or savory galettes. This pairing highlights the cider’s rustic charm.
By storing your cider properly and serving it with care, you’ll elevate the entire experience. Whether you’re enjoying it on your own or sharing it with friends, these tips ensure every sip is as delightful as the first.
Making cider with fermenters at home offers more than just a tasty drink—it’s a journey filled with creativity and satisfaction. You get to transform simple ingredients into something uniquely yours, experimenting with flavors and techniques along the way. Whether you’re using apples from your backyard or exploring new recipes, the process connects you to a timeless craft. With tools like Chenma’s stainless steel tanks, you can elevate your homemade cider experience. So, embrace the adventure, enjoy the learning, and savor the reward of sharing your creation with friends and family.
FAQ
What’s the best piece of advice for an aspiring cider maker?
Start simple and focus on the basics. Use high-quality ingredients, like fresh apples or pure apple juice, and ensure your equipment is clean and sanitized. Don’t rush the process—fermentation takes time, and patience often leads to better results. Experimenting is part of the fun, but mastering the fundamentals first will set you up for success.
Can I make probiotic-rich cider at home?
Yes, you can! Apples naturally contain a variety of microbes, including lactic acid bacteria, which contribute to probiotics. To preserve these beneficial microorganisms, avoid using sulfur dioxide (SO2) or pasteurizing your cider. This approach allows the probiotics to remain intact from the apple to the finished cider. Keep in mind that probiotic-rich ciders are rare commercially, so making your own gives you full control over the process.
Fun Fact: A single apple contains over 100,000 different microbes, most of which are found in the core. Including the core in your cider-making process can enhance its probiotic content.
What type of apple juice should I use for cider making?
Choose apple juice that is 100% pure, with no added preservatives like potassium sorbate or sodium benzoate. These chemicals can interfere with fermentation. If possible, source juice from local orchards or press your own apples for the freshest flavor. Minimally processed juice works best, as it retains more of the apple’s natural sugars and aromas.
Pro Tip: If you’re buying juice from a store, check the label carefully to ensure it’s free of preservatives. Fresh, unfiltered juice often produces the most flavorful cider.
How do I know if my cider is fermenting properly?
Fermentation usually starts within 24 to 48 hours. You’ll notice bubbling in the airlock, which indicates that the yeast is converting sugars into alcohol and carbon dioxide. If you don’t see activity after two days, check the temperature of your fermenter. Yeast thrives between 60°F and 75°F. If it’s too cold, move the fermenter to a warmer spot. Also, ensure your juice doesn’t contain preservatives that might inhibit yeast activity.
Can I make cider without specialized equipment?
Absolutely! While specialized tools like fermenters and hydrometers make the process easier, you can start with basic kitchen items. A sanitized glass jug, a balloon with a pinhole (as a makeshift airlock), and clean bottles work for small batches. As you gain experience, investing in proper equipment will improve your results and make the process more efficient.
How do I add flavors like spices or fruits to my cider?
You can add spices or fruits during secondary fermentation. For spices, steep them in the cider for a few days to infuse their flavors. Popular choices include cinnamon, cloves, and nutmeg. For fruits, chop them into small pieces and add them directly to the fermenter. This method allows the cider to absorb the fruit’s essence without disrupting the primary fermentation process.
Creative Tip: Try combinations like ginger and lime for a refreshing summer cider or cinnamon and pear for a cozy fall drink.
Is it better to use whole apples or store-bought juice?
Using whole apples gives you complete control over the flavor and quality of your cider. If you have access to fresh apples, pressing your own juice is ideal. However, store-bought juice can be a convenient alternative. Just make sure it’s minimally processed and free of preservatives. Both options can produce excellent cider when handled properly.
Quick Tip: If you’re using whole apples, mix sweet, tart, and aromatic varieties for a balanced flavor profile.
Why does my cider smell like rotten eggs during fermentation?
A sulfur-like smell often occurs when yeast lacks nutrients. This issue is common in cider making but can be resolved easily. Add yeast nutrients or diammonium phosphate (DAP) to the fermenter. These supplements provide essential nutrients for yeast health and reduce unpleasant odors.
How long does cider take to ferment?
Primary fermentation typically takes 10 to 14 days, but it can vary depending on the temperature and yeast strain. After primary fermentation, you can let the cider age for several weeks or months to develop more complex flavors. Use a hydrometer to check the specific gravity and ensure fermentation is complete before bottling.
Still have questions about making hard cider at home?
Don’t worry—you’re not alone! Cider making can feel overwhelming at first, but it gets easier with practice. If you’re stuck or unsure about a step, leave a comment below, and I’ll do my best to help you out. Remember, every batch is a learning experience, so enjoy the process and have fun experimenting!