When it comes to heating your home, stainless steel oil tank offers unmatched durability and efficiency. These tanks resist corrosion, ensuring they last longer and perform better. Plus, their design prioritizes safety, giving you peace of mind. Proper installation is key to maximizing these benefits. Always rely on a licensed professional to ensure safety considerations are met. Regular maintenance also keeps your tank in top shape, preventing costly issues down the road.
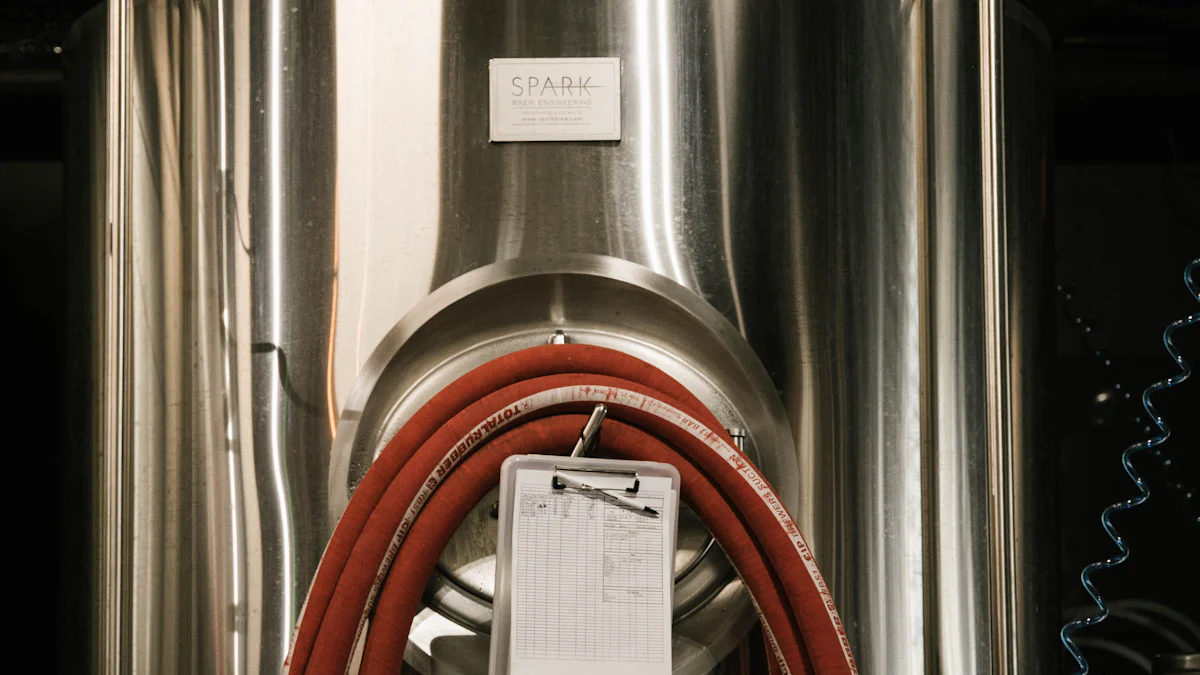
Chenma is one of the professional stainless steel wine tank manufacturers that can provide wineries with a variety of solutions.
What Are Stainless Steel Residential Oil Tanks?
Features of Stainless Steel Tanks
Stainless steel residential oil tanks are built with advanced materials and designs to ensure durability and safety. These tanks often use high-quality stainless steel, such as 304 or 316L, which resists corrosion and prevents contamination. Their seamless construction and solid structure make them highly reliable for storing heating oil.
Here are some standout features of these tanks:
- Exceptional corrosion resistance, even in harsh environments.
- Smooth, seamless surfaces that are easy to clean and maintain.
- Flexible designs, available in vertical or horizontal shapes to suit your space.
- Advanced safety features, like fusible link valves and optical leak alarms.
For a closer look at their technical specifications, check out the table below:
| Specification | Details |
|---|---|
| Outer Tank Material | Weld-free galvanized steel |
| Inner Tank Material | Seamless high-density polyethylene |
| Leak Alarm | Highly visible optical leak alarm |
| Weight | 55% lighter than a 12-gauge steel tank |
| Corrosion Resistance | Corrosion-resistant steel filling system |
| Burner Feeding System | Fusible link valve and check valve |
| Warranty | 30 years with 10 years insurance, $2 million clean-up policy |
Benefits Over Traditional Oil Tanks
Stainless steel residential oil tanks outperform traditional tanks in several ways. Their superior materials and design make them a better choice for long-term use. Here’s how they compare:
| Feature | Stainless Steel Tanks | Traditional Oil Tanks |
|---|---|---|
| Corrosion Resistance | Highly resistant due to chromium and nickel | Prone to corrosion in harsh environments |
| High-Temperature Performance | Withstands up to 700°C without deformation | Limited performance at high temperatures |
| Hygiene | Smooth, seamless, and easy to clean | Prone to impurities and bacterial growth |
These advantages mean fewer maintenance issues and a longer lifespan for your tank. Plus, the enhanced safety features reduce the risk of leaks or spills, protecting your home and the environment.
Why Homeowners Prefer Stainless Steel
You might wonder why stainless steel residential oil tanks are so popular among homeowners. The answer lies in their reliability and efficiency. These tanks last longer, require less maintenance, and provide peace of mind. Their corrosion resistance ensures they stay in excellent condition, even after years of use. Additionally, their sleek design and customizable shapes make them a practical and attractive choice for any home.
By choosing stainless steel, you’re investing in a tank that delivers top-notch performance while safeguarding your heating system. It’s no surprise that more homeowners are making the switch to stainless steel residential oil tanks.
How to Choose the Right Residential Oil Tank
Determining the Right Size for Your Home
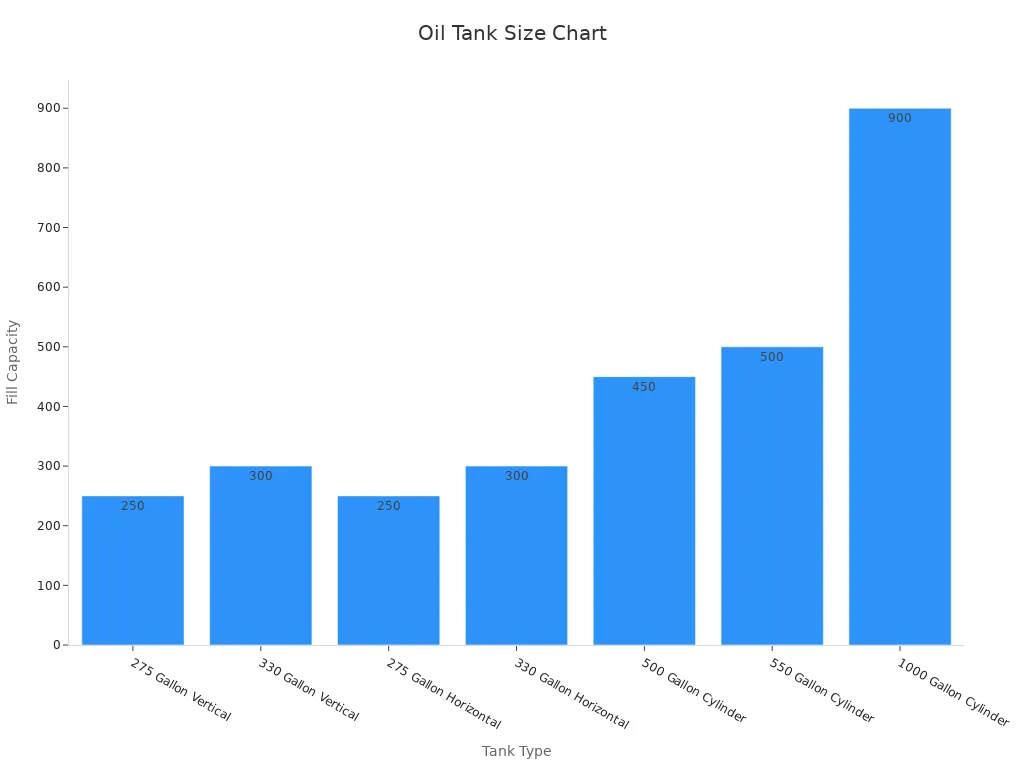
Choosing the right size for your residential oil tank is crucial. A tank that’s too small may require frequent refills, while an oversized tank could lead to unnecessary costs. The size you need depends on your home’s heating requirements and available space. Here’s a quick guide to help you decide:
| Tank Size (Gallons) | Typical Fill Capacity (Gallons) |
|---|---|
| 275 Gallon Vertical | 250 |
| 330 Gallon Vertical | 300 |
| 275 Gallon Horizontal | 250 |
| 330 Gallon Horizontal | 300 |
| 500 Gallon Cylinder | 450 |
| 550 Gallon Cylinder | 500 |
| 1000 Gallon Cylinder | 900 |
For a visual comparison, check out the chart below:
When selecting a size, consider your household’s annual oil consumption and the space available for installation. A professional installer can also help you make the best choice.
Above Ground vs. Underground Oil Tanks
Deciding between an above ground oil tank and an underground option depends on your priorities. Above ground oil tanks are easier to install and maintain. They allow for quick inspections and leak detection. On the other hand, underground tanks are less visible and better protected from external damage.
Here’s a comparison to help you weigh your options:
| Aspect | Above-Ground Tanks (ASTs) | Underground Tanks (USTs) |
|---|---|---|
| Installation | Easier and quicker installation | More invasive installation process |
| Maintenance | More accessible for maintenance and inspections | Harder to access for maintenance |
| Environmental Impact | Easier leak detection, less invasive to environment | Better protection from external damage |
| Safety | Better visibility for inspections | More protected from physical damage, but harder to detect leaks |
If you prefer convenience and visibility, an above ground oil tank might be the better choice. However, if aesthetics and space-saving are your priorities, an underground tank could work well.
Compatibility with Heating Systems
Your residential oil tank must work seamlessly with your heating system. Most modern tanks are designed to meet American Petroleum Institute (API-650) standards, ensuring compatibility with a wide range of systems. Whether you have a furnace or a boiler, make sure the tank’s design and capacity align with your heating needs.
| Feature | Description |
|---|---|
| Design Standards | Built according to the American Petroleum Institute API-650 specification. |
| Size Range | Available in sizes from 2 to 60 meters in diameter. |
| Purpose | Serves both commercial and domestic purposes. |
Consult your heating system’s manual or speak with a professional to confirm compatibility. This step ensures efficient heating and prevents potential issues down the line.
Understanding Regulations and Permits
Local Building Codes for Oil Tank Installation
Before installing a residential oil tank, you need to understand your local building codes. These codes ensure the tank is installed safely and meets zoning requirements. Most municipalities require tanks to be placed a certain distance from structures, property lines, and ignition sources. Some areas also mandate secondary containment systems to prevent spills.
To comply with these rules, check with your local building department. They’ll provide specific guidelines for your area. You might also need a building permit, which confirms your installation plan aligns with local regulations. Following these codes not only keeps your home safe but also avoids fines or penalties.
Environmental Compliance for Residential Oil Tanks
Environmental regulations play a big role in oil tank installations. The U.S. Environmental Protection Agency (EPA) has strict rules for underground storage tanks (USTs). These include leak monitoring and immediate reporting of contamination. Aboveground tanks (ASTs) must meet standards for corrosion control and fire protection, as outlined by the Steel Tank Institute (STI).
Here’s a quick overview of key regulations:
- EPA rules for USTs are detailed in 40 CFR Part 280, covering technical requirements.
- Financial responsibility for cleanup is addressed in 40 CFR Part 281.
- State program approvals are outlined in 40 CFR Parts 282.50-282.105.
By following these guidelines, you protect the environment and avoid costly cleanup fees.
How to Obtain Necessary Permits
Getting permits for oil tank installation is straightforward if you know what to expect. Most municipalities require a building permit to ensure compliance with local codes. Some towns also ask for a fire department permit to address safety concerns. After installation, inspections verify the tank meets all requirements.
| Type of Permit | Description |
|---|---|
| Building Permit | Ensures compliance with local building codes and zoning laws. |
| Fire Department Permit | Addresses potential fire hazards associated with oil tank installation. |
| Inspections | Conducted by local inspectors to verify proper installation. |
Contact your local authorities to learn about the permits you need. Proper documentation ensures a smooth installation process and keeps your project on track.
Preparing for Oil Tank Installation
Choosing the Best Location for Your Tank
Picking the right spot for your tank is one of the most important steps in oil tank installation. You want a location that’s both practical and safe. Start by considering accessibility. The tank should be easy to reach for refilling and maintenance. If you’re installing an above-ground tank, place it in an area with enough space for inspections and repairs. For underground tanks, choose a spot that won’t interfere with landscaping or other utilities.
Safety is another key factor. Keep the tank away from ignition sources like furnaces or electrical panels. Many local building codes also require a minimum distance between the tank and your home or property lines. Check these regulations before finalizing the location.
Ensuring a Stable and Safe Installation Site
A stable site ensures your tank stays secure and functions properly. For above-ground tanks, the surface must be level and strong enough to support the tank’s weight when full. Concrete pads or compacted gravel bases work well. If you’re installing an underground tank, make sure the soil is firm and free of debris.
Here’s a quick checklist to prepare the site:
- Ensure the tank is level and stable before installation.
- Connect the regulator and vent pipes as per manufacturer instructions.
- Have the local fire department inspect and approve the tank before use.
These steps help prevent accidents and ensure your tank operates efficiently.
Preparing the Area for Installation
Before installation day, clear the area of any obstacles. Remove debris, plants, or anything that could interfere with the process. If you’re installing an underground tank, mark the location of utility lines to avoid damage. For above-ground tanks, make sure there’s enough room for the tank and any necessary equipment.
You’ll also need the proper permits. Most municipalities require a building permit to ensure compliance with local codes. In some areas, you might also need a fire department permit. Once the tank is installed, inspections by local authorities will confirm everything meets safety standards.
By preparing the area thoroughly, you’ll make the installation process smoother and safer.
Step-by-Step Installation of an Above Ground Oil Tank
Positioning and Securing the Tank
Positioning your above ground oil tank correctly is the first step to a successful installation. Start by marking the tank’s coordinates and circumference using a measuring tape and chalk. This ensures the tank is placed precisely where it needs to be. Lay the annular plate according to the approved drawing, keeping the outer radius slightly positive (5 to 10 mm). This adjustment accounts for weld shrinkage and ensures a secure fit.
Use a crane, such as a crawler or hydra, to position the tank safely. Professional fitters should handle the alignment of the annular plate joints, using proper jigs and fixtures. Weld the joints in alternating quadrants to maintain balance and stability. Qualified welders should perform this task following the Welding Procedure Specification (WPS). Once the welding is complete, conduct non-destructive testing, like radiography, to ensure the tank meets API-650 and ASME standards.
Installing Safety Features and Accessories
Safety features are essential for your above ground oil tank. Install a fusible link valve to prevent oil flow in case of a fire. Add an optical leak alarm to detect leaks early and avoid environmental damage. These features not only protect your home but also comply with EPA regulations, which require regular testing for leaks and corrosion.
The Steel Tank Institute (STI) has developed standards to ensure tanks meet safety, fire, and environmental codes. By following these guidelines, you can trust that your tank is equipped to handle potential risks. Don’t skip this step—it’s crucial for long-term peace of mind.
Finalizing the Installation Process
The final step in the installation process is ensuring everything is secure and functional. Double-check all connections, including the vent and fill pipes. Test the tank for leaks by filling it partially and inspecting for any signs of oil seepage. Once you’re confident everything is in place, schedule an inspection with your local authorities. This step confirms that your installation complies with building codes and safety standards.
By following these steps, you’ll have a reliable and efficient above ground oil tank ready to serve your home’s heating needs.
Connecting the Oil Tank to Your Heating System
Linking the Tank to the Oil Supply Line
Connecting your oil tank to the supply line is a critical step in the installation process. Start by ensuring the tank is securely positioned and leveled. This stability prevents any shifting that could disrupt the connection. Next, locate the correct connection points between your heating appliance and the tank. Once identified, attach the supply pipe to the tank’s fill point. Make sure all connections are tight and supported to avoid any fuel leaks.
Follow these steps for a smooth connection process:
- Secure the tank in its designated position.
- Identify the connection points for the supply line.
- Attach the supply pipe to the tank’s fill point.
- Tighten and support all connections.
- Test for leaks before proceeding.
- Install a venting system as per local regulations.
- Check for spill containment requirements.
- Add an alarm system for safety.
Taking these precautions ensures your above ground oil tank operates efficiently and safely.
Testing for Leaks and Ensuring Proper Flow
Testing for leaks is essential to maintain the integrity of your tank and prevent fuel loss. Begin by partially filling the tank and inspecting all connections for any signs of seepage. Monthly leak detection monitoring is recommended to catch issues early. If repairs are made, test the tank for tightness within 30 days to confirm everything is secure. Secondary containment areas should also undergo testing to ensure they meet safety standards.
Here’s what you should do:
- Inspect all connections regularly.
- Test for leaks after repairs or adjustments.
- Monitor for leaks monthly to maintain safety.
- Ensure spill prevention equipment is functioning properly.
These steps not only protect your home but also help you comply with environmental regulations.
Completing the Connection to the Heating System
Once the tank is securely connected and tested, it’s time to link it to your heating system. Check your heating appliance’s manual to confirm compatibility with the tank. Attach the fuel line to the appliance, ensuring a tight seal to prevent leaks. After connecting, test the flow of fuel to verify proper operation. If the flow is consistent and there are no leaks, your system is ready to go.
Double-check all connections and schedule a professional inspection if needed. This final step ensures your above ground oil tank is fully integrated with your heating system, providing reliable fuel delivery for your home.
Maintenance and Care for Stainless Steel Residential Oil Tanks
Regular Inspections for Corrosion and Damage
Regular inspections are the backbone of keeping your tank in excellent condition. You should check for signs of corrosion, dents, or leaks at least once a month. Pay close attention to the tank’s seams and connections, as these areas are more prone to wear and tear. If you spot any rust or damage, address it immediately to prevent further issues.
Keeping the tank free of water is another critical step. Water can lead to rust and encourage microbial growth, which may damage the tank’s interior and contaminate the stored oil. A quick inspection of the tank’s vent and fill pipes can help you identify and resolve moisture-related problems early.
Tip: Use a flashlight to inspect hard-to-see areas and ensure no hidden damage goes unnoticed.
Cleaning and Removing Sediment Build-Up
Over time, sediment and sludge can accumulate at the bottom of your tank. This build-up can clog the oil supply line and reduce the tank’s efficiency. Regular cleaning is essential to remove these contaminants and maintain the quality of the stored oil. Professional cleaning services are highly effective for this task. They not only remove harmful sediments but also ensure compliance with safety regulations.
Cleaning also extends the tank’s lifespan by preventing structural damage caused by corrosive substances. By scheduling sediment removal every few years, you can optimize your tank’s storage capacity and avoid costly repairs.
Scheduling Professional Maintenance
While regular inspections and cleaning are tasks you can handle, professional maintenance is a must for long-term care. A professional technician can perform a thorough check-up, including testing for leaks, inspecting safety features, and ensuring the tank complies with local regulations. They also have the tools and expertise to address issues you might miss during routine checks.
Scheduling professional maintenance annually is a smart move. It not only keeps your tank in top shape but also gives you peace of mind knowing that your heating system is running safely and efficiently.
When to Consider Oil Tank Replacement
Signs Your Tank Needs Replacement
Knowing when to replace your oil tank can save you from unexpected issues. Look for signs like rust, dents, or leaks on the tank’s surface. If you notice oil pooling around the base, it’s a clear indicator of a problem. Frequent repairs or inconsistent heating performance might also mean it’s time for a replacement. Older tanks, especially those over 15 years old, are more prone to wear and tear. Regular inspections can help you catch these warning signs early.
Another red flag is water contamination inside the tank. This can lead to corrosion and damage the oil supply line. If you spot water during routine checks, it’s best to consult a professional. Don’t wait for a small issue to turn into a costly emergency.
Benefits of Upgrading to a New Tank
Upgrading to a new above ground oil tank offers several advantages. Modern stainless steel tanks are built to last longer and perform better. They resist corrosion, maintain structural integrity, and are easier to clean. Recent advancements, like double-walled designs, provide added safety by containing leaks and protecting the environment.
Here’s how a new tank compares to older models:
| Feature | Stainless Steel Tanks | Traditional Oil Tanks |
|---|---|---|
| Corrosion Resistance | High due to chromium and nickel content | Low, prone to rust and degradation |
| Temperature Performance | Withstands up to 700°C without deformation | Limited high-temperature performance |
| Lifespan | Significantly longer due to durability | Shorter lifespan, requires more frequent replacement |
Switching to a modern tank also improves efficiency and reduces maintenance costs. It’s an investment that pays off in the long run.
Choosing a Replacement Tank
Selecting the right replacement oil tank involves a few key considerations. First, check your local building codes to ensure compliance. You may need permits, such as a building permit or a fire department permit, depending on your area. Environmental regulations might also apply, especially for disposing of old tanks or contaminated soil.
When choosing a new tank, think about your heating needs and available space. Above ground oil tanks are a popular choice because they’re easier to install and maintain. Stainless steel models are especially reliable, offering enhanced durability and safety features. Consult a professional to find a tank that fits your home and heating system perfectly.
By replacing your old tank with a modern one, you’ll enjoy better performance, fewer headaches, and peace of mind.
Stainless steel residential oil tanks offer unmatched durability, safety, and efficiency. Their corrosion resistance, high-temperature performance, and hygiene benefits make them a top choice for homeowners:
| Advantage | Description |
|---|---|
| Corrosion Resistance | High chromium and nickel content provides excellent resistance to corrosion in harsh environments. |
| High-Temperature Performance | Can withstand temperatures up to 700°C, maintaining stability without deformation. |
| Hygiene and Cleanliness | Smooth, seamless inner walls prevent impurity accumulation and meet hygiene standards. |
Professional installation and regular maintenance ensure your tank performs at its best. Don’t hesitate to consult experts for guidance. Their expertise guarantees a safe and efficient setup, giving you peace of mind. 😊
FAQ
How often should you inspect your stainless steel oil tank?
Inspect your tank monthly for corrosion, leaks, or dents. Regular checks prevent costly repairs and ensure safe operation. Don’t skip this step—it’s essential.
Can you install an oil tank yourself?
No, you shouldn’t. Professional installation ensures compliance with local codes, safety standards, and environmental regulations. It also guarantees proper setup for efficient heating.
What’s the lifespan of a stainless steel residential oil tank?
Most stainless steel tanks last 20-30 years. Their corrosion resistance and durability make them a long-term investment for your home’s heating needs.