A cider fermenting bucket is a game-changer in making cider from apples. This food-grade container ensures a clean and controlled environment for fermentation, which is crucial for producing high-quality cider. Unlike traditional methods, it simplifies the process by minimizing contamination risks and maintaining consistency. Whether you’re new to cider making or refining your craft, this tool boosts your confidence. With just fresh-pressed apple juice, yeast, and patience, you can start making hard cider at home. The journey of transforming apples into delicious cider begins with the right equipment.
Understanding the Role of a Cider Fermenting Bucket
Key features of a cider fermenting bucket
A cider fermenting bucket is more than just a container; it is a purpose-built tool designed to streamline the cider-making process. These buckets are typically made from food-grade plastic, ensuring they are safe for handling liquids intended for consumption. Their durable construction allows them to withstand the rigors of fermentation without compromising the quality of your cider.
One of the standout features is the inclusion of an airlock system. This system consists of a rubber stopper and an airlock that fits snugly into the lid of the bucket. The airlock allows carbon dioxide, a byproduct of fermentation, to escape while preventing air and contaminants from entering. This ensures a controlled environment for the yeast to work its magic during apple cider fermentation.
Many fermenting buckets also come with volume markings on the side. These markings help you measure your cider accurately, making it easier to follow recipes or experiment with different quantities. Additionally, the wide opening at the top of the bucket simplifies cleaning and allows you to add ingredients or stir the mixture with ease.
Benefits of using a fermenting bucket for apple cider fermentation
Using a fermenting bucket offers several advantages that make it an essential tool for cider enthusiasts. First, it provides a clean and controlled environment for fermentation. The food-grade material prevents unwanted reactions with the cider, ensuring the final product tastes as intended. The airlock system further enhances this by minimizing the risk of contamination.
The bucket’s design also makes the fermentation process more manageable. Its lightweight nature allows you to move it easily, even when filled with liquid. The wide opening simplifies transferring cider to other containers, such as glass carboys, for secondary fermentation or bottling. A funnel can be used during this process to prevent spillage, saving both time and effort.
Another benefit is the bucket’s versatility. It serves as an excellent primary fermentation vessel, accommodating large batches of cider. Whether you’re a beginner or an experienced cider maker, the bucket’s user-friendly features make it a reliable choice. You can focus on perfecting your recipe without worrying about the technical challenges of fermentation.
Essential Tools and Ingredients for Making Cider from Apples
Equipment needed alongside the cider fermenting bucket
To achieve successful cider production, you need more than just a cider fermenting bucket. A few additional tools will make the process smoother and ensure your cider turns out as intended. Here’s a list of essential equipment to accompany your fermentation vessel:
- Airlock and Rubber Stopper: These are crucial for maintaining a controlled fermentation environment. The airlock allows carbon dioxide to escape while keeping contaminants out.
- Funnel: A funnel simplifies transferring fresh-pressed apple cider into the fermenting bucket without spilling.
- Hydrometer: This tool measures the sugar content in your cider, helping you track fermentation progress and determine alcohol levels.
- Siphon or Auto-Siphon: Use this to transfer cider from the fermenting bucket to bottles or secondary containers without disturbing the sediment.
- Sterilizer or Sanitizer: Cleanliness is vital in cider production. A sterilizer ensures all equipment remains free of harmful bacteria or wild yeast.
- Bottles and Caps: Once fermentation is complete, you’ll need bottles to store your cider. Glass bottles with caps or swing tops work best for preserving carbonation.
- Measuring Spoons and Cups: These help you accurately measure ingredients like sugar or yeast.
Each piece of equipment plays a specific role in the cider-making process. Together, they create a seamless workflow, from juice extraction to bottling.
Ingredients required for fermenting cider
The ingredients for fermenting cider are simple yet essential. Each one contributes to the transformation of fresh-pressed apple cider into a flavorful beverage. Here’s what you’ll need:
- Fresh-Pressed Apple Cider: This is the foundation of your cider. Opt for unpasteurized juice for the best results, as it retains natural sugars and flavors. If you’re extracting juice yourself, ensure the apples are clean and free of debris.
- Yeast: Yeast drives the fermentation process by converting sugar into alcohol and carbon dioxide. You can choose from a variety of yeast strains, each offering unique flavor profiles. For beginners, commercial cider yeast is a reliable option.
- Sugar (Optional): Adding sugar can adjust the sweetness or dryness of your cider. For a dry cider, use less sugar. For a sweeter result, increase the amount slightly.
- Campden Tablets: These tablets help eliminate unwanted bacteria or wild yeast in the juice before fermentation begins. They ensure a clean slate for your chosen yeast to thrive.
- Water (Optional): In some cases, you may need water to dilute overly concentrated juice or adjust the flavor balance.
These ingredients work together to create a harmonious fermentation process. By carefully selecting and preparing them, you set the stage for a successful batch of cider.
Step-by-Step Guide to Apple Cider Fermentation
Preparing your cider fermenting bucket and tools
Start by ensuring your cider fermenting bucket and all tools are clean and sanitized. This step is crucial to prevent unwanted bacteria or wild yeast from interfering with the fermentation process. Use a food-grade sanitizer to clean the fermentation vessel, airlock, funnel, and any other equipment you plan to use. Rinse thoroughly to remove any residue.
Once sanitized, assemble your fermenting cider setup. Attach the airlock to the lid of the fermenting bucket. Fill the airlock with water or a sanitizer solution to create a barrier that allows carbon dioxide to escape while keeping oxygen and contaminants out. This setup ensures a stable and clean environment for fermentation.
Place the bucket on a stable surface in a location with a consistent temperature. Fermentation thrives in temperatures between 60°F and 75°F. Avoid areas with direct sunlight or fluctuating temperatures, as these can disrupt the process. With your tools and cider fermenting bucket ready, you’ve set the stage for a successful fermentation journey.
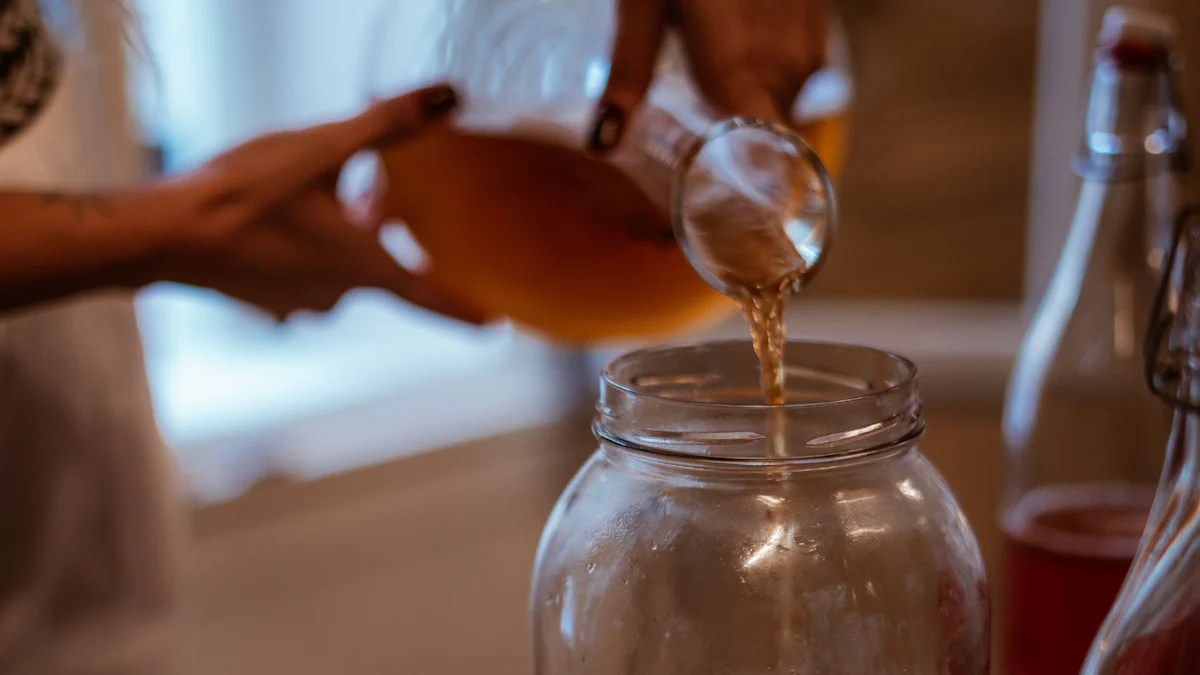
Starting the fermentation process
To begin the step-by-step fermentation process, pour fresh-pressed apple cider into the prepared fermentation vessel. If you’re using unpasteurized juice, it’s ideal for retaining natural sugars and flavors. For pasteurized juice, consider adding Campden tablets to eliminate any unwanted microorganisms before introducing yeast.
Next, add your chosen yeast to the cider. Sprinkle the yeast evenly over the surface of the juice. Different yeast strains can produce varying flavor profiles, so select one that aligns with your taste preferences. Stir gently to mix the yeast into the cider without introducing too much air.
Seal the fermenting bucket with its lid and ensure the airlock is securely in place. The yeast will begin converting the sugars in the cider into alcohol and carbon dioxide. Within 24 to 48 hours, you should notice bubbling in the airlock, indicating active fermentation. This marks the transformation of apple juice into hard cider.
Monitoring and managing the fermentation
During fermentation, monitor the progress daily. Check the airlock for consistent bubbling, which signals that the yeast is actively working. The bubbling may slow down after a few days, but this is normal as the fermentation process progresses.
Keep the fermentation vessel undisturbed to allow sediment, known as lees, to settle at the bottom. Moving the bucket too often can mix the lees back into the cider, affecting its clarity and flavor. If you notice excessive foam or yeast pushing through the airlock, clean it promptly to maintain a clean environment.
After one to two weeks, use a hydrometer to measure the cider’s specific gravity. This tool helps you track the sugar levels and determine when fermentation is complete. When the readings remain stable for several days, the yeast has likely consumed all the sugars, and primary fermentation is finished.
At this stage, you can transfer the cider to a secondary fermentation vessel or prepare it for bottling. Use a siphon to move the liquid carefully, leaving the lees behind. This step enhances the clarity and taste of your cider, ensuring a polished final product.
Bottling and aging your hard cider
Bottling marks the final step in making hard cider, transforming your fermented beverage into a ready-to-enjoy product. To begin, ensure all bottles and tools are thoroughly sanitized. Cleanliness is critical to prevent contamination that could spoil your cider. Use glass bottles with caps or swing tops, as they preserve carbonation effectively and maintain the cider’s quality over time.
Carefully transfer the cider from the fermenting bucket into the bottles using a siphon or auto-siphon. This process minimizes disturbance to the sediment, or lees, at the bottom of the bucket. Leave about an inch of headspace in each bottle to allow for slight expansion during aging. If you prefer a sweeter cider, this is the stage where bottling and sweetening adjustments can be made. Add a small amount of sugar or a sweetener of your choice, but measure carefully to avoid over-carbonation.
Once bottled, seal the bottles tightly and store them in a cool, dark place. A consistent temperature between 50°F and 60°F is ideal for aging. Avoid direct sunlight or fluctuating temperatures, as these can negatively impact the flavor and stability of your cider. Over the next few weeks, the cider will continue to develop its character. The carbonation will build, and the flavors will harmonize, creating a more refined beverage.
Aging your hard cider can enhance its complexity and depth. While some ciders are best enjoyed fresh, others benefit from extended aging. Heritage and traditional ciders, for example, often develop unique mineral and tannin notes over time. Experiment with aging by setting aside a few bottles for several months or even a year. Taste them periodically to observe how the flavors evolve. You may discover new layers of aroma and taste that weren’t present initially.
“Hard cider is more like wine than beer; it will benefit from aging in secondary fermentation and after bottling.” This perspective highlights the potential of aging to elevate your cider’s quality. Whether you prefer a crisp, fresh cider or a more mature, nuanced one, the choice is yours. By experimenting with aging, you can tailor the process to suit your taste preferences.
When you’re ready to enjoy your cider, chill the bottles before serving. Pour carefully to avoid disturbing any remaining sediment. Each sip will reflect the effort and patience you’ve invested in crafting your hard cider. Bottling and aging not only complete the cider-making process but also open the door to discovering the full potential of your homemade creation.
Tips for Achieving the Best Results When Fermenting Cider
Choosing the right yeast for apple cider fermentation
Selecting the right yeast is a critical step in crafting high-quality cider. Yeast not only drives the fermentation process but also significantly influences the flavor, aroma, and overall quality of your cider. Different yeast strains produce unique flavor profiles, ranging from crisp and dry to fruity and aromatic. For example, champagne yeast creates a dry cider with a clean finish, while ale yeast can add subtle fruity notes.
Scientific research highlights the importance of yeast in cider making. A study published in Fermentation in 2022 found that yeast strains play a pivotal role in generating flavor substances in cider. This means your choice of yeast directly impacts the final taste and aroma of your beverage. For beginners, commercial cider yeast is a reliable option because it ensures consistent results. If you want to experiment, try wild fermentation methods, which rely on natural yeasts present in the environment. However, this approach requires more patience and careful monitoring.
When adding yeast, ensure the juice is at the right temperature, typically between 60°F and 75°F. Temperatures outside this range can stress the yeast, leading to off-flavors or stalled fermentation. By choosing the right yeast and creating optimal conditions, you set the foundation for a flavorful and aromatic cider.
Maintaining the ideal fermentation environment
Creating the perfect environment for fermentation is essential for producing high-quality cider. Yeast thrives in stable conditions, so maintaining a consistent temperature is crucial. The ideal range for most fermentation methods is between 60°F and 75°F. Temperatures below this range can slow down yeast activity, while higher temperatures may cause unwanted flavors to develop.
Place your fermenting bucket in a location free from direct sunlight and temperature fluctuations. A basement or pantry often works well. Use a thermometer to monitor the temperature regularly. If the environment is too warm, consider using a cooling wrap or placing the bucket in a water bath to regulate the temperature.
Oxygen exposure can also affect the quality of your cider. Ensure the fermenting bucket is sealed properly, with the airlock securely in place. The airlock allows carbon dioxide to escape while preventing oxygen and contaminants from entering. This controlled environment helps the yeast work efficiently, resulting in a clean and balanced cider.
Cleanliness is another key factor. Always sanitize your equipment before use to eliminate bacteria or wild yeast that could spoil your cider. A clean and stable environment ensures the fermentation process runs smoothly, leading to a high-quality final product.
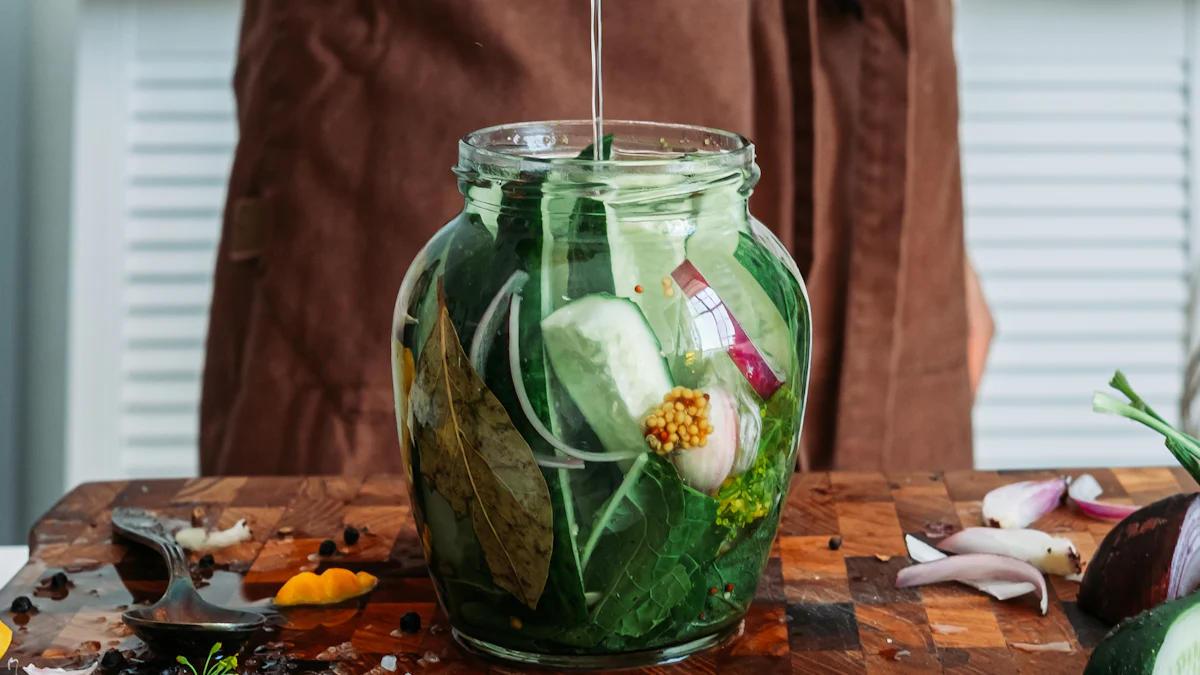
Experimenting with flavors and ingredients
Experimentation adds creativity and excitement to cider making. By trying different flavors and ingredients, you can craft a cider that suits your personal taste. Start by exploring various apple varieties. Sweet apples like Fuji or Gala create a sweeter cider, while tart apples like Granny Smith add a crisp, tangy profile. Mixing apple types can result in a more complex flavor.
You can also enhance your cider with additional ingredients. Spices like cinnamon, cloves, or nutmeg add warmth and depth, especially in fall-inspired ciders. Fresh fruits such as berries, pears, or cherries introduce unique flavors and colors. For a floral aroma, consider adding edible flowers like elderflower during secondary fermentation.
Sweetness levels can be adjusted by adding sugar or honey before fermentation. For a dry cider, use less sugar. If you prefer a sweeter beverage, increase the sugar content slightly. Always measure carefully to avoid over-carbonation during bottling.
Experimenting with flavors allows you to discover new combinations and refine your recipe. Keep notes on your adjustments and results to replicate successful batches. By embracing creativity, you can elevate your cider-making skills and produce a truly unique beverage.
Troubleshooting Common Issues in Apple Cider Fermentation
Fermentation not starting
When fermentation doesn’t start, it can feel frustrating. This issue often arises due to inactive yeast or unsuitable conditions. Begin by checking the temperature of your cider. Yeast thrives between 60°F and 75°F. If the temperature falls outside this range, adjust it to create a more favorable environment. For example, move the fermenting bucket to a warmer location if it’s too cold.
Inactive yeast is another common cause. Ensure the yeast you’re using is fresh and stored properly. Expired or improperly stored yeast may fail to activate. To test its viability, mix a small amount of yeast with warm water and sugar. If bubbles form within 10 minutes, the yeast is active and ready for use.
Sanitization also plays a crucial role. Residual sanitizing solution or contamination can inhibit fermentation. Rinse all equipment thoroughly before use to remove any residue. If fermentation still doesn’t start, consider adding a fresh batch of yeast to the cider. This step often resolves the issue and gets the process back on track.
Off-flavors in the cider
Off-flavors can ruin the taste of your cider. These flavors often result from poor fermentation practices or environmental factors. One common culprit is high fermentation temperature. When temperatures exceed 75°F, yeast can produce unwanted compounds, leading to off-flavors. Keep the fermenting bucket in a cool, stable environment to avoid this issue.
Oxygen exposure during fermentation can also cause off-flavors. Ensure the fermenting bucket is sealed tightly, and the airlock is functioning correctly. Oxygen can lead to oxidation, which imparts a stale or cardboard-like taste to the cider. Always handle the cider carefully to minimize air contact, especially during transfers.
Another factor is contamination. Wild yeast or bacteria can introduce unpleasant flavors. Proper sanitization of all equipment is essential to prevent this. If off-flavors persist, consider using Campden tablets before fermentation to eliminate unwanted microorganisms. This step creates a clean slate for your chosen yeast to work effectively.
Over-carbonation or bottle explosions
Over-carbonation can lead to bottle explosions, posing safety risks. This issue usually occurs when too much sugar is added before bottling. Sugar feeds the yeast, creating carbon dioxide, which builds pressure in sealed bottles. To prevent this, measure sugar carefully during the bottling stage. Use a priming sugar calculator to determine the correct amount based on your cider’s volume.
Incomplete fermentation before bottling is another cause. If fermentation hasn’t finished, residual sugars in the cider continue to ferment in the bottle, increasing pressure. Use a hydrometer to confirm that fermentation is complete. Stable readings over several days indicate that the yeast has consumed all available sugars.
Proper storage conditions also play a role. Store bottled cider in a cool, dark place to slow down yeast activity. Temperatures between 50°F and 60°F are ideal. Regularly check the bottles for signs of excessive pressure, such as bulging caps. If you notice this, release some pressure by carefully loosening the cap.
By addressing these issues, you can ensure a safer and more enjoyable cider-making experience. Understanding carbonation techniques for a sparkling finish can also help you achieve the desired level of fizz without risking over-carbonation.
How to Know When Your Hard Cider Is Ready
Signs of completed fermentation
Knowing when your hard cider is ready requires observing specific indicators. The most reliable way to determine this is by checking for the signs of active fermentation and ensuring they have ceased. During fermentation, you’ll notice bubbling in the airlock as carbon dioxide escapes. When this bubbling slows significantly or stops entirely, it’s a strong sign that the yeast has consumed most of the sugars.
Using a hydrometer provides a more precise measurement. This tool measures the specific gravity of your cider, which reflects the sugar content. At the start of fermentation, the reading will be higher due to the sugar concentration. As fermentation progresses, the reading will drop. When the specific gravity stabilizes over three consecutive days, it indicates that fermentation has completed.
Visual cues also help. The cider will appear clearer as the yeast and sediment settle at the bottom of the fermenting bucket. A cloudy appearance often signals that fermentation is still active. Additionally, the absence of foam or froth on the surface suggests that the process is nearing completion.
Temperature plays a role in fermentation speed. If your cider has been fermenting in cooler conditions, the process may take longer. Warmer environments can accelerate it but may risk off-flavors. Monitoring these factors ensures you don’t rush or delay the next steps unnecessarily.
Tasting and adjusting your cider
Tasting your cider is an essential step in determining its readiness and fine-tuning its flavor. Begin by pouring a small sample into a clean glass. Let the cider roll over your tongue to engage all parts of your palate. The tip of your tongue detects sweetness, the sides sense sourness, and the back perceives bitterness. This technique helps you identify the cider’s balance and complexity.
If the cider tastes too dry, consider adding a sweetener like honey or sugar. Do this cautiously, as even small amounts can significantly alter the flavor. For a more robust apple taste, you might experiment with artificial apple flavorings. These are potent, so add them sparingly and taste frequently to avoid overpowering the cider.
Acidity and tannins also influence the overall profile. If the cider feels too sharp, blending it with a sweeter batch or adding a touch of water can mellow the acidity. On the other hand, if it lacks depth, introducing spices like cinnamon or nutmeg during secondary fermentation can enhance its character.
Remember, the goal is to create a cider that suits your preferences. Keep detailed notes on any adjustments you make. This practice helps you replicate successful batches and refine your process over time. Tasting and adjusting not only ensure a flavorful final product but also allow you to explore your creativity as a cider maker.
Storing and Enjoying Your Homemade Hard Cider
Proper storage conditions for hard cider
Storing your hard cider correctly ensures its quality and extends its shelf life. The ideal storage environment is a cool, dark place with a stable temperature. A basement or pantry works well for this purpose. Avoid exposing your cider to direct sunlight, as UV rays can degrade its flavor and aroma over time. Consistency in temperature is key. Fluctuations can stress the cider, potentially altering its taste.
The recommended storage temperature for cider ranges from 50°F to 68°F. While refrigeration is not necessary, extreme cold (below 35°F) can dull the cider’s flavors. On the other hand, excessive heat can accelerate spoilage. If you plan to age your cider, aim for a steady temperature around 55°F, which allows the flavors to mature gradually.
For unopened bottles, store them on their sides if they have corks. This position keeps the cork moist, preventing it from drying out and allowing air to seep in. Bottles with caps or swing tops can remain upright. Once opened, refrigerate the cider and consume it within a few days to enjoy its best taste.
Proper storage not only preserves the freshness of your homemade cider but also enhances its potential for aging. Some ciders, especially those with higher alcohol content or tannins, can develop more complex flavors over time. By following these guidelines, you ensure that every sip of your cider remains as enjoyable as the day it was bottled.
Serving tips for the best cider experience
Serving cider the right way elevates your drinking experience. Start by chilling your cider to the optimal serving temperature. For most ciders, this falls between 46°F and 50°F. This range highlights the cider’s natural flavors and aromas without muting them. Avoid serving it too cold, as excessive refrigeration can mask its subtleties.
When pouring cider, use a clean glass to preserve its clarity and carbonation. A tulip-shaped glass or a wine glass works best. These shapes concentrate the cider’s aromas, enhancing your sensory experience. Tilt the glass slightly while pouring to minimize foam and maintain a smooth presentation.
Pairing cider with food can further enhance its appeal. Dry ciders complement savory dishes like roasted meats or sharp cheeses. Sweeter ciders pair well with desserts or spicy foods, balancing their flavors. Experiment with pairings to discover combinations that suit your palate.
For special occasions, consider adding a creative twist to your cider. Garnish it with a slice of apple or a cinnamon stick for a festive touch. You can also mix cider with other beverages to create cocktails, such as a cider mimosa or a spiced cider punch.
Enjoying your homemade cider is about more than just drinking it. It’s about appreciating the effort and care you put into crafting it. By serving it thoughtfully, you can fully savor the fruits of your labor and share the experience with others.
Encouraging Experimentation in Making Cider from Apples
Trying different apple varieties for unique flavors
Experimenting with apple varieties is one of the most exciting aspects of making cider from apples. Each type of apple brings its own characteristics to the table, influencing the flavor, aroma, and overall profile of your cider. Apples high in tannins and acidity, often referred to as cider apples, are ideal for crafting high-quality cider. These apples, with their bitter and tangy taste, create a robust and well-balanced beverage.
You can start by exploring single-variety ciders, where only one type of apple is used. For example, using Granny Smith apples results in a crisp and tart cider, while Fuji apples produce a sweeter and smoother drink. Mixing different apple varieties allows you to create complex and unique flavors. Combining sweet apples like Gala with tart ones like Braeburn can strike a perfect balance between sweetness and acidity.
If you have access to heritage or heirloom apple varieties, consider incorporating them into your cider-making process. These apples often have distinctive flavors that are hard to find in commercial varieties. For instance, Kingston Black and Dabinett apples are renowned for their rich tannins and bold flavors, making them excellent choices for hard cider.
“The best apples for cider-making are those that are high in tannins and acidity. These apples have a bitter taste, which gives the cider its characteristic tangy flavor.”
When selecting apples, freshness matters. Freshly harvested apples retain their natural sugars and flavors, which are essential for successful fermentation. If you’re growing your own apples, experiment with different combinations from your orchard. This not only enhances the quality of your cider but also adds a personal touch to your creation.
Exploring advanced cider-making techniques
Once you’ve mastered the basics, diving into advanced fermentation methods can elevate your cider-making skills. Techniques like wild fermentation, barrel aging, and secondary fermentation open up new possibilities for creating complex and unique flavors.
Wild fermentation relies on the natural yeasts present on apple skins and in the environment. This method produces cider with a distinct character, as the wild yeasts contribute unpredictable yet intriguing flavors. While it requires patience and careful monitoring, the results can be incredibly rewarding. Many traditional cider makers swear by this approach for its authenticity and depth.
Barrel aging is another technique worth exploring. Aging cider in oak barrels imparts subtle notes of vanilla, spice, or even smokiness, depending on the type of wood used. This method enhances the complexity of your cider, making it comparable to fine wines. If barrels aren’t accessible, oak chips or spirals can achieve similar effects.
Secondary fermentation allows you to refine your cider further. During this stage, you can introduce additional ingredients like fruits, spices, or herbs to infuse new flavors. For example, adding cherries or raspberries creates a fruity twist, while cinnamon or cloves add warmth and depth. This step also helps clarify the cider, resulting in a polished final product.
“My buddy, Ed got the idea that we could make some hard cider by corking it into recycled Coca-Cola bottles and waiting for it to go hard. It didn’t work. The corks popped and the bottles fizzed over.”
Experimentation sometimes leads to unexpected outcomes, as illustrated in the anecdote above. However, every attempt teaches you something valuable about the process. Keep detailed notes on your experiments, including the apple varieties, fermentation methods, and additional ingredients used. This documentation helps you replicate successful batches and avoid repeating mistakes.
By trying different apple varieties and exploring advanced techniques, you can transform cider making into a creative and fulfilling journey. Each experiment brings you closer to crafting a cider that reflects your personal taste and style.
The Chenma Advantage in Cider Fermentation Equipment
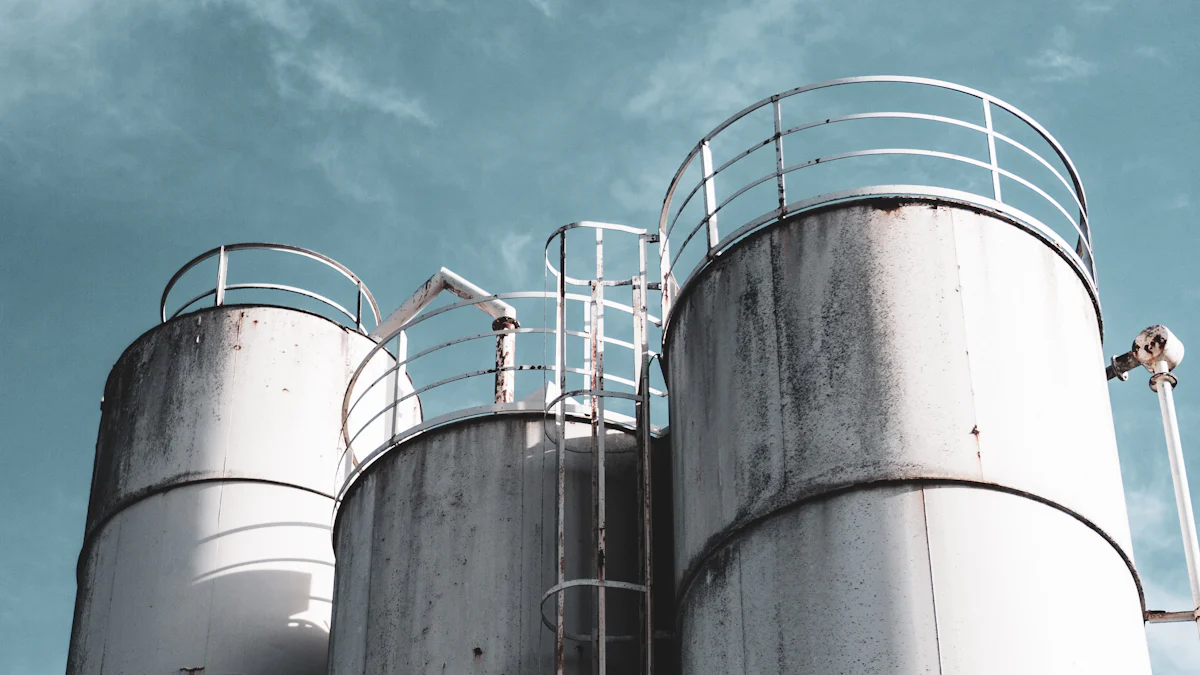
Why choose Chenma’s stainless steel fermenting tanks
When it comes to cider fermentation, the equipment you use plays a crucial role in determining the quality of your final product. Chenma’s stainless steel fermenting tanks stand out as a top choice for both beginner and advanced cider makers. These tanks are designed with precision and durability, ensuring that your cider-making process is efficient and reliable.
Chenma offers a wide range of fermenting tanks tailored to meet various production needs. For small-scale cider makers, the 3000L Stainless Steel Cider Fermenting Tank provides an excellent balance of capacity and functionality. If you’re looking to scale up, options like the 5000L Stainless Steel Jacketed Cider Fermentation Tank or the 10KL Cider Fermentation Vessels deliver the capacity needed for larger batches without compromising on quality. For commercial cider producers, the 100HL Cider Fermenter offers industrial-grade performance, making it ideal for high-volume production.
The stainless steel construction of these tanks ensures a clean and hygienic environment for fermentation. Stainless steel resists corrosion and does not react with the cider, preserving its natural flavors and aromas. Additionally, these tanks are easy to clean, which minimizes the risk of contamination and ensures consistent results with every batch.
Another key feature of Chenma’s fermenting tanks is their advanced temperature control systems. Fermentation temperature significantly impacts the flavor and quality of cider. Chenma’s tanks often include jacketed designs, allowing precise temperature regulation. This feature helps you maintain the ideal fermentation conditions, ensuring that the yeast performs optimally and produces a balanced, flavorful cider.
“Stainless steel tanks are the gold standard in fermentation equipment due to their durability, hygiene, and ability to maintain consistent temperatures.”
By choosing Chenma’s fermenting tanks, you invest in equipment that supports your cider-making goals, whether you’re crafting small batches at home or producing cider on a commercial scale.
Customization options for advanced cider makers
Every cider maker has unique needs, and Chenma understands the importance of customization in achieving the perfect fermentation setup. Chenma offers tailored solutions to meet the specific requirements of advanced cider makers, ensuring that their equipment aligns with their production goals.
Chenma’s talented engineers specialize in adapting tanks to suit individual preferences. Whether you need modifications to an existing design or a completely custom fermenting tank, Chenma can deliver. For example, you can request additional features like specialized fittings, custom dimensions, or enhanced insulation to optimize your fermentation process. These options allow you to create a setup that matches your cider-making style and production scale.
For cider makers experimenting with advanced techniques, Chenma’s customization options open up new possibilities. If you’re interested in barrel-aging flavors, you can incorporate oak infusion systems into your tank design. For those focusing on precise carbonation levels, Chenma can integrate pressure control systems to help you achieve the perfect sparkling cider.
Chenma’s commitment to quality extends to every custom project. All tanks are manufactured using state-of-the-art machinery and adhere to the latest safety and quality standards. Certifications such as ISO9001-2005 and EU CE ensure that you receive equipment built to perform reliably and safely.
By choosing Chenma’s customizable fermenting tanks, you gain the flexibility to experiment and innovate. Whether you’re refining traditional cider recipes or exploring new flavor profiles, Chenma’s equipment empowers you to take your cider-making craft to the next level.
A cider fermenting bucket is your gateway to mastering the art of cider making. It provides a clean, controlled environment essential for producing high-quality cider while simplifying the process of making hard cider at home. By experimenting with different techniques, apple varieties, and tools like hydrometers or thermometers, you can refine your craft and create unique flavors. Start your journey today with confidence, knowing that every batch brings you closer to crafting cider that reflects your personal taste and dedication to quality.
FAQ
What is the ideal temperature for fermenting cider?
The ideal temperature for fermenting cider ranges between 60°F and 75°F. Yeast thrives within this range, ensuring a steady and efficient fermentation process. Temperatures below 60°F can slow down yeast activity, while higher temperatures may lead to off-flavors. Use a thermometer to monitor the environment where your fermenting bucket is placed. A stable temperature helps maintain the quality of your cider.
How do I know when fermentation is complete?
You can determine if fermentation is complete by observing a few key signs:
- Airlock Activity: Bubbling in the airlock will slow down or stop entirely.
- Hydrometer Reading: Use a hydrometer to measure the specific gravity of your cider. When the reading stabilizes over three consecutive days, fermentation has likely finished.
- Visual Clarity: The cider will appear clearer as sediment settles at the bottom of the fermenting bucket.
These indicators ensure that the yeast has consumed all the sugars, signaling the end of fermentation.
Can I use any type of apple juice for cider making?
Not all apple juices are suitable for cider making. For the best results, use fresh-pressed, unpasteurized apple juice. This type of juice retains natural sugars and flavors essential for fermentation. If you use pasteurized juice, ensure it contains no preservatives like potassium sorbate, as these can inhibit yeast activity. Always check the label before starting the fermentation process.
Why is my fermentation not starting?
Fermentation may not start due to several reasons:
- Inactive Yeast: Ensure the yeast is fresh and properly stored. Test its viability by mixing it with warm water and sugar. If bubbles form, the yeast is active.
- Temperature Issues: Yeast requires a temperature between 60°F and 75°F to activate. Adjust the environment if it’s too cold or too warm.
- Sanitization Residue: Residual sanitizing solution on equipment can inhibit yeast. Rinse all tools thoroughly before use.
If fermentation still doesn’t begin, add a fresh batch of yeast to kickstart the process.
How can I prevent off-flavors in my cider?
To avoid off-flavors, focus on maintaining proper fermentation practices:
- Temperature Control: Keep the fermenting bucket in a stable environment within the ideal temperature range.
- Minimize Oxygen Exposure: Ensure the fermenting bucket is sealed tightly, and the airlock is functioning correctly.
- Sanitize Equipment: Clean all tools thoroughly to prevent contamination from wild yeast or bacteria.
These steps help preserve the natural flavors of your cider and ensure a clean-tasting final product.
What should I do if my cider is too dry?
If your cider tastes too dry, you can adjust its sweetness during bottling. Add a small amount of sugar, honey, or a non-fermentable sweetener like stevia. Measure carefully to avoid over-carbonation. For a sweeter cider, experiment with blending it with a fresh batch of unfermented apple juice. Always taste as you go to achieve the desired balance.
How do I avoid bottle explosions during carbonation?
Bottle explosions occur due to excessive pressure from over-carbonation. To prevent this:
- Measure Sugar Accurately: Use a priming sugar calculator to determine the correct amount based on your cider’s volume.
- Ensure Fermentation is Complete: Use a hydrometer to confirm that fermentation has finished before bottling.
- Store Bottles Properly: Keep bottled cider in a cool, dark place with a consistent temperature between 50°F and 60°F.
Regularly check bottles for signs of excessive pressure, such as bulging caps, and release pressure if necessary.
Can I experiment with flavors in cider making?
Absolutely! Experimenting with flavors adds creativity to your cider-making process. You can:
- Use Different Apple Varieties: Combine sweet and tart apples for a balanced flavor.
- Add Spices or Fruits: Ingredients like cinnamon, cloves, berries, or pears can enhance your cider’s profile.
- Try Secondary Fermentation: Introduce additional flavors like herbs or flowers during this stage.
Keep detailed notes on your experiments to replicate successful batches and refine your recipes.
How long should I age my cider?
The aging period depends on your cider’s style and personal preference. Most ciders benefit from aging for a few weeks to several months. During this time, flavors harmonize, and carbonation develops. Store your cider in a cool, dark place with a stable temperature around 55°F. Taste periodically to determine when it reaches your desired flavor profile.
What makes Chenma’s fermenting tanks a good choice for cider making?
Chenma’s stainless steel fermenting tanks offer several advantages:
- Durability: Stainless steel resists corrosion and ensures a hygienic fermentation environment.
- Temperature Control: Advanced systems allow precise regulation, crucial for maintaining ideal fermentation conditions.
- Customization: Chenma provides tailored solutions, such as specialized fittings or oak infusion systems, to meet your unique needs.
These features make Chenma’s tanks a reliable choice for both beginners and advanced cider makers.